Hamburger Helper from a box has fed millions of families across decades, and look, nobody is judging. But if you have ever tasted the homemade version — with real cheese, fresh aromatics, properly browned beef, and pasta that actually absorbs flavor as it cooks — you quickly realize the box was just a placeholder until you figured out the real thing. This Hamburger Helper recipe homemade takes the same 30-minute concept and makes it genuinely, unapologetically delicious.
This easy one pot Hamburger Helper dinner approach cooks everything — beef, aromatics, pasta, and sauce — in a single pan, just like the original. Except this version uses real ingredients, real cheese, and a sauce you actually recognize. Welcome to the classic Hamburger Helper copycat recipe that makes the box version feel like a distant, slightly embarrassing memory.
Servings: 4 to 6 Prep Time: 10 minutes Cook Time: 25 minutes Total Time: 35 minutes
What You Need — The Complete Ingredients List
This cheesy beef Hamburger Helper recipe uses straightforward pantry ingredients. Here is everything for four to six generous servings:
For the beef base:
- 500g ground beef (80/20 fat ratio — the fat adds flavor the lean version lacks entirely)
- 1 medium white onion, finely diced
- 4 cloves garlic, finely minced
- 1 tablespoon olive oil
- 1 teaspoon garlic powder
- 1 teaspoon onion powder
- 1 teaspoon smoked paprika
- 1/2 teaspoon dried oregano
- 1/2 teaspoon chili powder (optional — adds depth without real heat)
- 1 teaspoon salt
- 1/2 teaspoon black pepper
- 1 tablespoon tomato paste
- 1 tablespoon Worcestershire sauce
For the pasta and sauce:
- 300g elbow macaroni or small pasta shells (uncooked)
- 2.5 cups beef broth
- 1 cup whole milk
- 1 can (400g) crushed tomatoes
- 2 cups freshly grated cheddar cheese (never pre-shredded — it genuinely matters)
- 1/2 cup freshly grated Monterey Jack or colby cheese
- 2 tablespoons full-fat cream cheese (for extra silkiness)
- 1/2 cup sour cream (stirred in at the very end)
Optional garnish:
- Sliced spring onions or chives
- Extra shredded cheddar
- Sour cream for serving
- Hot sauce
FYI, 80/20 ground beef is the correct choice for this recipe. Leaner ground beef releases less fat during browning, which means less flavor in the pan drippings that form the base of the whole dish. The fat renders during cooking and the excess can be drained — but you need it there during the browning stage to develop proper flavor.
The Making Process — Every Step in Full Detail
Step 1: Brown the Ground Beef Properly
Place a large, wide skillet or Dutch oven over medium-high heat. If the pan feels dry, add one tablespoon of olive oil. Add the ground beef to the hot pan and break it apart immediately into smaller pieces using a wooden spoon or spatula. Spread it across the surface of the pan and leave it undisturbed for one to two minutes — this brief resting contact develops browning on the bottom of the beef rather than steaming it.
Continue breaking the beef apart and stirring for another three to four minutes until no visible pink remains and the majority of pieces show at least some brown caramelization on their surface. This browning is the Maillard reaction — the same process that creates the flavor in seared steak. Ground beef that gets properly browned rather than just cooked through grey tastes dramatically more complex and savory in the finished dish.
If a significant amount of fat has rendered into the pan — more than about two tablespoons — carefully tilt the pan and spoon out the excess into a heatproof bowl. Leaving two tablespoons of rendered beef fat in the pan is ideal — it adds flavor and provides the fat for cooking the onion and garlic in the next step. Removing all the fat leaves the pan too dry and the flavors shallow.
Step 2: Cook the Aromatics in the Beef Fat
Reduce the heat to medium. Add the finely diced white onion directly to the pan with the browned beef. Stir the onion through the beef so it sits in contact with the remaining fat and the browned bits on the pan surface. Cook for five to six minutes, stirring occasionally, until the onion softens completely and turns translucent with lightly golden edges developing.
Add the minced garlic to the beef and onion mixture and stir constantly for 60 to 90 seconds until fragrant and pale golden. The garlic cooks quickly in the residual heat of the pan — keep stirring and do not let it sit still long enough to burn. Burned garlic carries a bitter, harsh flavor through the entire dish and genuinely cannot be corrected with additional seasoning later.
Add the garlic powder, onion powder, smoked paprika, dried oregano, chili powder, salt, and black pepper. Stir the spices through the beef and onion mixture and cook for 30 seconds — this brief blooming of the dry spices in the hot fat and beef drippings activates their essential oils and produces a noticeably more aromatic and flavorful result than adding them with the liquid. Now add the tomato paste and stir it constantly for one to two minutes until it caramelizes slightly and turns from bright red to a deeper, slightly darker color. Add the Worcestershire sauce and stir through — it sizzles and partly evaporates, leaving behind a concentrated savory depth.
Step 3: Add the Pasta and Cooking Liquids
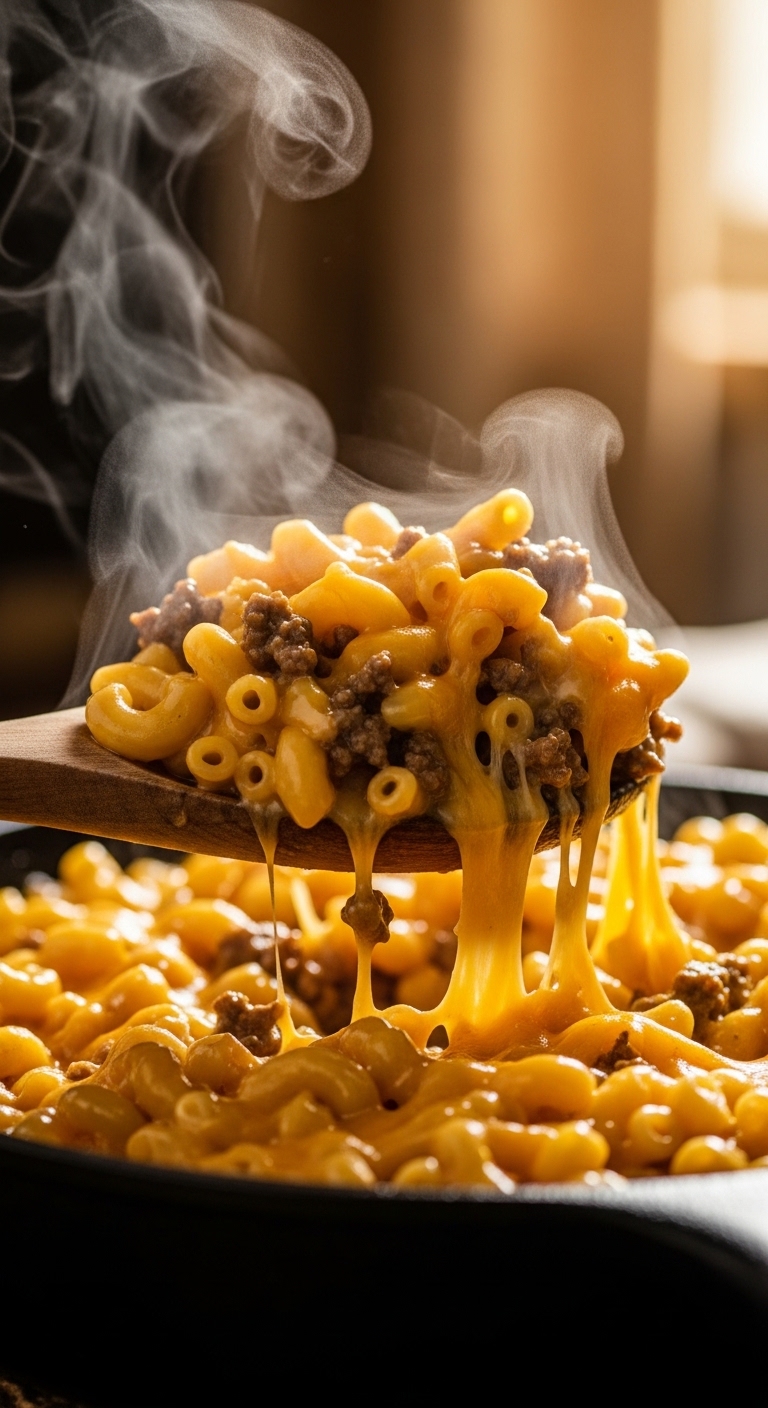
Pour the beef broth, whole milk, and crushed tomatoes directly into the pan over the beef and spice mixture. Stir everything together thoroughly, scraping up any browned bits from the bottom of the pan — these dissolved bits add concentrated flavor to the liquid that cooks the pasta. Bring the entire mixture to a full, rolling boil over medium-high heat, stirring occasionally.
Once boiling, add the dry elbow macaroni or pasta shells directly to the liquid in the pan. Stir to distribute the pasta evenly through the beef and liquid. The pasta must start cooking in a full boil to ensure even, proper cooking throughout — pasta added to simmering or warm liquid cooks unevenly and can become gluey in some spots while still hard in others.
Reduce the heat to medium and maintain a steady, active simmer. Cook the pasta in the pan uncovered for 10 to 12 minutes, stirring every two to three minutes. The frequent stirring is important — it prevents the pasta from sticking to the bottom of the pan and clumping together, and it also ensures the starch released by the cooking pasta distributes evenly through the liquid rather than settling. The pasta absorbs the seasoned beef broth and tomato liquid as it cooks, which is what gives this beef pasta skillet dinner Hamburger Helper its characteristic deeply flavored pasta rather than bland pasta in a separate sauce.
Step 4: Add the Cheese and Finish the Sauce
After 10 to 12 minutes, test the pasta for doneness — it should feel just tender with a slight bite remaining at the center. The liquid in the pan should have reduced significantly and look thick and saucy rather than soupy. If significant liquid still remains, cook for another two to three minutes until it reduces to the correct consistency. The sauce should coat the pasta rather than pool at the bottom of the pan.
Reduce the heat to the lowest setting on your stove. Add the cream cheese first — stir it through the hot pasta and sauce until it melts completely and distributes evenly. The cream cheese acts as an emulsifier, which helps the shredded cheddar and Monterey Jack melt smoothly into the sauce without breaking or becoming grainy. This technique produces the silky, coating sauce texture that makes this creamy cheesy Hamburger Helper recipe genuinely special compared to the box version.
Add the shredded cheddar and Monterey Jack in two or three batches on the lowest heat setting, stirring each addition fully before adding the next. Adding all the cheese at once can drop the temperature of the sauce too rapidly and cause the proteins to seize and clump. Take two extra minutes with this step — it produces a noticeably smoother, more cohesive sauce. Remove the pan from heat and stir in the sour cream — adding it off the heat prevents it from curdling from direct high heat contact. Taste and adjust seasoning before serving.
Step 5: Serve and Garnish
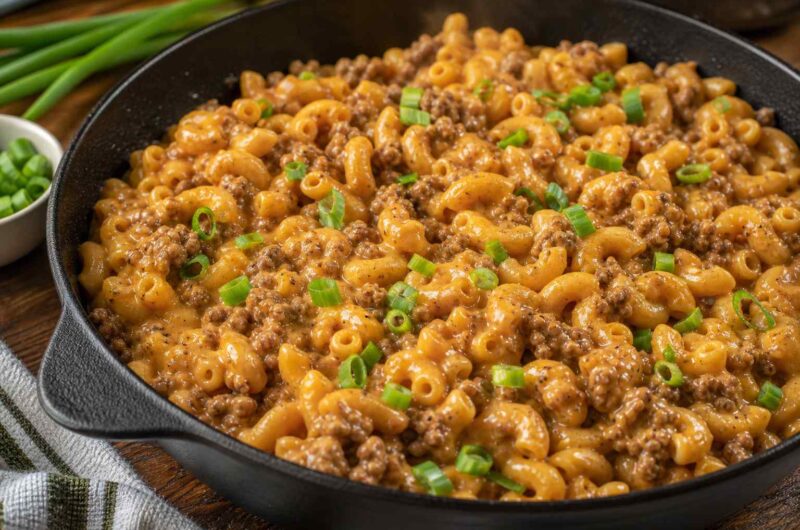
Spoon the finished homemade Hamburger Helper from scratch directly from the skillet into bowls or onto plates. Scatter sliced spring onions or chives generously over each serving — the fresh green color and mild onion flavor provide a visual and flavor contrast to the rich, cheesy pasta. Add an extra small pile of freshly grated cheddar on top of each bowl while the pasta is still hot enough to melt it slightly.
Serve with hot sauce on the table for anyone who wants additional heat, and a small dollop of sour cream alongside each serving for a cool, tangy contrast. This quick Hamburger Helper meal ideas centerpiece needs nothing else alongside it to constitute a complete, satisfying dinner — but a simple green salad or roasted broccoli makes it feel like a slightly more complete meal for those who want vegetables involved IMO 🙂
The Healthy Version Worth Trying
The healthy Hamburger Helper recipe easy version uses a few targeted swaps without losing the essential satisfaction:
- Replace 80/20 ground beef with 90/10 lean ground beef or a mixture of beef and ground turkey
- Use whole wheat pasta for additional fiber — the cooking time may increase by two to three minutes
- Replace whole milk with 2 percent milk and reduce the cheddar quantity slightly
- Skip the cream cheese and increase the sour cream to three tablespoons for a lighter sauce
- Add one cup of frozen peas or baby spinach stirred in with the cheese for a vegetable component
These swaps reduce the calorie density meaningfully while keeping the one-pan cooking method, the 35-minute timeline, and the genuinely satisfying result intact.
Variations Worth Making
Cheeseburger Version
Add a tablespoon of yellow mustard and a tablespoon of ketchup to the beef and onion mixture during the spice addition stage. Replace half the cheddar with American cheese, which melts into an even smoother, creamier sauce. Top each serving with diced pickles and shredded iceberg lettuce for the full cheeseburger flavor profile in pasta form. This one pan ground beef pasta recipe variation produces something genuinely different from the base recipe despite using almost identical ingredients.
Spicy Tex-Mex Version
Double the chili powder, add a teaspoon of cumin, and stir in a can of drained black beans along with the pasta. Use pepper jack cheese instead of Monterey Jack for additional heat. Top with diced jalapeños, sliced avocado, fresh cilantro, and a squeeze of lime juice. This version transforms the basic cheesy beef Hamburger Helper recipe concept into something with a bold, completely different flavor direction.
Common Mistakes to Avoid
For a perfect homemade Hamburger Helper from scratch result:
- Using pre-shredded cheese: Anti-caking agents prevent smooth melting — always grate fresh from the block
- Not browning the beef properly: Grey, steamed beef tastes flat — always develop real browning on the surface
- Skipping the tomato paste caramelization: Raw tomato paste tastes sharp and thin — always cook for one to two minutes in the hot pan
- Adding cheese on high heat: Causes the proteins to seize and turn grainy — always reduce to the lowest heat before adding cheese
- Not stirring the pasta during cooking: Leads to sticking and clumping — stir every two to three minutes throughout the pasta cooking stage
The Creamy Beef Pasta Skillet You Need This Week
4
servings10
minutes25
minutesThis Homemade Hamburger Helper browns seasoned ground beef with onion and garlic, cooks elbow macaroni directly in seasoned beef broth, crushed tomatoes, and milk, then finishes with cream cheese and freshly grated cheddar for a silky, deeply flavored one-pan cheesy beef pasta dinner. Serving four to six in 35 minutes.
Ingredients
Beef Base:
500g ground beef (80/20)
1 medium white onion, finely diced
4 cloves garlic, finely minced
1 tablespoon olive oil
1 teaspoon each: garlic powder, onion powder, smoked paprika
1/2 teaspoon each: dried oregano, chili powder, black pepper
1 teaspoon salt
1 tablespoon tomato paste
1 tablespoon Worcestershire sauce
Pasta and Sauce:
300g elbow macaroni, uncooked
2.5 cups beef broth
1 cup whole milk
1 can (400g) crushed tomatoes
2 cups freshly grated cheddar cheese
1/2 cup freshly grated Monterey Jack or colby cheese
2 tablespoons full-fat cream cheese
1/2 cup sour cream
Optional Garnish:
Sliced spring onions, extra cheddar, sour cream, hot sauce
- Heat a large wide skillet over medium-high heat, add ground beef, break into pieces, and cook undisturbed for one to two minutes before stirring to develop browning, then continue cooking three to four more minutes until fully browned with no pink remaining
- Drain excess fat leaving approximately two tablespoons in the pan, then reduce heat to medium and add finely diced onion, cooking for five to six minutes until soft and golden
- Add minced garlic and stir constantly for 60 to 90 seconds until fragrant, then add all dry spices and stir for 30 seconds to bloom
- Add tomato paste and cook stirring for one to two minutes until it darkens slightly, then add Worcestershire sauce and stir through
- Pour in beef broth, whole milk, and crushed tomatoes, stir to combine scraping up any browned bits, and bring to a full rolling boil
- Add dry elbow macaroni directly to the boiling liquid, stir to distribute evenly, reduce heat to medium, and cook uncovered for 10 to 12 minutes stirring every two to three minutes until pasta is just tender and sauce has thickened
- Reduce heat to the lowest setting, stir in cream cheese until fully melted, then add shredded cheddar and Monterey Jack in two to three batches stirring each fully before adding the next
- Remove from heat, stir in sour cream, taste and adjust seasoning, then serve immediately garnished with spring onions, extra cheddar, and sour cream
Frequently Asked Questions
Q1: Can I use a different pasta shape for Hamburger Helper? Yes — any small pasta shape works well in this one-pan method. Rotini, small shells, penne, and ditalini all cook similarly to elbow macaroni and hold the sauce effectively. Avoid very large pasta shapes like rigatoni — they require more liquid and longer cooking time than the formula is calibrated for. Very fine pasta like angel hair cooks too quickly and turns mushy before the sauce fully develops its flavor.
Q2: Can I make this recipe ahead of time? The dish stores well refrigerated for up to three days in an airtight container. The pasta absorbs significant additional liquid during storage and the sauce thickens considerably when cold. To reheat, add two to three tablespoons of beef broth or milk per serving and warm gently in a pan over medium-low heat, stirring frequently. Microwaving works but stir every 30 seconds and add a splash of liquid to prevent the pasta from drying out.
Q3: Can I substitute the ground beef with another protein? Ground turkey produces an excellent result with a lighter flavor — use the same browning technique and seasoning. Ground pork adds more fat and richness. Italian sausage — casings removed — adds a completely different spice profile that works beautifully with the cheesy pasta base. For a vegetarian version, use finely chopped mushrooms and lentils in place of beef — the umami from the mushrooms and the Worcestershire sauce maintains the savory depth.
Make This Tonight and Retire That Blue Box Forever
This easy one pot Hamburger Helper dinner gives you everything the original promised — one pan, 35 minutes, deeply satisfying cheesy beef pasta — but with real ingredients, real flavor, and a result that actually tastes like food you chose to eat rather than food you defaulted to. The box served its purpose. This recipe serves you better.
Cook it once and it becomes the weeknight standard. Your future self will thank you 🙂