Nutella cheesecake bars are one of those desserts that make people visibly emotional at a bake sale. The moment a thick, fudgy chocolate hazelnut base meets a creamy swirled cheesecake layer and someone takes their first bite — the conversation stops. Whatever was being discussed ceases to matter. This is just the reality of combining Nutella and cream cheese in the same baked good.
This easy Nutella cheesecake bars dessert uses a brownie-style Nutella base, a thick cream cheese filling swirled with extra Nutella, baked until just set, and chilled until the layers firm into clean, sliceable bars. No complicated techniques, no water baths, and no ingredients that require a specialist shop. The result tastes like the best Nutella cheesecake bars dessert recipe you have ever encountered and takes considerably less effort than it looks.
What You’ll Need (Ingredients)
Simple, accessible, and built around one jar of Nutella doing significant work across multiple components. Full-fat cream cheese is non-negotiable here.
For Nutella brownie base:
- 200g (¾ cup) Nutella
- 80g (5.5 tablespoons) unsalted butter, melted
- 150g (¾ cup) caster sugar
- 2 large eggs, room temperature
- 1 teaspoon vanilla extract
- 100g (¾ cup) plain flour
- 25g (3 tablespoons) cocoa powder, sifted
- ½ teaspoon fine salt
- ½ teaspoon baking powder
Cream cheese filling:
- 450g (2 cups) full-fat cream cheese, room temperature
- 100g (¾ cup) icing sugar, sifted
- 1 teaspoon vanilla extract
- 1 large egg, room temperature
- 1 tablespoon fresh lemon juice
- 2 tablespoons double cream
For the Nutella swirl topping:
- 100g (⅓ cup) Nutella, warmed slightly
- 1 tablespoon double cream — mixed with Nutella to make it pourable
Optional garnish:
- 2 tablespoons chopped roasted hazelnuts
- 1 tablespoon cocoa powder for dusting
- Dark chocolate shavings
How to Make It — Full Step-by-Step Process
Step One: Prepare the Tin and Preheat the Oven
Preheat your oven to 175°C (350°F) fan-forced or 180°C (355°F) conventional. Grease a 23x23cm (9×9 inch) square baking tin thoroughly with butter, covering both the base and sides completely. Line the tin with two strips of parchment paper in a crossing X pattern with several centimetres of overhang on all four sides — this overhang forms the handles you will use to lift the entire chilled slab cleanly out of the tin before slicing.
The parchment lining is not just about convenience — it is about protecting both layers of this rich Nutella cream cheese bars recipe easy result from tearing when removed. Cream cheese fillings bond firmly to unlined tins during baking and resist removal without tearing the top layer regardless of how well-greased the tin is. Two crossing strips of parchment eliminate this problem completely. Grease the parchment paper lightly as well, particularly along the sides where it folds up against the tin walls.
Step Two: Make the Nutella Brownie Base
Combine 200g of Nutella and 80g of melted unsalted butter in a large mixing bowl and stir together until completely smooth and uniform. The combination of Nutella and butter creates a richer, more fudgy base than butter alone and produces the deep chocolate hazelnut flavour that defines these bars from the very first bite. Now Add 150g of caster sugar and stir vigorously for 1 minute until fully incorporated and the mixture looks slightly glossy.
Add 2 room temperature eggs to the Nutella mixture one at a time, stirring firmly after each addition until fully combined before adding the next. Add 1 teaspoon of vanilla extract and stir once more. Sift 100g of plain flour, 25g of cocoa powder, ½ teaspoon of fine salt, and ½ teaspoon of baking powder directly into the bowl. Fold everything together with a large spatula using slow, deliberate strokes until no dry flour streaks remain and the batter looks uniform and slightly thick.
Pour the Nutella brownie batter into the prepared tin and spread it evenly across the base to all four corners using the spatula, pressing it gently into a flat, even layer approximately 1 to 1.5 cm deep. The base layer does not need to be perfectly smooth on top because the cream cheese filling covers it entirely — but an even thickness across the full base ensures the brownie layer bakes uniformly and produces consistent texture in every bar. Set the tin aside while you make the cream cheese filling.
Step Three: Make the Cream Cheese Filling
Beat 450g of room temperature full-fat cream cheese with an electric hand mixer on medium speed for 2 full minutes until completely smooth, pale, and slightly fluffy. Cold cream cheese produces a lumpy, uneven filling regardless of how long you beat it — always allow 45 to 60 minutes at room temperature before starting. Scrape down the sides and bottom of the bowl with a spatula after the first minute to ensure every part of the cream cheese is incorporated evenly.
Add 100g of sifted icing sugar, 1 teaspoon of vanilla extract, 1 large room temperature egg, 1 tablespoon of fresh lemon juice, and 2 tablespoons of double cream to the beaten cream cheese. Beat on medium speed for a further 1 to 2 minutes until everything is fully combined and the mixture looks smooth, glossy, and slightly thickened. The egg adds structure that helps the cream cheese layer set into a sliceable, stable filling during baking. The lemon juice adds a subtle acidity that cuts through the richness of the cream cheese and prevents the simple Nutella dessert bars cheesecake style filling from tasting flat or cloying.
Pour the cream cheese filling over the unbaked Nutella brownie base in the tin and spread it evenly to all four edges using an offset spatula, working in smooth strokes from the centre outward. The filling should cover the brownie base completely in a flat, even layer with no brownie base visible through the cream cheese. Work gently to avoid disturbing the brownie layer beneath — pressing too hard with the spatula can drag the brownie batter up through the cream cheese filling and create an uneven distribution between the layers.
Step Four: Add the Nutella Swirl
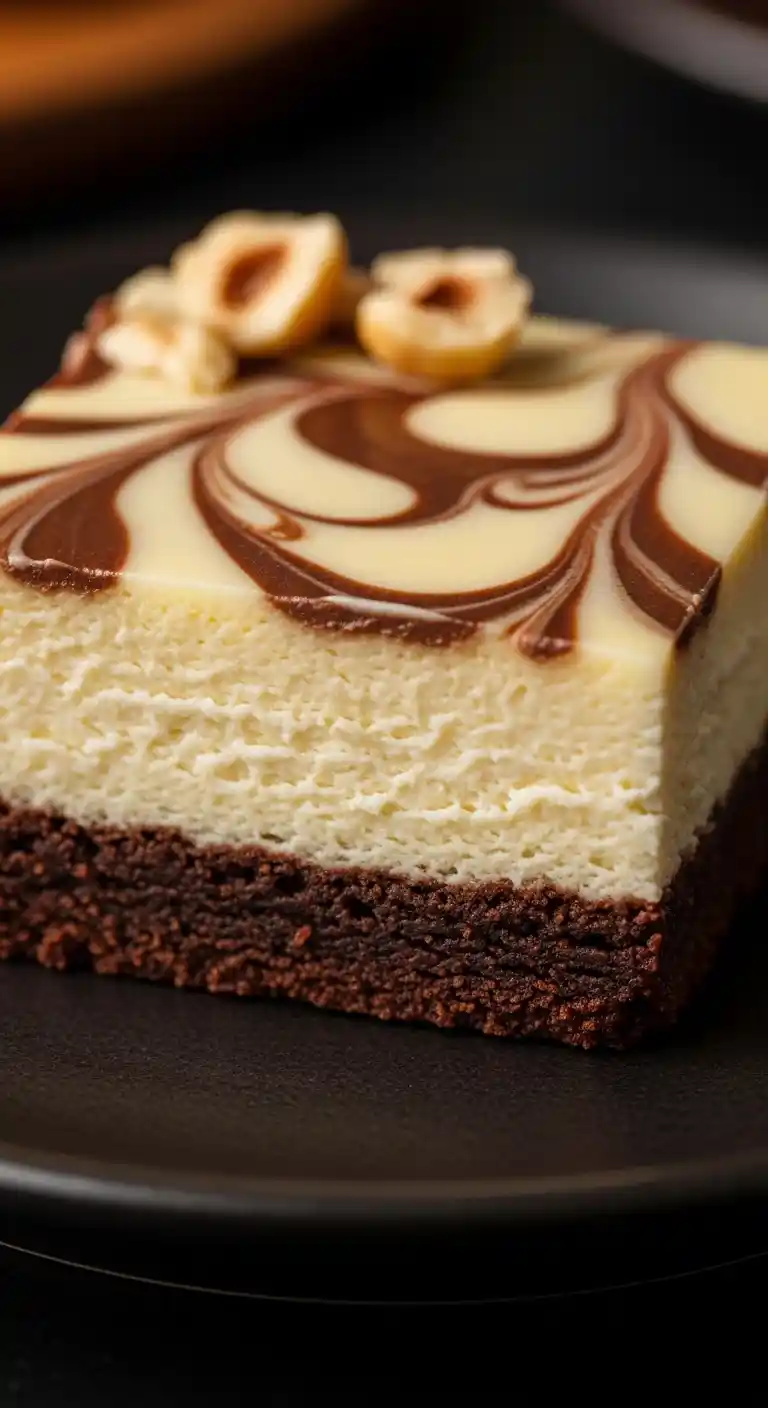
Warm 100g of Nutella in the microwave for 15 to 20 seconds until it becomes noticeably looser and more pourable. Add 1 tablespoon of double cream and stir until smooth and uniformly fluid. The cream thins the warmed Nutella just enough to drizzle and swirl without it sinking immediately through the cream cheese layer — undiluted Nutella is too thick to swirl effectively and tends to sit in heavy blobs rather than producing the fudgy Nutella swirl cheesecake bars recipe pattern that makes these bars look so visually impressive.
Drop spoonfuls of the warmed Nutella mixture across the cream cheese surface in a random pattern — approximately 8 to 10 drops evenly distributed across the entire surface. Draw a wooden skewer, toothpick, or thin knife through each Nutella drop in slow, looping figure-eight movements, connecting the drops and pulling the Nutella through the cream cheese to create the marbled swirl pattern. Work across the entire surface in 3 to 4 passes for a well-distributed swirl. Do not over-swirl — 3 to 4 passes produce a beautiful, distinct marbled pattern, while 10 or more passes blend the layers together into a muddy, indistinct surface. :/
Step Five: Bake, Chill, and Slice
Place the assembled tin in the preheated oven and bake for 28 to 33 minutes until the cream cheese layer looks set around the edges and the centre has a very slight wobble when you shake the tin gently. The centre firms significantly as it cools and chills — pulling the bars when the centre looks completely rigid produces an over-baked, dry cheesecake layer. Remove from the oven when the outer two thirds look firmly set and the very centre has that slight, slow wobble.
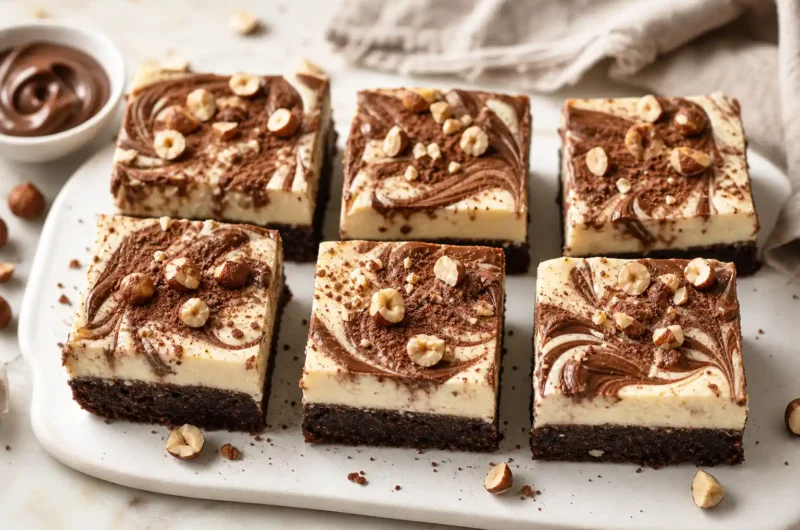
Cool in the tin on a wire rack at room temperature for 1 full hour before covering loosely with cling film and refrigerating for a minimum of 3 hours. Overnight chilling produces a firmer, denser cheesecake layer that slices with exceptional cleanness and holds the swirl pattern sharply in every cut. Remove the chilled tin from the fridge and lift the slab out using the parchment overhangs. Scatter chopped roasted hazelnuts and chocolate shavings across the surface if using, then dust lightly with cocoa powder. Slice into 12 even bars using a sharp knife dipped in hot water and wiped clean between each cut. 🙂
Why Nutella in the Base Changes Everything
Have you ever made a plain brownie base for a cheesecake bar and found it decent but somehow lacking the personality to match the filling? The base is almost always the problem.
Adding 200g of Nutella to the brownie batter introduces chocolate hazelnut flavour into the base layer that echoes through the cream cheese filling and the swirl topping, creating a coherent, unified flavour profile across all three components. A plain cocoa brownie base tastes good alongside the cream cheese but does not create the same sense of intentional flavour layering that defines a genuinely impressive baked Nutella cheesecake bar recipe easy enough to produce at home.
The Nutella also contributes to the fudgy texture of the base. Nutella contains a significant amount of sugar, fat, and hazelnut paste — all of which contribute moisture and richness to the brownie layer and produce a denser, fudgier crumb than a plain butter and cocoa base achieves on its own. FYI, the brownie base in this recipe does not bake fully crisp and dry — it stays slightly fudgy by design, which makes the textural contrast with the creamy cheesecake filling above it considerably more satisfying.
Getting the Swirl Pattern Right
The creamy Nutella cheesecake brownies bars format depends visually on the swirl pattern looking deliberate and distinct rather than accidentally muddy — and the difference between the two comes entirely from technique and restraint.
The key is stopping after 3 to 4 passes of the skewer regardless of how much you want to keep going. Each additional pass blends the Nutella further into the cream cheese and reduces the contrast between the dark Nutella and the pale cheesecake filling. After 6 or more passes the swirl becomes a uniform light brown surface with no visible pattern — still tasty, obviously, but considerably less impressive visually. IMO treating the swirl stage like a 30-second operation rather than a craft project produces the best result every single time.
Common Mistakes to Avoid
Using cold cream cheese: Cold cream cheese does not beat smooth and produces a grainy, lumpy filling that bakes unevenly. Always bring it to room temperature for at least 45 minutes before starting — this single preparation step makes a visible difference to the finished texture.
Over-swirling the Nutella topping: More than 4 passes with the skewer blends the layers into a muddy surface with no visible swirl pattern. Three to four deliberate passes across the full surface produces a clean, distinct marbled result every time.
Under-chilling before slicing: Bars sliced before the cheesecake layer has fully set collapse, smear, and lose the clean definition between the brownie base and cream cheese filling. Always chill for the full 3 hours minimum — overnight is always better.
Adding too much cream to the Nutella swirl: More than 1 tablespoon of cream makes the Nutella too thin and it sinks through the cream cheese filling during baking rather than sitting on the surface and swirling. One tablespoon produces the right consistency for surface-level swirling.
Skipping the lemon juice in the filling: The lemon juice is not a flavour addition — it is an acidity balance that prevents the cream cheese filling from tasting flat and overly sweet. Without it, the filling tastes like sweetened cream cheese rather than a properly balanced cheesecake layer. :/
Rich Nutella Cream Cheese Bars Recipe Easy to Make
12
servings20
minutes30
minutesThese Nutella cheesecake bars spread a fudgy Nutella brownie base in a lined tin, top with a smooth cream cheese egg filling, swirl warmed Nutella across the surface in a marbled pattern, bake until just set, and chill for three hours. Ready in 45 minutes of active prep with stunning layered results.
Ingredients
Nutella brownie base:
200g Nutella
80g unsalted butter, melted
150g caster sugar
2 large eggs, room temperature
1 teaspoon vanilla extract
100g plain flour
25g cocoa powder, sifted
½ teaspoon fine salt
½ teaspoon baking powder
Cream cheese filling:
450g full-fat cream cheese, room temperature
100g icing sugar, sifted
1 teaspoon vanilla extract
1 large egg, room temperature
1 tablespoon fresh lemon juice
2 tablespoons double cream
Nutella swirl topping:
100g Nutella, warmed
1 tablespoon double cream
Optional garnish:
2 tablespoons chopped roasted hazelnuts
1 tablespoon cocoa powder
Dark chocolate shavings
- Preheat oven to 175°C fan and grease a 23x23cm square tin thoroughly
- Line with two crossing parchment strips with overhang on all four sides
- Stir Nutella and melted butter together until completely smooth
- Add caster sugar and stir vigorously for 1 minute until incorporated
- Add eggs one at a time stirring firmly after each addition
- Add vanilla extract and stir once more
- Sift flour, cocoa powder, salt, and baking powder into the bowl
- Fold with a spatula until no dry flour streaks remain then stop
- Pour brownie batter into prepared tin and spread evenly to all four corners
- Beat room temperature cream cheese on medium speed for 2 minutes until smooth
- Scrape down bowl sides after first minute to ensure even beating
- Add icing sugar, vanilla, egg, lemon juice, and double cream
- Beat on medium speed for 1 to 2 minutes until smooth and slightly thickened
- Pour cream cheese filling over unbaked brownie base and spread evenly to edges
- Warm 100g Nutella in microwave for 15 to 20 seconds until looser
- Add 1 tablespoon double cream to warmed Nutella and stir until smooth
- Drop 8 to 10 spoonfuls of warmed Nutella across the cream cheese surface
- Draw a skewer through each drop in figure-eight movements for 3 to 4 passes
- Bake for 28 to 33 minutes until edges look set and centre has a slight wobble
- Cool in tin on a wire rack for 1 full hour
- Cover loosely with cling film and refrigerate for minimum 3 hours or overnight
- Lift slab from tin using parchment overhangs and place on a cutting board
- Scatter hazelnuts and chocolate shavings and dust with cocoa powder if using
- Slice into 12 bars using a hot damp knife wiped clean between each cut
FAQs
Q1: Can I make these as no bake Nutella cheesecake bars? Yes — for a no bake Nutella cheesecake bars recipe version, replace the brownie base with a pressed biscuit crust made from 250g of crushed chocolate digestives mixed with 80g of melted butter, pressed firmly into the tin and chilled for 30 minutes. Make the cream cheese filling without the egg, fold in 100g of extra Nutella, spread over the chilled crust, and refrigerate overnight. The no bake version does not require the oven at all and produces a softer, mousse-like filling rather than a baked cheesecake texture.
Q2: Can I use a different chocolate hazelnut spread instead of Nutella? Yes — any good quality chocolate hazelnut spread works as a direct Nutella substitute. Store-brand versions vary in hazelnut content and sweetness, which affects the flavour of both the base and the swirl. Taste your chosen spread before using — if it tastes noticeably sweeter than Nutella, reduce the caster sugar in the brownie base by 20g to compensate and prevent the finished bars from tasting cloying.
Q3: Why did my cream cheese layer crack during baking? Cracking in a baked cream cheese layer almost always results from over-baking or a temperature that is too high. Bake at 175°C fan maximum and remove the bars when the centre still has a slight wobble — the residual heat continues cooking the filling as it cools. If cracking occurs, the Nutella swirl pattern and cocoa powder dusting cover surface cracks completely in the finished bars with no visible evidence.
Wrapping It Up
This chocolate hazelnut cheesecake bars homemade recipe delivers genuinely impressive, flavour-layered bars from a straightforward process. Make a fudgy Nutella brownie base, spread a smooth cream cheese filling over the unbaked base, swirl warmed Nutella across the top in 3 to 4 passes, bake until the edges are set and the centre wobbles slightly, cool, chill for 3 hours, and slice cleanly with a hot knife. Those six steps produce a perfect result every time.
Whether you serve these at a dinner party with chopped hazelnuts and chocolate shavings, make the no bake version for a simpler occasion, bake them a day ahead for the firmest slices, or simply eat one straight from the fridge because Tuesday deserves something good — they consistently impress everyone who tries them. Now open that Nutella jar and make something worth every swirl.