A standard cinnamon roll is already one of the better things you can put in an oven. A red velvet cinnamon rolls recipe — with a deep crimson dough, a buttery cinnamon filling, and a thick cream cheese glaze draped over the top — is an entirely different level of breakfast achievement. They look like something a professional baker made at 4am for a very important occasion. You made them on a Sunday morning in your kitchen.
This easy red velvet rolls homemade version uses a yeasted enriched dough coloured deep red with cocoa powder and food colouring, filled with a classic brown sugar cinnamon butter, rolled tightly, and baked until pillowy soft. The cream cheese frosting goes on warm from the oven so it melts slightly into every layer. The result looks stunning, tastes extraordinary, and makes the entire house smell like the best bakery you have ever visited.
What You’ll Need (Ingredients)
All familiar, all straightforward, with one jar of red food colouring doing the visual heavy lifting. The bread flour makes the biggest texture difference here.
For red velvet dough:
- 500g (4 cups) strong white bread flour, plus extra for dusting
- 7g (1 sachet) instant yeast
- 60g (5 tablespoons) caster sugar
- 1 teaspoon fine salt
- 2 tablespoons cocoa powder, sifted
- 240ml (1 cup) whole milk, warmed to 40°C
- 60g (4 tablespoons) unsalted butter, melted and cooled
- 2 large eggs, room temperature
- 1 tablespoon red gel food colouring
- 1 teaspoon vanilla extract
- 1 teaspoon white wine vinegar
Cinnamon filling:
- 100g (7 tablespoons) unsalted butter, very soft at room temperature
- 150g (¾ cup) light brown sugar, packed
- 2.5 teaspoons ground cinnamon
- ¼ teaspoon fine salt
- ¼ teaspoon ground nutmeg
For the cream cheese frosting:
- 225g (1 cup) full-fat cream cheese, room temperature
- 150g (1¼ cups) icing sugar, sifted
- 3 tablespoons whole milk
- 1 teaspoon vanilla extract
- 1 pinch fine salt
How to Make It — Full Step-by-Step Process
Step One: Make the Red Velvet Dough
Combine 500g of strong white bread flour, 7g of instant yeast, 60g of caster sugar, 1 teaspoon of fine salt, and 2 tablespoons of sifted cocoa powder in a large mixing bowl. Whisk the dry ingredients together thoroughly to distribute the yeast and salt evenly — keeping them on opposite sides of the bowl initially before whisking prevents the salt from directly contacting and inhibiting the yeast before the liquid is added. Make a well in the centre.
Warm 240ml of whole milk to approximately 40°C — warm enough to feel comfortably hot on the inside of your wrist but not so hot it stings. Milk that is too hot kills the yeast instantly and produces a dough that never rises regardless of how long you wait. Add the warm milk, 60g of cooled melted butter, 2 room temperature eggs, 1 tablespoon of red gel food colouring, 1 teaspoon of vanilla extract, and 1 teaspoon of white wine vinegar to the well. The vinegar reacts with the cocoa powder and red colouring to deepen and brighten the red colour of the finished dough — the same chemistry that gives classic red velvet cake its characteristic hue.
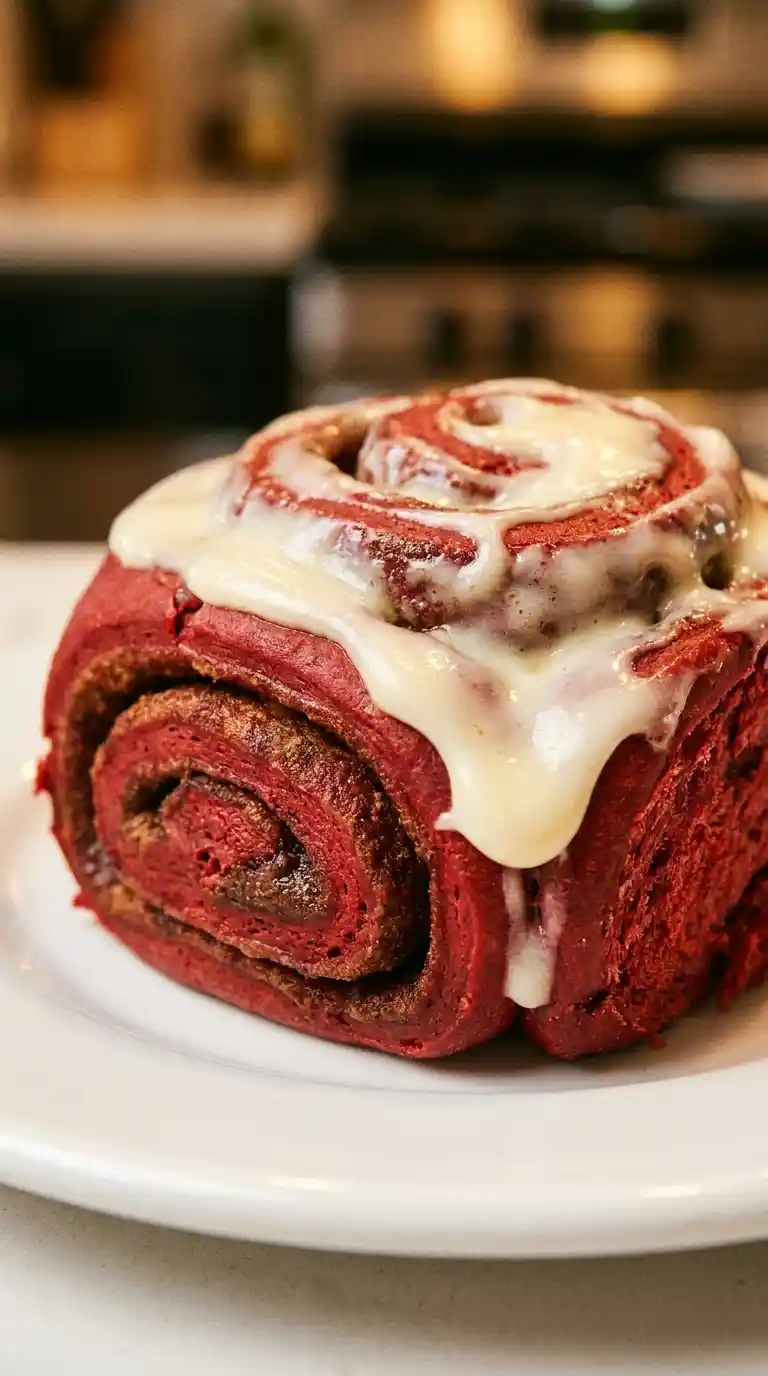
Mix everything together with a wooden spoon or your hand until a shaggy dough forms with no dry flour remaining at the bottom of the bowl. The dough will look intensely red at this stage — much redder than the finished baked rolls, which develop a deeper, more burgundy tone during baking. Turn the dough out onto a lightly floured surface and knead firmly for 8 to 10 minutes by hand until the dough feels smooth, slightly tacky, and elastic — it should spring back slowly when you press a finger into the surface. If using a stand mixer with a dough hook, knead on medium speed for 6 minutes.
Step Two: First Rise
Shape the kneaded dough into a smooth ball and place it in a lightly oiled large bowl. Turn the dough once to coat the surface in a thin layer of oil — this prevents a dry skin from forming during rising. Cover the bowl tightly with cling film or a clean damp tea towel and leave in a warm, draught-free place for 60 to 75 minutes until doubled in size. A switched-off oven with just the light on provides ideal rising conditions — consistently warm and completely draught-free.
The dough needs to double fully before you proceed — a partially risen dough produces dense, tight rolls that do not puff into the soft fluffy red velvet rolls recipe easy result you are aiming for. Press a floured finger into the risen dough — if the indent springs back slowly and partially, the dough is ready. If it springs back immediately and completely, give it another 10 to 15 minutes and test again.
Step Three: Make the Cinnamon Filling
Beat 100g of very soft room temperature unsalted butter in a bowl until smooth and spreadable — it should be soft enough to spread easily without tearing the dough but firm enough to stay in place when the dough is rolled. Add 150g of packed light brown sugar, 2.5 teaspoons of ground cinnamon, ¼ teaspoon of fine salt, and ¼ teaspoon of ground nutmeg. Stir everything together until the butter and sugar form a thick, paste-like mixture that holds together without being runny.
The nutmeg is not a decorative addition — it adds a warm, slightly spiced background note that makes the cinnamon flavour more complex and interesting without being identifiable as nutmeg on its own. Most people notice something tastes better without knowing what changed when you add it. FYI, making the filling slightly ahead and allowing it to sit at room temperature for 10 minutes produces a more spreadable consistency than using it immediately after mixing.
Step Four: Roll, Fill, and Cut
Turn the risen dough out onto a lightly floured surface and press it gently to deflate. Roll it into a large rectangle approximately 40cm wide by 30cm tall and 5mm thick using a rolling pin, working from the centre outward in even strokes to maintain a consistent thickness across the entire surface. A rectangle with even thickness produces rolls that are uniform in size and bake at the same rate — uneven thickness produces some rolls that are over-filled and burst and others that are under-filled and flat.
Spread the cinnamon filling evenly across the entire surface of the dough rectangle using an offset spatula or the back of a spoon, working right to all four edges and leaving absolutely no bare dough visible. An even, edge-to-edge filling application means every layer of every roll contains cinnamon butter — which is, after all, the entire point of the exercise.
Starting from the long edge closest to you, roll the dough away from you into a tight, even log using both hands simultaneously, keeping the tension even across the full width as you roll. A loose, uneven roll produces rolls that unravel during baking and lose their swirl definition. Roll firmly and consistently — the log should feel taut when complete. Trim the ragged ends with a sharp knife and discard, then cut the log into 12 equal rolls approximately 3 to 3.5 cm wide each. Use a sharp serrated knife or unflavoured dental floss to cut — a regular blunt knife compresses the soft dough and produces uneven, misshapen rolls rather than clean, defined swirls.
Step Five: Second Rise and Bake
Arrange the 12 cut rolls cut-side up in a greased 23x33cm (9×13 inch) baking dish, placing them close together but not quite touching — they expand during the second rise and the final bake and will press together naturally, producing the pull-apart texture that defines a properly made baked red velvet sweet rolls recipe result. Cover loosely with cling film and allow to rise in a warm place for a further 30 to 45 minutes until visibly puffed and the rolls are touching each other gently.
Preheat your oven to 180°C (350°F) fan-forced or 190°C (375°F) conventional during the final 15 minutes of the second rise. Bake the risen rolls for 20 to 24 minutes until the tops look set and the internal temperature reaches approximately 88°C (190°F) if you have a thermometer. The rolls should look slightly underdone rather than deeply golden — enriched doughs continue cooking from residual heat after leaving the oven, and over-baked rolls dry out quickly and lose the pillowy softness that makes this homemade red velvet swirl cinnamon buns result so genuinely impressive. Remove from the oven and allow to cool for exactly 5 minutes before adding the frosting. 🙂
Why Bread Flour Produces the Softest Rolls
Have you ever made cinnamon rolls with plain flour and found them decent but somehow denser and less pillowy than a bakery version? The flour protein content is almost always the reason.
Strong white bread flour contains more protein than plain flour — typically 12 to 14% versus 9 to 11% — which develops a stronger, more elastic gluten network when kneaded. This stronger network traps more gas during both rises, producing a lighter, more airy crumb that gives each roll its characteristic soft, pull-apart texture. Plain flour produces a tender crumb but lacks the structural elasticity that makes enriched roll dough genuinely fluffy rather than simply soft.
The cocoa powder in the dough also plays a functional role beyond colour. Cocoa contains natural acids that interact with the white wine vinegar and the red food colouring to produce the deep, true red colour of a proper rich red velvet breakfast rolls recipe result. Without the vinegar, the colour stays slightly orange-pink rather than achieving the deep, jewel-like red that makes these rolls look so visually striking fresh from the oven.
Making the Cream Cheese Frosting
The cream cheese red velvet cinnamon rolls frosting is what separates a genuinely impressive roll from a standard sweet bun — and it takes under 5 minutes to make correctly.
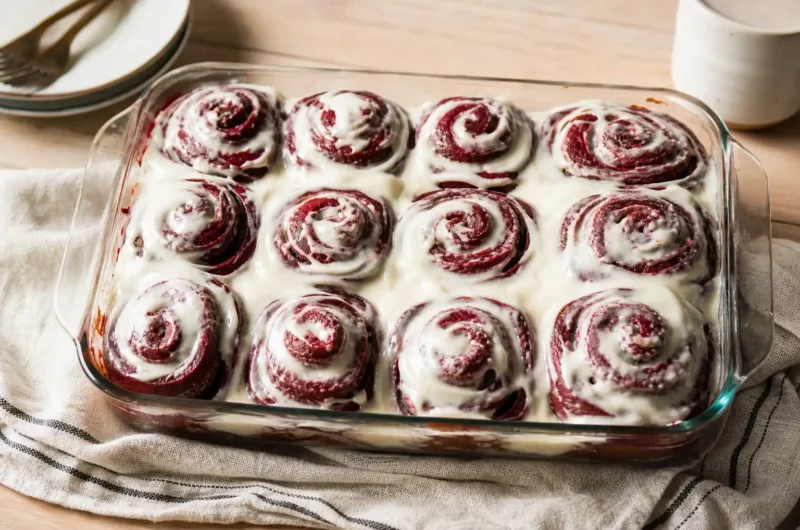
Beat 225g of room temperature full-fat cream cheese with an electric hand mixer for 2 minutes until smooth. Add 150g of sifted icing sugar, 3 tablespoons of whole milk, 1 teaspoon of vanilla extract, and a pinch of salt. Beat for 1 minute until the frosting looks smooth, pourable, and slightly glossy. Pour it immediately over the rolls while they are still warm from the oven — warm rolls absorb a thin layer of frosting into the top surface, creating a sticky, lacquered quality that cold rolls never achieve. IMO this frosting-on-warm-rolls step is the single most important finishing decision in the entire recipe and one that takes zero extra effort.
Red Velvet Cinnamon Rolls Recipe Soft and Stunning
12
servings30
minutes22
minutesThese red velvet cinnamon rolls make a cocoa-enriched red yeasted dough, roll it with brown sugar cinnamon butter, cut into 12 swirls, rise until puffed, and bake until just set. Frosted immediately with warm cream cheese glaze, they deliver soft, fluffy, visually stunning bakery-quality rolls in under 2.5 hours.
Ingredients
Red velvet dough:
500g strong white bread flour
7g instant yeast
60g caster sugar
1 teaspoon fine salt
2 tablespoons cocoa powder, sifted
240ml whole milk, warmed
60g unsalted butter, melted
2 large eggs, room temperature
1 tablespoon red gel food colouring
1 teaspoon vanilla extract
1 teaspoon white wine vinegar
Cinnamon filling:
100g unsalted butter, very soft
150g light brown sugar, packed
2.5 teaspoons ground cinnamon
¼ teaspoon fine salt
¼ teaspoon ground nutmeg
Cream cheese frosting:
225g full-fat cream cheese, room temperature
150g icing sugar, sifted
3 tablespoons whole milk
1 teaspoon vanilla extract
1 pinch fine salt
- Whisk flour, yeast, sugar, salt, and cocoa powder together in a large bowl
- Warm milk to 40°C and combine with melted butter, eggs, food colouring, vanilla, and vinegar
- Pour wet ingredients into dry ingredients and mix until a shaggy dough forms
- Knead on a floured surface for 8 to 10 minutes until smooth and elastic
- Shape into a ball, place in an oiled bowl, and cover tightly
- Rise in a warm place for 60 to 75 minutes until doubled in size
- Beat soft butter with brown sugar, cinnamon, salt, and nutmeg into a thick paste
- Turn risen dough out and press gently to deflate
- Roll into a 40x30cm rectangle approximately 5mm thick
- Spread cinnamon filling evenly across the entire surface to all four edges
- Roll tightly from the long edge into a firm even log
- Trim ragged ends and cut log into 12 equal rolls using a serrated knife
- Arrange rolls cut-side up in a greased 23x33cm baking dish close together
- Cover loosely and rise for 30 to 45 minutes until visibly puffed and touching
- Preheat oven to 180°C fan during the final 15 minutes of rising
- Bake for 20 to 24 minutes until tops look set and slightly underdone
- Remove from oven and cool for exactly 5 minutes
- Beat cream cheese until smooth then add icing sugar, milk, vanilla, and salt
- Beat frosting for 1 minute until smooth and pourable
- Pour cream cheese frosting over warm rolls immediately and spread to cover
Common Mistakes to Avoid
Using hot milk: Milk above 45°C kills the yeast before it activates and produces a dough that never rises. Always warm milk to 40°C — comfortably hot on the wrist, not stinging — and check with a thermometer if you are unsure.
Rolling the log too loosely: A loose roll unravels during baking and the swirl definition disappears in the oven. Roll firmly with consistent tension across the full width and the swirl stays defined through both the rise and the bake.
Using liquid food colouring instead of gel: Liquid colouring adds water to the dough and dilutes the colour significantly — you need far more liquid colouring to achieve the same depth as gel, which throws off the dough hydration. Always use gel food colouring for the deepest, truest red with minimal liquid addition. :/
Skipping the second rise: Cutting the second rise short produces rolls that do not puff fully before baking and bake into dense, compact spirals rather than light, airy swirls. Always wait until the rolls are visibly puffed and touching before putting them in the oven.
Adding frosting to cold rolls: Cold rolls do not absorb any frosting into the surface and the frosting sits as a separate layer that slides off when sliced. Always frost within 5 minutes of removing from the oven for the best result.
FAQs
Q1: Can I make these overnight for Valentine’s Day morning? Yes — these valentine red velvet cinnamon rolls ideas work perfectly as an overnight recipe. Complete all steps through cutting and arranging the rolls in the baking dish, cover tightly with cling film, and refrigerate overnight. Remove from the fridge 45 minutes before baking to allow the second rise to complete at room temperature, then bake as normal. The overnight cold fermentation actually develops a slightly richer, more complex flavour in the finished rolls.
Q2: Can I make these without red food colouring? Yes — omitting the red food colouring produces a deep brown cocoa-tinted dough that tastes identical but lacks the visual drama. For a natural red alternative, replace the gel colouring with 2 tablespoons of beetroot powder — it produces a more muted, earthy pink-red tone rather than the vivid red of gel colouring but contains no artificial colouring. The baked colour will be noticeably less vibrant but still distinctly different from a standard cinnamon roll.
Q3: Why did my rolls turn out dense? Dense rolls almost always result from under-proofing during either the first or second rise, killing the yeast with milk that was too hot, or under-kneading the dough. Ensure the milk is at the correct temperature, knead for the full 8 to 10 minutes, allow the dough to double fully during the first rise, and let the shaped rolls puff visibly during the second rise before baking.
Wrapping It Up
This fluffy red velvet rolls recipe easy enough for a home baker delivers genuinely stunning, bakery-quality rolls from a straightforward process. Make a cocoa-enriched red dough with warm milk and gel colouring, knead until elastic, rise until doubled, spread with cinnamon butter, roll tightly, cut into 12 even rolls, rise again until puffed, bake until just set, and frost immediately with cream cheese glaze. Those eight steps produce a perfect result every time.
Whether you make these for Valentine’s Day morning with an overnight rise, bake them as a special weekend project, or simply decide on a Tuesday that the week needs something extraordinary — they consistently impress everyone who sees and eats them. Now activate that yeast and make something worth waking up for.