A genuinely good chocolate cake is one of those things people spend years chasing and rarely find in their own kitchen. Too dry, too dense, too flat, not chocolatey enough — the list of ways a chocolate cake can disappoint is impressively long. The good news is that a properly made homemade choco cake from scratch fixes every single one of those problems at once.
This moist chocolate cake recipe easy enough for a complete beginner uses one bowl, straightforward pantry ingredients, and a method that produces a deeply chocolatey, genuinely moist crumb with a tender, soft texture that holds together cleanly when sliced. Paired with a simple chocolate buttercream frosting, the result tastes like a bakery style chocolate cake homemade in your own kitchen — which is exactly what it is.
What You’ll Need (Ingredients)
Accessible, affordable, and worth measuring precisely. The cocoa powder and hot coffee together make the biggest flavour difference here.
For the chocolate cake layers:
- 250g (2 cups) plain flour
- 300g (1½ cups) caster sugar
- 75g (¾ cup) good quality cocoa powder, sifted
- 2 teaspoons bicarbonate of soda
- 1 teaspoon baking powder
- 1 teaspoon fine salt
- 2 large eggs, room temperature
- 240ml (1 cup) whole milk, room temperature
- 240ml (1 cup) strong hot coffee or hot water
- 120ml (½ cup) neutral oil — vegetable or sunflower
- 2 teaspoons vanilla extract
- 240ml (1 cup) buttermilk, room temperature
For the chocolate buttercream frosting:
- 250g (1 cup + 2 tablespoons) unsalted butter, room temperature
- 400g (3¼ cups) icing sugar, sifted
- 60g (½ cup) cocoa powder, sifted
- 4 tablespoons whole milk or double cream
- 1 teaspoon vanilla extract
- 1 pinch of salt
Optional eggless version:
- Replace 2 eggs with 2 tablespoons of ground flaxseed mixed with 6 tablespoons of water, rested for 5 minutes
How to Make It — Full Step-by-Step Process
Step One: Prepare Your Tins and Preheat the Oven
Preheat your oven to 175°C (350°F) fan-forced or 180°C (355°F) conventional. Grease two 20cm (8 inch) round cake tins thoroughly with butter or non-stick spray, making sure to cover the sides as well as the base. Cut two circles of parchment paper to fit the base of each tin and press them flat against the greased base — the parchment prevents the cake from sticking even if the greased sides release perfectly, and removing a freshly baked chocolate sponge from a tin without tearing is one of the small victories that makes the whole process feel considerably more satisfying.
Dust the greased and lined tins lightly with a small amount of cocoa powder rather than plain flour — tapping out the excess — which prevents the pale flour residue that plain flour leaves on the outside of a dark chocolate cake. This step takes 30 seconds and produces a cleaner, more professional finish on the outer edge of each baked layer. Set the prepared tins aside on a baking tray while you make the batter.
Step Two: Combine the Dry Ingredients
This is a one bowl chocolate cake recipe, which means all the dry ingredients go into a single large mixing bowl before any liquid is added. Add 250g of plain flour, 300g of caster sugar, 75g of sifted cocoa powder, 2 teaspoons of bicarbonate of soda, 1 teaspoon of baking powder, and 1 teaspoon of fine salt to the bowl.
Whisk all the dry ingredients together thoroughly for a full 60 seconds until completely combined with no visible streaks of cocoa or flour remaining. This dry whisking step distributes the leavening agents and cocoa evenly through the flour, which produces an even rise and consistent chocolate colour throughout the finished cake. Clumps of unmixed bicarbonate of soda or baking powder in the batter create uneven rising and occasional bitter pockets in the baked cake — the 60-second whisk prevents both problems entirely.
Step Three: Add the Wet Ingredients
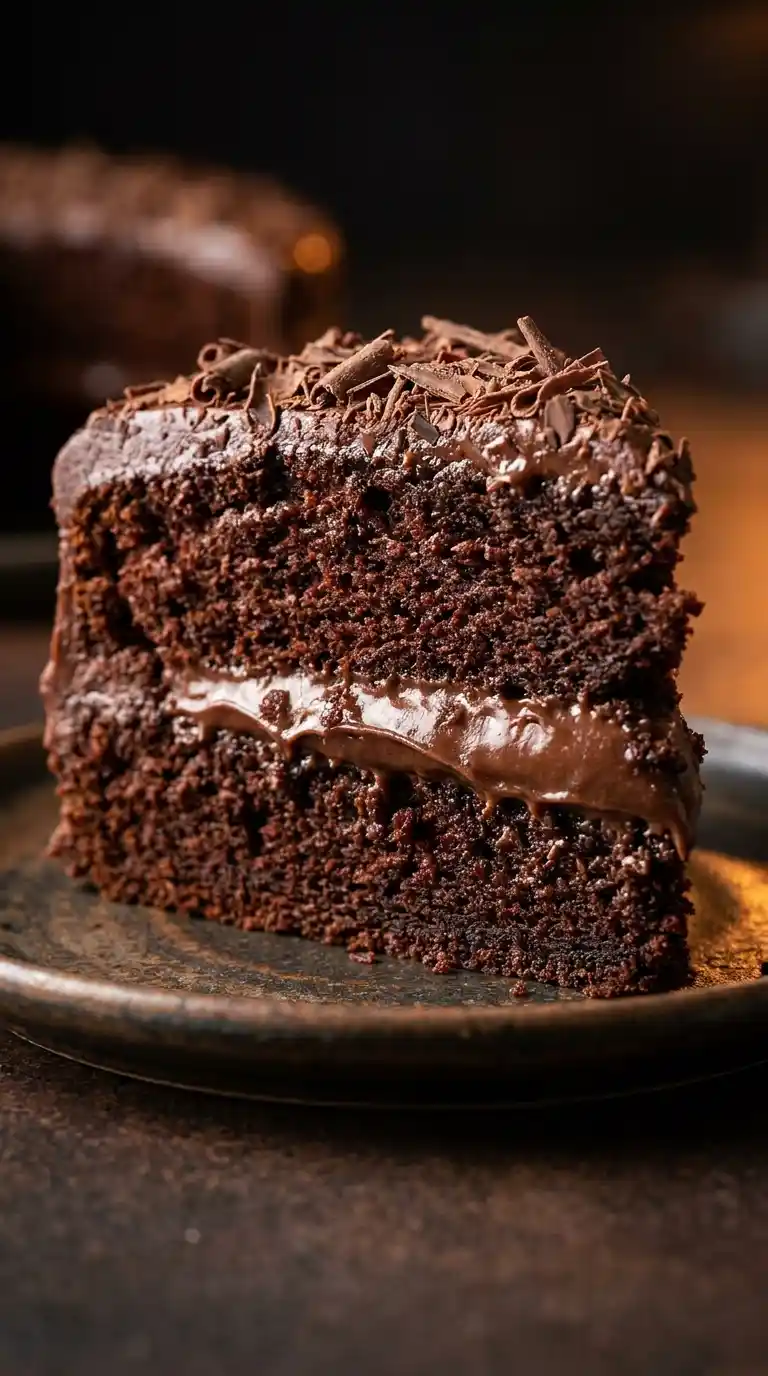
Make a well in the centre of the dry ingredient mixture. Add 2 large room temperature eggs, 240ml of whole milk, 120ml of neutral oil, 2 teaspoons of vanilla extract, and 240ml of room temperature buttermilk to the well. Beat everything together with an electric hand mixer on low speed for 1 minute until the dry and wet ingredients are roughly combined, then increase to medium speed and beat for 2 full minutes until the batter looks smooth, uniform, and slightly thickened.
Now add 240ml of strong hot coffee — or hot water if you prefer — to the batter and beat on low speed until fully incorporated. The batter will look very thin and pourable at this stage, which is alarming the first time you make this recipe and completely normal every time after. Hot coffee intensifies the cocoa flavour dramatically by blooming the cocoa powder, producing the deep, complex chocolate flavour that defines the best chocolate sponge cake recipe result rather than a flat, one-note cocoa taste. Hot water works and produces a good result — hot coffee works better and produces a great one. FYI, the coffee flavour itself disappears entirely during baking and leaves only the enhanced chocolate behind.
Step Four: Bake the Cake Layers
Divide the batter evenly between the two prepared cake tins — weigh them if you want identical layers, aiming for approximately equal weight in each tin. The batter pours easily at this consistency. Place both tins on the same oven rack if they fit side by side, or on separate racks in the upper and centre positions if they do not. Bake for 32 to 38 minutes until a skewer or toothpick inserted into the very centre of each layer comes out clean with no wet batter clinging to it.
Check the cakes at the 30-minute mark by inserting a skewer into the thickest part of the centre — if it comes out with wet batter, return to the oven and check every 3 minutes until clean. A skewer with moist crumbs attached but no wet batter is perfectly done. Remove both tins from the oven and allow the cakes to cool in their tins on a wire rack for 15 full minutes before attempting to turn them out. Turning out too early tears the cake because the structure has not set firmly enough. After 15 minutes, run a thin knife around the inside edge of each tin, invert onto the wire rack, remove the parchment paper, and allow to cool completely — at least 1 hour — before frosting.
Step Five: Make the Chocolate Buttercream and Frost
Beat 250g of room temperature unsalted butter alone on medium-high speed for 3 to 4 minutes until pale and noticeably fluffy. Add 400g of sifted icing sugar and 60g of sifted cocoa powder in three additions, starting the mixer on the lowest speed after each addition to prevent a powder cloud, then increasing to medium speed for 30 seconds between additions. After all the sugar and cocoa are incorporated, beat on medium-high for 2 full minutes.
Add 4 tablespoons of milk or double cream, 1 teaspoon of vanilla extract, and 1 pinch of salt, then beat on high speed for 1 final minute until the fluffy chocolate cake frosting recipe result looks smooth, glossy, and spreadable. Place one cooled cake layer on a serving plate or cake board, flat side up. Spread a generous layer of buttercream — approximately one third of the total frosting — evenly across the top surface using an offset spatula. Place the second layer on top, flat side down. Apply the remaining frosting to the top and sides of the assembled cake, spreading in smooth strokes for a clean finish or using the back of a spoon to create textured swirls for a more casual, rustic result. 🙂
Why Hot Coffee Transforms the Chocolate Flavour
Have you ever made a chocolate cake that tasted more like sweetened flour than actual chocolate, despite following the recipe precisely? The problem is almost always insufficient cocoa bloom.
Cocoa powder contains flavour compounds that only fully activate when exposed to heat and liquid simultaneously — a process called blooming. Adding hot coffee or hot water to the batter forces this blooming to happen before the cake even reaches the oven, producing a dramatically deeper, more complex chocolate flavour in the finished cake than cold liquid ever achieves. The rich chocolate layer cake recipe format specifically uses this technique to produce the intense chocolate flavour that makes people ask what your secret ingredient is.
The type of cocoa powder also matters. Dutch-process cocoa has been treated to reduce acidity and produces a deeper, darker colour and a smoother, less bitter flavour than natural cocoa. Either type works in this recipe — Dutch-process produces a richer colour and slightly smoother flavour, while natural cocoa produces a more intense, slightly sharper chocolate note. Both make an excellent simple chocolate cake recipe homemade result. IMO Dutch-process is worth seeking out specifically for this cake because the colour difference alone makes the finished layers look considerably more impressive.
Making the Eggless Version
The eggless chocolate cake recipe easy alternative uses flax eggs as a direct substitution and produces a genuinely moist, rich result that most people cannot distinguish from the standard version in a blind tasting.
Mix 2 tablespoons of ground flaxseed with 6 tablespoons of cold water in a small bowl and stir well. Allow to rest for exactly 5 minutes until the mixture thickens into a gel — this gel mimics the binding and moisture-trapping function of eggs in the batter. Add the flax egg mixture at exactly the same stage as the regular eggs in the standard method. The finished cake bakes slightly denser than the egg version but remains genuinely moist and chocolatey with a tender crumb that slices cleanly and tastes excellent.
Common Mistakes to Avoid
Using cold ingredients: Cold eggs, cold milk, and cold buttermilk create an uneven batter that mixes poorly and produces a denser, less even crumb. Always bring all wet ingredients to room temperature before starting — 30 minutes on the counter is sufficient.
Opening the oven before 30 minutes: Opening the oven door before the cake structure has set causes the centre to collapse and creates a sunken, dense layer that no amount of frosting covers convincingly. Wait until the 30-minute mark before checking. :/
Frosting warm cake layers: Buttercream applied to warm cake melts immediately, slides off the surface, and produces an uneven, greasy finish. Always cool layers completely — at least 1 hour at room temperature — before applying any frosting.
Under-measuring the cocoa: Cocoa powder compacts in the bag and measuring by volume without sifting produces significantly less cocoa than the recipe requires. Always sift cocoa before measuring and spoon it lightly into the measuring cup rather than scooping directly from the container.
Skipping the salt in the frosting: Salt in chocolate buttercream cuts the sweetness and allows the cocoa flavour to come through clearly. Without it, the frosting tastes flat and overly sweet rather than genuinely rich and chocolatey.
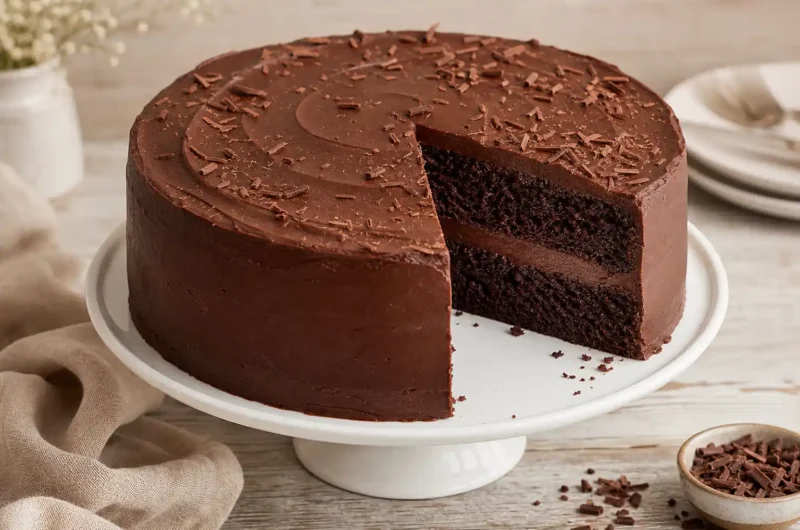
Rich Chocolate Layer Cake Recipe Worth Making
10
servings20
minutes35
minutesThis chocolate cake whisks cocoa, flour, sugar, and leavening in one bowl, adds eggs, buttermilk, oil, and hot coffee for deep flavour and moisture, bakes into two tender layers, then frosts with a smooth chocolate buttercream. Ready in 55 minutes, it delivers genuinely moist, rich, bakery-quality results every time.
Ingredients
Chocolate cake layers:
250g plain flour
300g caster sugar
75g cocoa powder, sifted
2 teaspoons bicarbonate of soda
1 teaspoon baking powder
1 teaspoon fine salt
2 large eggs, room temperature
240ml whole milk, room temperature
240ml strong hot coffee or hot water
120ml neutral oil
2 teaspoons vanilla extract
240ml buttermilk, room temperature
Chocolate buttercream frosting:
250g unsalted butter, room temperature
400g icing sugar, sifted
60g cocoa powder, sifted
4 tablespoons whole milk or double cream
1 teaspoon vanilla extract
1 pinch of salt
- Preheat oven to 175°C fan and grease two 20cm round cake tins thoroughly
- Line bases with parchment paper circles and dust sides with cocoa powder
- Add flour, sugar, cocoa, bicarbonate of soda, baking powder, and salt to a large bowl
- Whisk all dry ingredients together for 60 seconds until completely combined
- Make a well in the centre of the dry ingredients
- Add eggs, milk, oil, vanilla extract, and buttermilk to the well
- Beat on low for 1 minute then increase to medium for 2 full minutes until smooth
- Add hot coffee or hot water and beat on low until fully incorporated
- Divide batter evenly between the two prepared tins
- Bake for 32 to 38 minutes until a skewer inserted in the centre comes out clean
- Check from the 30-minute mark every 3 minutes if needed
- Cool in tins on a wire rack for 15 minutes before turning out
- Remove parchment paper and cool completely on the rack for at least 1 hour
- Beat room temperature butter alone for 3 to 4 minutes until pale and fluffy
- Add sifted icing sugar and cocoa powder in three additions starting on low speed
- Beat on medium-high for 2 full minutes after all sugar and cocoa are incorporated
- Add milk, vanilla extract, and salt then beat on high for 1 final minute
- Place first cake layer flat side up on a serving plate
- Spread one third of buttercream evenly across the top surface
- Place second layer flat side down on top of the frosted first layer
- Apply remaining buttercream to the top and sides of the assembled cake
- Spread smooth or create textured swirls and serve at room temperature
FAQs
Q1: Can I make this as a single layer cake instead of two layers? Yes — pour all the batter into one deep 23cm (9 inch) round tin and bake at 175°C fan for 45 to 55 minutes until a skewer comes out clean. Check from the 40-minute mark. The single layer produces a deeper, denser cake that slices into generous portions and works well topped simply with frosting and a scatter of chocolate shavings rather than a fully layered assembly.
Q2: Can I use this recipe to make chocolate cupcakes? Yes — this batter makes approximately 24 standard cupcakes. Fill cupcake cases two thirds full and bake at 175°C fan for 18 to 22 minutes until a skewer comes out clean. The same chocolate buttercream frosting works perfectly piped onto the cooled cupcakes. The hot coffee blooming technique applies identically and produces the same deeply flavoured result in cupcake form.
Q3: Why did my cake sink in the middle? Sinking almost always results from one of three causes — opening the oven before the structure set, underbaking, or using too much leavening. Measure bicarbonate of soda and baking powder precisely, do not open the oven before 30 minutes, and always test with a skewer rather than relying on time alone. A slightly sunken centre can be levelled with a serrated knife before frosting with no visible evidence in the finished cake.
Wrapping It Up
This rich chocolate layer cake recipe delivers a genuinely moist, deeply chocolatey, bakery-quality result from a straightforward 55-minute process. Whisk dry ingredients in one bowl, add wet ingredients and beat smooth, pour in hot coffee for maximum cocoa bloom, divide between two tins, bake until a skewer runs clean, cool completely, then frost with chocolate buttercream. Those seven steps produce a perfect result every single time.
Whether you make this as a full two-layer celebration cake, bake it as cupcakes for a party, use the eggless version for dietary requirements, or simply make one layer for a quiet Tuesday that calls for chocolate cake — it consistently delivers the kind of result that makes people ask for the recipe before they finish their first slice. Now preheat that oven and make something genuinely worth eating.