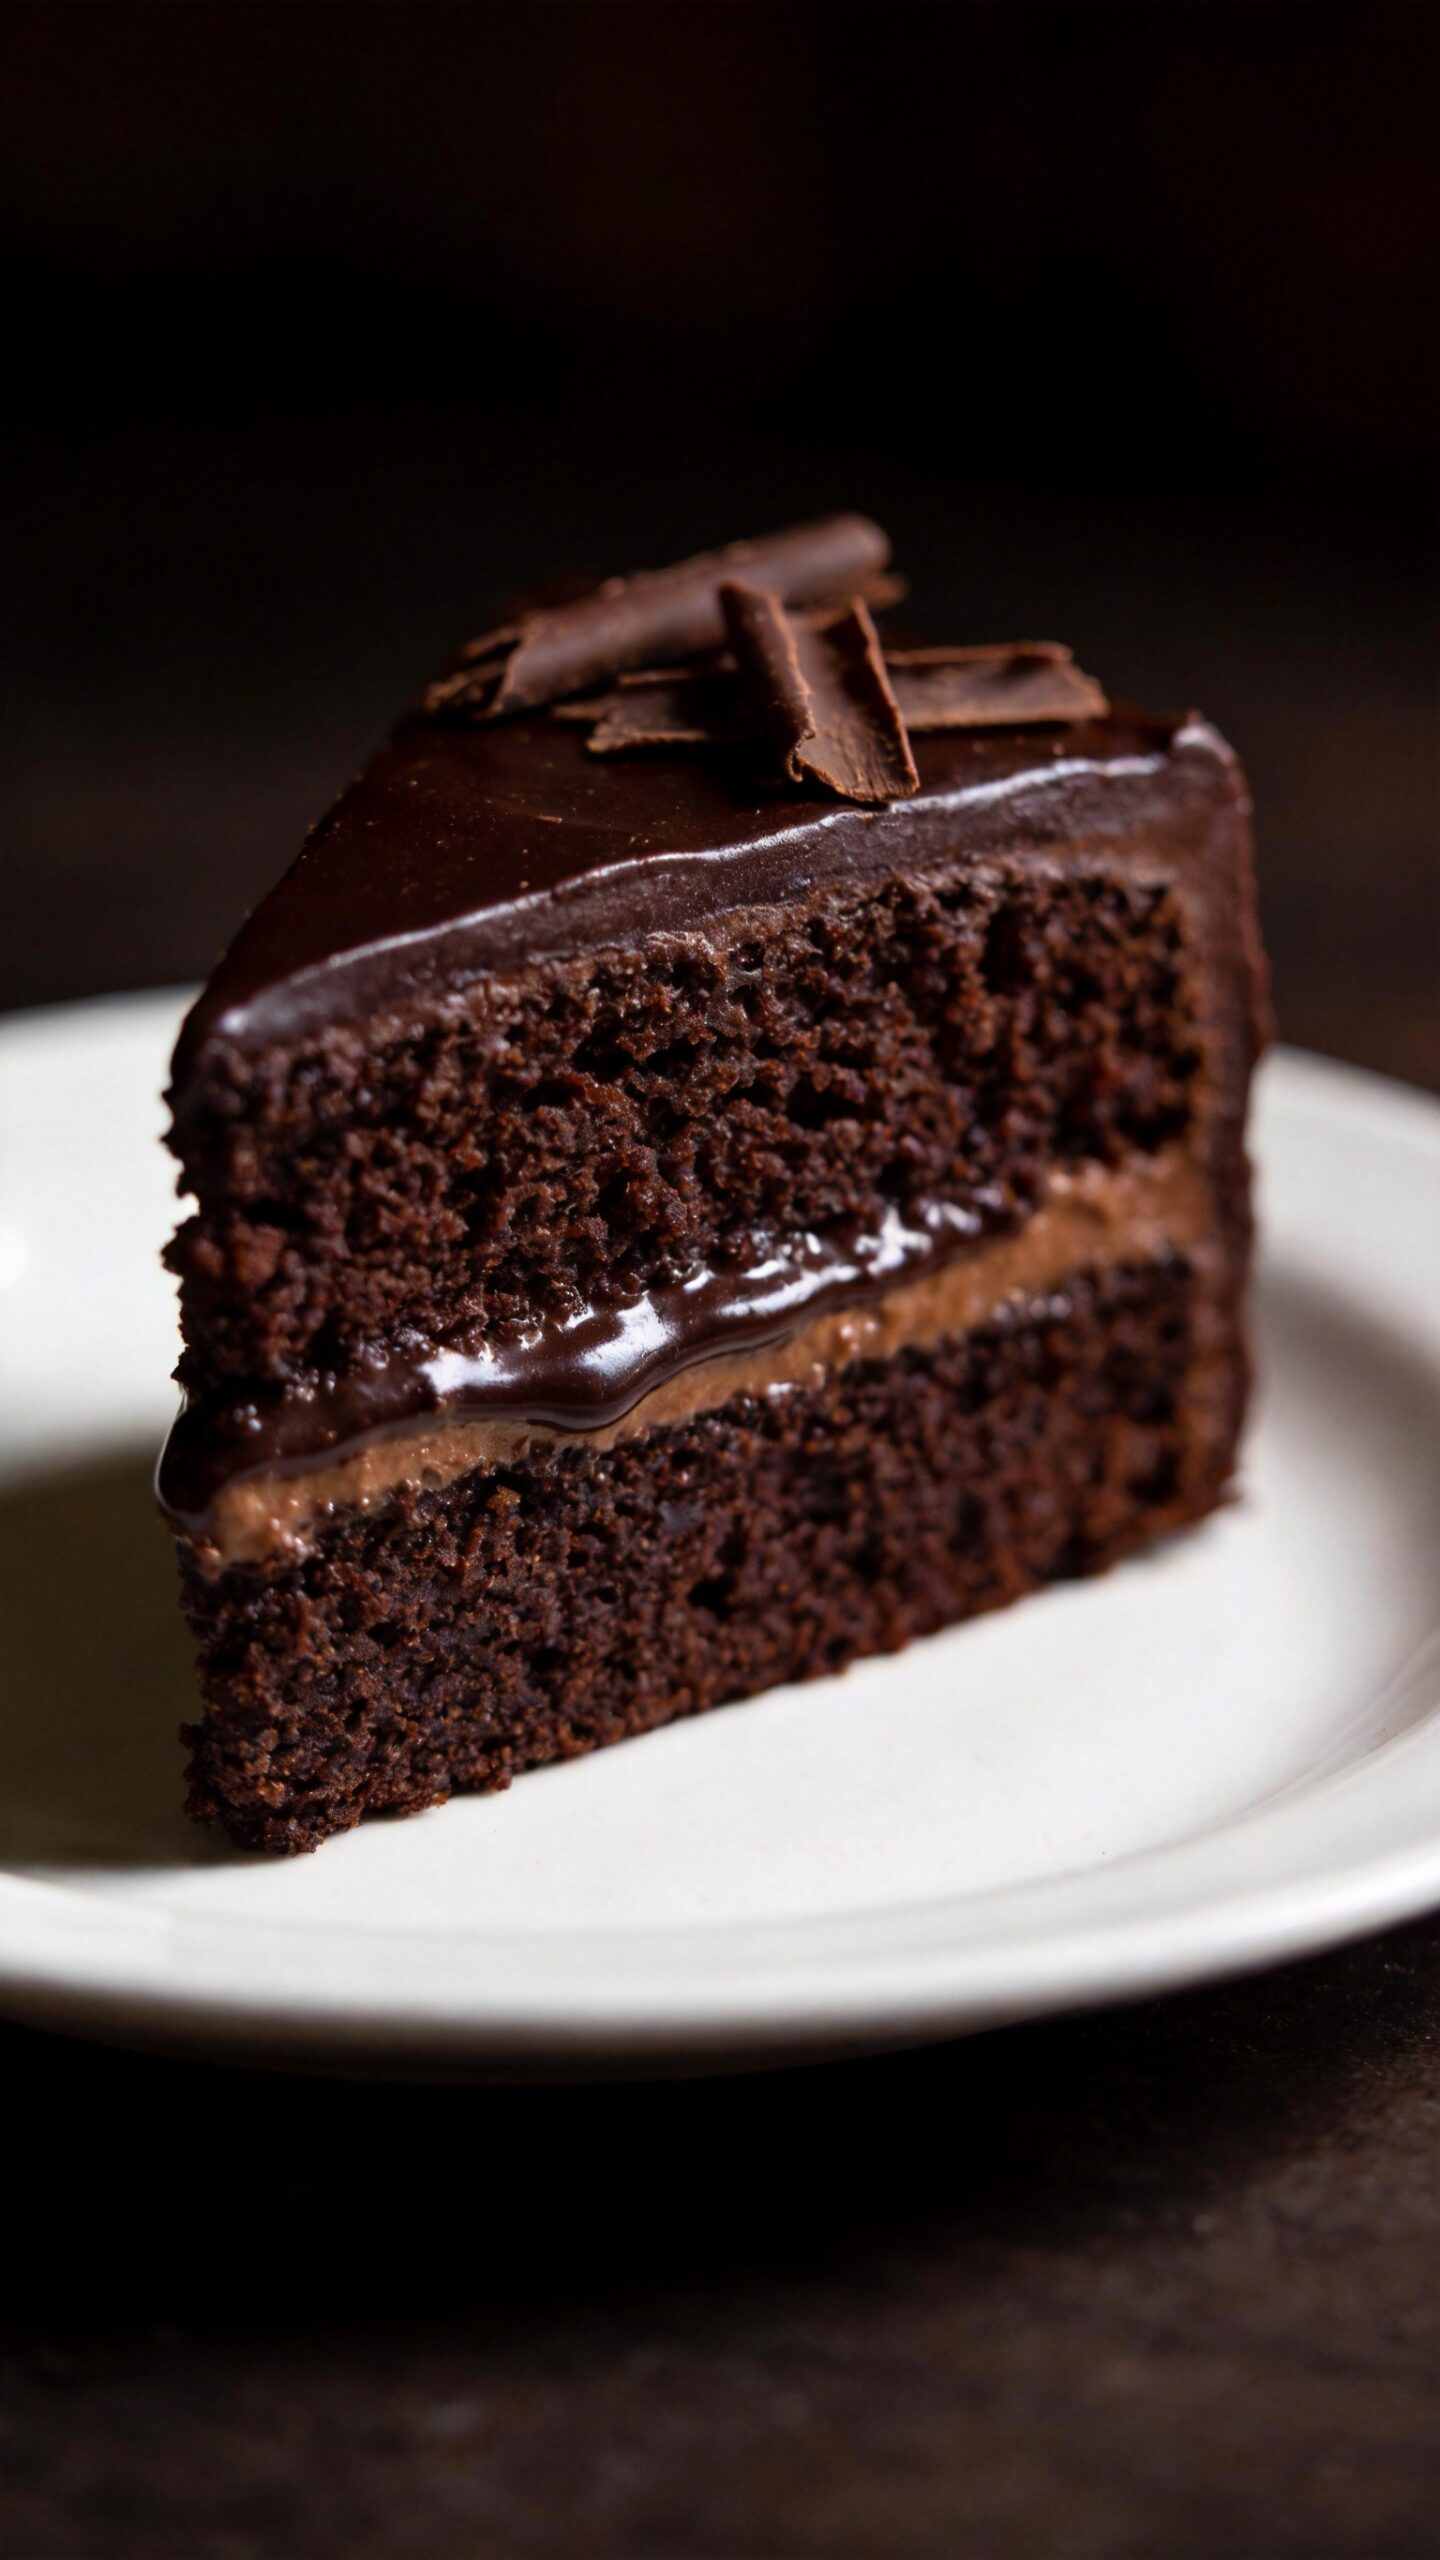
The first time I made this chocolate coffee cake, I brought it to a dinner party expecting polite compliments. Instead, three people asked for the recipe before dessert was even finished and one person quietly took a second slice before anyone noticed. That is the most reliable reaction this cake gets.
Coffee and chocolate together create a flavour combination that neither ingredient achieves alone. The coffee deepens and amplifies the chocolate, making it taste richer, darker, and more complex without making the cake taste like a cup of espresso. This moist chocolate coffee layer cake delivers that combination in every single bite.
What You’ll Need (Ingredients)
Clean, reliable baking ingredients — nothing unusual, nothing you would need a specialist supplier for.
For chocolate coffee cake layers:
- 250g (2 cups) plain flour
- 80g (3/4 cup) unsweetened cocoa powder — use Dutch-processed for the deepest colour
- 300g (1.5 cups) caster sugar
- 2 teaspoons baking powder
- 1 teaspoon bicarbonate of soda
- 1/2 teaspoon salt
- 2 large eggs, room temperature
- 240ml (1 cup) whole milk, room temperature
- 120ml (1/2 cup) vegetable oil or melted butter
- 2 teaspoons vanilla extract
- 240ml (1 cup) hot strong brewed coffee — or 240ml hot water with 2 teaspoons instant espresso powder dissolved in it
- 120ml (1/2 cup) sour cream or full-fat Greek yogurt
Mocha coffee frosting:
- 250g (2.25 sticks) unsalted butter, softened at room temperature
- 400g (3.5 cups) icing sugar, sifted
- 3 tablespoons unsweetened cocoa powder, sifted
- 2 tablespoons strong brewed coffee, cooled completely
- 1 teaspoon vanilla extract
- 2 to 3 tablespoons heavy cream
- 1 pinch of salt
For decoration:
- Chocolate shavings or cocoa powder for dusting
- Chocolate covered espresso beans — optional but worth it
How to Make It — Full Step-by-Step Process
Step One: Prepare Your Tins and Preheat the Oven
Set your oven to 175°C (350°F) fan-forced or 180°C (360°F) conventional and allow it to preheat fully for at least 20 minutes. A fully preheated oven ensures the cake rises evenly from the moment it goes in rather than sitting in gradually warming air, which causes uneven rise and a domed, cracked top.
Take two 20cm (8 inch) round cake tins and grease the base and sides generously with butter or cooking spray. Cut two circles of baking parchment to fit the base of each tin exactly and press them flat against the greased base. Then grease the parchment as well. This double-grease method guarantees the cake releases cleanly from the tin after baking without tearing the bottom layer — a frustrating problem that ruins otherwise perfect cakes and is completely preventable with 2 minutes of preparation.
Step Two: Combine the Dry Ingredients
Sift 250g of plain flour, 80g of cocoa powder, 2 teaspoons of baking powder, 1 teaspoon of bicarbonate of soda, and 1/2 teaspoon of salt together into a large mixing bowl. Sifting removes lumps from both the flour and especially the cocoa powder, which clumps persistently and distributes unevenly through the batter if added without sifting.
Add 300g of caster sugar to the sifted dry ingredients and whisk everything together briefly with a balloon whisk for about 15 seconds. Whisking the dry ingredients together before adding any wet ingredients ensures even distribution of the raising agents throughout the flour. Pockets of concentrated baking powder or bicarbonate of soda cause uneven rising during baking and can leave a slightly metallic aftertaste in the finished cake.
Step Three: Combine the Wet Ingredients Separately
In a separate large jug or bowl, crack 2 room temperature eggs and whisk them lightly for 10 seconds. Add 240ml of whole milk, 120ml of vegetable oil, 2 teaspoons of vanilla extract, and 120ml of sour cream. Whisk everything together until the mixture looks uniform and smooth throughout. Using room temperature eggs and milk matters here — cold ingredients added to a batter create a temperature shock that causes the fat and liquid to separate temporarily, producing a slightly curdled batter that can result in a denser, less tender finished cake.
The sour cream is one of the most important ingredients in this recipe. Its fat content adds richness and moisture, while the acidity reacts with the bicarbonate of soda to create extra lift during baking. The combination produces the tender, moist crumb that defines a genuinely good coffee flavoured chocolate cake recipe easy enough to make on a weekend afternoon.
Step Four: Combine Wet and Dry Ingredients
Pour the wet ingredient mixture into the bowl of dry ingredients. Use a large spatula or wooden spoon to fold everything together using wide, sweeping circular motions. Stop folding as soon as no visible streaks of dry flour remain in the batter — a few small lumps are completely acceptable and far preferable to an over-mixed batter.
Over-mixing is the single most damaging thing you can do to a cake batter. When you mix flour with liquid, gluten develops in the flour proteins. A small amount of gluten development produces structure. Too much produces a tough, chewy, dense cake rather than the tender, moist crumb this recipe aims for. Fold until just combined and then stop immediately, even if the urge to keep stirring feels overwhelming. :/
Step Five: Add the Hot Coffee
With the batter mixed to just combined, pour in 240ml of hot strong brewed coffee slowly while folding gently. The batter will look very thin and almost runny after the coffee goes in — this is completely normal and correct. Do not panic and assume something has gone wrong.
The hot coffee does two critical things simultaneously. First, it blooms the cocoa powder by opening up the cocoa particles and releasing their full flavour, which produces a significantly deeper, more intense chocolate taste than cold liquid ever achieves. Second, it thins the batter to a consistency that produces an exceptionally moist, fudgy chocolate coffee cake recipe rather than a dry, dense one. Thin batter going into the oven is exactly what you want here.
Divide the finished batter evenly between the two prepared tins. Pour slowly from a height to break up any air bubbles in the batter as it falls. Tap each tin firmly on the counter 3 to 4 times after pouring to release any remaining trapped air bubbles from the mixture.
Step Six: Bake the Cake Layers
Place both tins on the centre rack of your preheated oven. Position them side by side with at least 5cm of space between them to allow heat to circulate evenly around both tins throughout the baking time. If your oven only has one functional shelf, bake one tin at a time for the most consistent results.
Bake for 32 to 36 minutes without opening the oven door during the first 28 minutes. Opening the door too early causes a sudden temperature drop that can make the cake layers sink in the centre — particularly in a chocolate batter that relies on both baking powder and bicarbonate of soda for its rise. At the 32-minute mark, insert a clean skewer or toothpick into the centre of each cake. A skewer that comes out with a few moist crumbs attached means the cake is perfectly done. A skewer with wet batter clinging to it means it needs 3 to 4 more minutes.
Remove from the oven and allow the tins to cool on a wire rack for 15 minutes before attempting to remove the cakes. After 15 minutes, run a thin knife around the edge of each tin to loosen the sides, then invert each tin onto the wire rack and lift away. Peel the parchment circles off the base of each layer gently and allow both layers to cool completely — a minimum of 45 minutes — before applying any frosting. Frosting warm cake causes the buttercream to melt instantly and slide off in an unglamorous way. FYI, patience here produces a genuinely beautiful finished cake.
Step Seven: Make the Mocha Coffee Frosting
Place 250g of softened room temperature butter into a large mixing bowl. Beat the butter using a hand mixer or stand mixer on medium-high speed for 3 full minutes until it turns noticeably pale — almost white — and looks light and fluffy rather than dense and yellow. This extended beating incorporates air into the butter and creates the light, creamy base that a good buttercream frosting needs.
Add the sifted icing sugar gradually in 4 separate additions while mixing on low speed between each addition. Adding all the sugar at once creates a cloud of fine icing sugar that coats everything in a 50cm radius and produces a lumpy frosting. Adding it gradually gives you full control over the consistency throughout. After all the sugar incorporates, increase the speed to medium-high and beat for 2 more minutes until the frosting looks smooth and light.
Add 3 tablespoons of sifted cocoa powder, 2 tablespoons of cooled strong brewed coffee, 1 teaspoon of vanilla extract, and a pinch of salt. Beat on medium speed for 1 minute until everything incorporates evenly and the frosting turns a rich, deep brown colour. Add heavy cream 1 tablespoon at a time until the frosting reaches a spreadable but firm consistency — it should hold a peak when you lift the beaters but still spread easily across the cake surface without tearing the crumb.
Step Eight: Assemble and Frost the Cake
Place one completely cooled cake layer on a flat serving plate or cake board. Spoon approximately one-third of the mocha frosting onto the centre of the layer and spread it outward using an offset spatula or the back of a large spoon. Spread to within 5mm of the edge — the weight of the second layer will push the frosting to the edge naturally once placed.
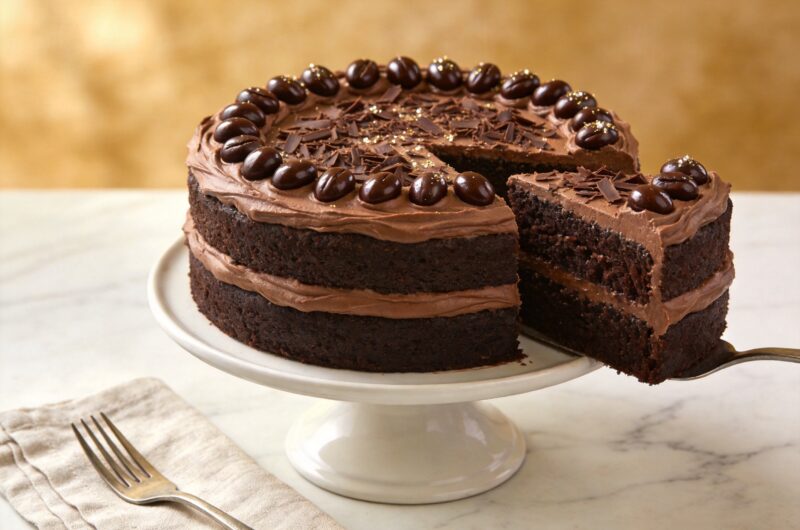
Carefully position the second cake layer on top, pressing gently and evenly to seat it flat. Add half the remaining frosting to the top and spread it across the surface in an even layer. Use the last portion of frosting to cover the sides of the cake, working from the top edge downward in smooth, even strokes. For a bakery style chocolate coffee cake recipe finish, use a clean bench scraper or the flat side of a long palette knife to smooth the sides by holding the scraper vertically against the frosting and rotating the cake slowly on the plate. This technique produces clean, even sides with a professional appearance.
Decorate the top with chocolate shavings, a light dusting of cocoa powder through a fine sieve, or a ring of chocolate covered espresso beans around the outer edge. Refrigerate the finished cake for 20 minutes to firm the frosting before slicing.
Why Coffee Makes Chocolate Cake Better
Have you ever baked a chocolate cake without coffee and then made the same recipe with coffee, and noticed the difference was genuinely significant? The reason comes down to flavour chemistry. Cocoa powder contains hundreds of flavour compounds, and many of them respond directly to the presence of coffee by activating and intensifying.
Coffee shares several of the same aromatic compounds as chocolate — specifically the bitter, roasted, and slightly fruity notes. When you combine them in a batter, those shared compounds reinforce each other and produce a chocolate flavour that tastes deeper and more complex than chocolate alone achieves. This is why even people who do not enjoy coffee flavour in desserts still respond positively to this decadent chocolate espresso cake dessert — they taste more chocolate, not coffee.
Tips for a Perfect Cake Every Time
Use room temperature ingredients: Cold eggs and milk added to a batter cause the fat to seize slightly and produce a denser crumb. Take eggs and milk out of the fridge 45 minutes before baking.
Do not skip the sour cream: Sour cream adds both fat and acidity to the batter. The fat keeps the crumb moist and tender for days after baking. The acidity reacts with the raising agents to produce a lighter, more open crumb structure.
Brew the coffee strong: Weak or diluted coffee adds moisture without adding meaningful flavour. Use a strong brewed coffee or dissolve 2 teaspoons of instant espresso powder in 240ml of hot water for a reliably intense result every time.
Cool completely before frosting: Even a slightly warm cake melts buttercream on contact. A fully cooled cake — minimum 45 minutes at room temperature — holds frosting cleanly and produces a polished, professional finish.
Rich Chocolate Espresso Cake for Any Special Occasion
12
servings25
minutes35
minutes45
minutesThis chocolate coffee cake combines rich cocoa batter with hot brewed coffee for a deeply moist, fudgy crumb, then tops it with a silky mocha buttercream frosting made with real espresso and cocoa. Baked in two layers and assembled like a bakery cake, it delivers genuinely impressive results at home.
Ingredients
Cake layers:
250g plain flour
80g unsweetened cocoa powder
300g caster sugar
2 teaspoons baking powder
1 teaspoon bicarbonate of soda
1/2 teaspoon salt
2 large eggs, room temperature
240ml whole milk, room temperature
120ml vegetable oil
2 teaspoons vanilla extract
240ml hot strong brewed coffee
120ml sour cream
Mocha frosting:
250g unsalted butter, softened
400g icing sugar, sifted
3 tablespoons cocoa powder, sifted
2 tablespoons strong brewed coffee, cooled
1 teaspoon vanilla extract
2 to 3 tablespoons heavy cream
1 pinch salt
Decoration:
Chocolate shavings or cocoa powder for dusting
Chocolate covered espresso beans (optional)
- Preheat oven to 175°C fan or 180°C conventional for at least 20 minutes
- Grease two 20cm round tins, line bases with parchment, and grease parchment
- Sift flour, cocoa powder, baking powder, bicarbonate of soda, and salt into a large bowl
- Add caster sugar and whisk dry ingredients together briefly
- Crack eggs into a separate jug and whisk lightly
- Add whole milk, vegetable oil, vanilla extract, and sour cream to the eggs
- Whisk wet ingredients together until smooth and uniform
- Pour wet ingredients into the dry ingredients bowl
- Fold together with a spatula using wide sweeping motions until just combined with no dry streaks
- Pour hot strong brewed coffee into the batter slowly while folding gently
- Divide batter evenly between both prepared tins
- Tap each tin firmly on the counter 3 to 4 times to release air bubbles
- Place both tins on the centre rack with space between them
- Bake for 32 to 36 minutes without opening the oven door for the first 28 minutes
- Test with a skewer — a few moist crumbs means done, wet batter means 3 more minutes
- Cool in tins on a wire rack for 15 minutes
- Run a knife around the edges, invert onto the rack, and peel off parchment
- Cool cake layers completely for at least 45 minutes before frosting
- Beat softened butter in a bowl on medium-high speed for 3 full minutes until pale and fluffy
- Add sifted icing sugar gradually in 4 additions mixing on low between each addition
- Beat on medium-high for 2 minutes after all sugar is incorporated
- Add sifted cocoa powder, cooled coffee, vanilla extract, and salt
- Beat for 1 minute until smooth and deep brown throughout
- Add heavy cream 1 tablespoon at a time until frosting reaches a firm spreadable consistency
- Place one cooled cake layer on a serving plate
- Spread one-third of the frosting onto the first layer using an offset spatula
- Position the second layer on top and press gently to seat flat
- Spread half the remaining frosting across the top surface
- Use the last frosting portion to cover the sides evenly
- Smooth the sides with a bench scraper or palette knife for a clean finish
- Decorate the top with chocolate shavings, cocoa powder dusting, or espresso beans
- Refrigerate for 20 minutes to firm the frosting before slicing and serving
Common Mistakes to Avoid
Over-mixing the batter: Once the flour hydrates in the batter, gluten develops with every additional stir. Fold to just combined and stop — the difference between a tender crumb and a tough one is literally 30 extra seconds of unnecessary mixing.
Opening the oven too early: The first 28 minutes of baking are critical for structure setting. Opening the door before this point causes a temperature drop that collapses the rising batter before it sets — and no amount of additional baking time can fix a sunken centre.
Using cold butter for the frosting: Cold butter does not incorporate air during beating and produces a dense, heavy frosting that spreads poorly and tastes waxy. Room temperature butter beaten for 3 minutes produces a frosting that feels genuinely light and smooth.
Frosting a warm cake: Warm cake melts buttercream on contact and makes the layers slide apart during assembly. Always cool cake layers completely — 45 minutes minimum — before applying any frosting. IMO this is the single most common mistake home bakers make with layer cakes. 🙂
FAQs
Q1: Can I make this cake without a stand mixer?
Yes — a hand mixer works perfectly for both the batter and frosting. For the batter, a large bowl and a balloon whisk work well too since the batter is thin enough to mix without a machine. The frosting requires at least a hand mixer to achieve the light, airy texture that defines a good buttercream — whisking by hand simply does not incorporate enough air.
Q2: Can I make this as a single layer cake or sheet cake?
Yes. Pour the full batter into a greased and lined 33x23cm (13×9 inch) rectangular baking tin and bake at the same temperature for 38 to 42 minutes. A sheet cake bakes slightly longer because the batter sits deeper in a smaller surface area than two separate round tins. Check with a skewer at 38 minutes and add time in 3-minute increments as needed.
Q3: How do I store the finished chocolate coffee cake?
Store the frosted cake covered at room temperature for up to 2 days or in the fridge for up to 5 days. Bring refrigerated cake to room temperature for 30 minutes before serving — cold buttercream tastes firmer and less creamy than room temperature buttercream. The unfrosted cake layers keep well wrapped tightly in cling film at room temperature for up to 3 days or in the freezer for up to 1 month.
Q4: Can I make this recipe caffeine-free?
Yes. Replace the brewed coffee in the batter with an equal volume of hot water mixed with 2 tablespoons of chicory extract or decaffeinated instant coffee. The chicory adds a slightly bitter, roasted note similar to coffee without any caffeine content. Replace the brewed coffee in the frosting with 2 tablespoons of milk for a plain chocolate buttercream that works equally well on this simple chocolate coffee cake from scratch.
Q5: Why does my cake sink in the middle after baking?
Sinking centres happen most commonly for three reasons. The oven door opened before the structure set — usually within the first 25 minutes. The oven temperature was too high and the outside set before the inside cooked through. Or the batter was over-mixed, which weakened the gluten structure before baking. Using an oven thermometer, keeping the door closed for the first 28 minutes, and mixing only until just combined prevents all three causes reliably.
Wrapping It Up
This chocolate coffee cake recipe delivers a genuinely stunning, bakery-quality result from a straightforward home baking process. Sift the dry ingredients, fold the batter to just combined, add hot coffee at the end, bake without opening the oven, cool completely before frosting, and beat the butter properly before adding sugar. Those six habits produce a fudgy chocolate coffee cake recipe result that earns compliments every single time.
Whether you bake it for a birthday, a dinner party, or a quiet weekend treat, this cake delivers every time. Now preheat the oven and get baking — the coffee is already on. 🙂