Refried beans from a can taste acceptable at best and vaguely disappointing at worst. Homemade refried beans taste like something a Mexican grandmother made specifically for you — creamy, deeply savory, rich with lard or butter, and seasoned properly from start to finish. I made my first batch of homemade refried beans from scratch after one particularly sad canned version experience and immediately understood what I had been missing for years.
This Mexican refried beans recipe authentic approach starts with dried pinto beans cooked low and slow until perfectly tender, then mashed in seasoned fat with aromatics until smooth, creamy, and genuinely extraordinary. This is the best Mexican refried beans side dish you will ever serve alongside tacos, burritos, enchiladas, or honestly just eaten straight from the pot with a spoon.
Servings: 6 to 8 Prep Time: 10 minutes (plus overnight soaking) Cook Time: 2 hours (beans) plus 20 minutes (mashing and seasoning) Total Time: Approximately 2.5 hours active day
What You Need — The Complete Ingredients List
This healthy refried beans recipe homemade version uses simple, honest pantry ingredients. Here is everything for six to eight generous servings:
Cooking the beans:
- 500g dried pinto beans (or black beans for refried black beans recipe easy version)
- 2 litres cold water (for cooking)
- 1 medium white onion, halved (left in large pieces — not diced)
- 6 cloves garlic, smashed and left whole
- 2 bay leaves
- 1 teaspoon salt (added in the last 30 minutes of cooking only)
For frying and seasoning:
- 3 tablespoons lard (traditional and genuinely worth using) or vegetable oil for vegan refried beans recipe homemade
- 1 medium white onion, finely diced
- 4 cloves garlic, finely minced
- 1 teaspoon ground cumin
- 1/2 teaspoon smoked paprika
- 1/2 teaspoon chili powder
- 1/2 teaspoon black pepper
- 1 teaspoon salt (adjust to taste)
- Reserved bean cooking liquid (approximately 1 to 1.5 cups — keep all of it)
Optional additions:
- 2 tablespoons unsalted butter (for extra richness at the end)
- 1/2 teaspoon dried oregano
- Juice of half a lime (for brightness)
- Crumbled cotija cheese or shredded cheddar for serving
- Fresh cilantro for garnish
FYI, lard produces a noticeably better flavor and texture than vegetable oil in this recipe. The fat carries and amplifies the bean flavor in a way that oil alone does not. If you prefer a fully plant-based version, refined coconut oil produces the best oil-based result after lard — it has a neutral flavor and high fat content that creates a similar richness.
The Making Process — Every Step in Full Detail
Step 1: Soak the Dried Beans Overnight
Place the 500g of dried pinto beans in a large bowl and cover with at least twice their volume of cold water. Let them soak at room temperature overnight — a minimum of eight hours and up to twelve hours. The soaking rehydrates the beans partially and significantly reduces the total cooking time while also removing some of the indigestible complex sugars that cause discomfort after eating beans.
The beans should look noticeably plumper and slightly lighter in color after soaking — they absorb a significant amount of water overnight. Drain the soaking water completely and rinse the beans under cold running water before cooking. Never cook beans in their soaking water — it contains the dissolved sugars you want to remove and can also carry some of the earthy, slightly bitter compounds that make improperly handled beans taste flat and heavy.
If you genuinely forgot to soak overnight — it happens — use the quick soak method instead. Place the dried beans in a large pot, cover with cold water, and bring to a full boil. Boil for two minutes, then remove from heat, cover, and let the beans soak in the hot water for one hour. Drain, rinse, and proceed with cooking. The quick soak produces slightly less evenly cooked beans than the overnight method but works perfectly well for this refried beans recipe easy approach.
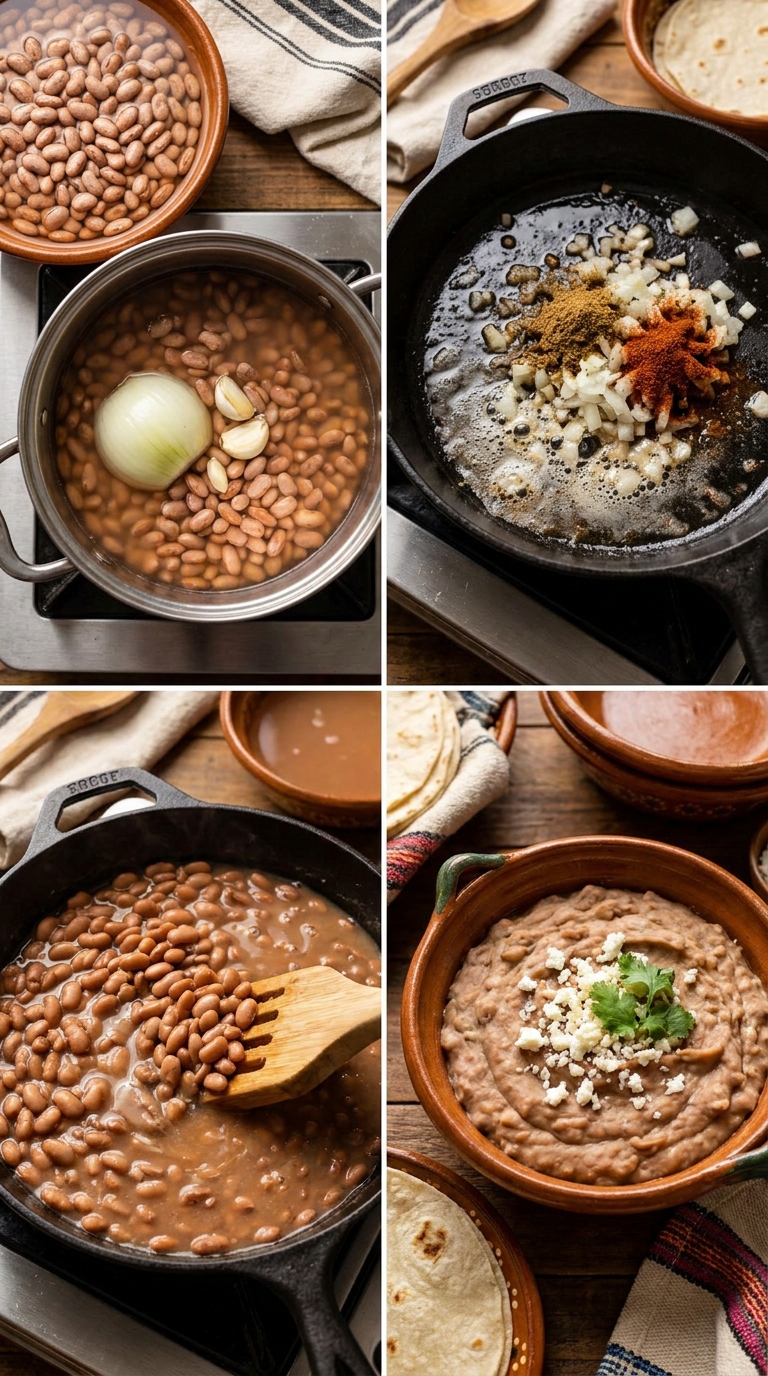
Step 2: Slow Cook the Beans Until Perfectly Tender
Place the soaked, drained beans in a large pot. Cover with approximately two litres of fresh cold water — the water should cover the beans by at least 5cm. Add the halved white onion, smashed whole garlic cloves, and bay leaves. Do not add any salt at this stage — salt added early in bean cooking hardens the skins and significantly extends the cooking time required to achieve tender centers.
Bring the pot to a boil over high heat, then skim any foam that rises to the surface using a large spoon — this foam is dissolved proteins and bean compounds and removing it produces a cleaner-tasting bean and a clearer cooking liquid. After skimming, reduce the heat to medium-low and let the beans simmer gently and steadily. A gentle simmer keeps the beans moving slightly without the aggressive boiling that causes the skins to split and the beans to break apart unevenly.
Cook the beans for approximately one hour and thirty minutes to two hours, checking tenderness at the ninety-minute mark. The beans are ready when they crush easily between your thumb and forefinger and taste completely tender throughout with no chalky center remaining. Add one teaspoon of salt to the pot in the last thirty minutes of cooking. Reserve all of the cooking liquid before draining — this starchy, flavorful liquid is the key to achieving creamy refried beans restaurant style consistency during the mashing step.
Step 3: Prepare the Aromatic Base
While the beans finish cooking, heat three tablespoons of lard or vegetable oil in a wide, heavy-bottomed skillet or saucepan over medium heat. Add the finely diced white onion and cook for seven to eight minutes, stirring occasionally, until completely soft, translucent, and developing lightly golden edges. Properly softened onion creates a sweet, savory base that supports the bean flavor rather than competing with it.
Add the minced garlic to the softened onion and stir constantly for 60 to 90 seconds until fragrant and pale golden. Do not let the garlic brown — burned garlic adds bitterness that carries directly into the finished beans and cannot be corrected later. Add the ground cumin, smoked paprika, chili powder, black pepper, and dried oregano if using. Stir the spices through the onion and garlic mixture for 30 seconds — this brief toasting in the hot fat activates the spice oils and produces a far more aromatic result than adding them later with the liquid.
The aromatic base should look golden, fragrant, and unified at this stage — the spices fully distributed through the fat-coated onion and garlic. This base is the flavor foundation of the entire Mexican refried beans recipe authentic result. A properly built aromatic base produces beans that taste deeply seasoned throughout rather than having seasoning sitting only on the surface of the mash.
Step 4: Add and Mash the Beans
Add the drained cooked beans to the skillet with the aromatic base in two to three additions. Stir each addition through the onion, garlic, and spice mixture before adding the next. Let the beans cook in the aromatic fat for two to three minutes over medium heat — this brief frying of the whole beans in the seasoned fat is where the term refried beans actually comes from. The beans pick up flavor from the fat and the aromatics during this short frying period before mashing begins.
Begin mashing the beans using a heavy potato masher, the back of a wooden spoon, or a bean masher. Press and mash the beans thoroughly, working from the edges of the pan toward the center. Add the reserved warm bean cooking liquid gradually — starting with half a cup and adding more as you mash. The starchy cooking liquid loosens the mash and creates the smooth, creamy consistency that defines properly made refried beans. Thin cooking liquid produces flat, watery beans while the starchy bean liquid produces a glossy, rich, coating consistency.
Continue mashing and adding liquid until the beans reach your preferred consistency — some people love a completely smooth, restaurant-style paste while others prefer a more rustic texture with some whole bean pieces remaining throughout. Both are correct. The slow cooked refried beans recipe approach — using fully cooked, properly tender beans — gives you complete control over the final texture because properly cooked beans mash evenly and smoothly, while under-cooked beans resist mashing and leave hard spots in the finished dish.
Step 5: Season, Finish, and Serve
Taste the finished beans and adjust the seasoning. Add more salt if needed — beans absorb salt readily and often need more than you expect. Add a squeeze of fresh lime juice for brightness if desired — the acid lifts the earthy, rich flavor profile and prevents the beans from tasting heavy or one-dimensional. If adding butter, stir it through the hot beans off the heat until fully melted and incorporated — it adds a final gloss and richness.
The beans should look smooth and glossy, hold a soft shape when spread but flow slowly when the pan is tilted — similar to a thick hummus in consistency. If they look too thick, add another splash of warm bean cooking liquid and stir vigorously. If they look too thin, continue cooking over medium heat while stirring constantly until excess moisture evaporates and the beans thicken to the correct consistency IMO.
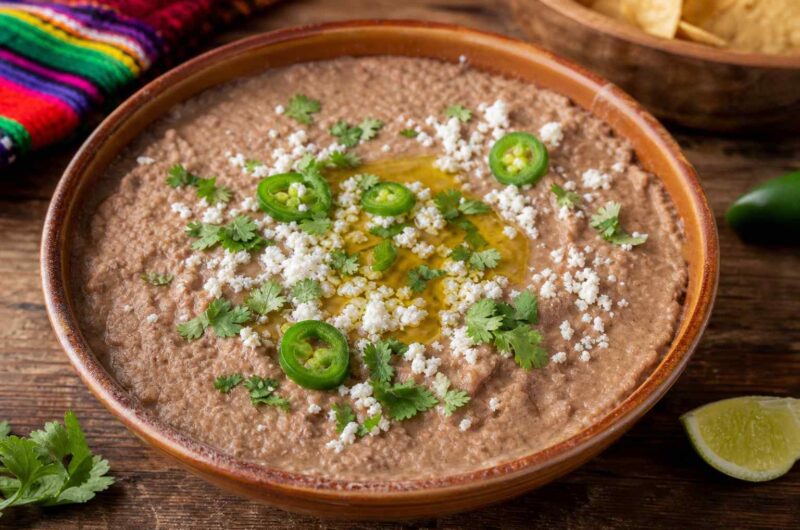
Serve immediately in a wide bowl or as a spread alongside tacos, burritos, tostadas, or huevos rancheros. Top with a drizzle of olive oil or melted butter, crumbled cotija cheese, fresh cilantro, and sliced jalapeños for the full easy canned refried beans upgrade recipe presentation — except this version is made entirely from scratch and tastes incomparably better than anything from a can.
The Canned Bean Shortcut — When You Need Speed
Not every weeknight allows for dried bean cooking. The easy canned refried beans upgrade recipe approach takes 15 minutes and produces a result significantly better than standard canned refried beans. Drain and rinse two cans of pinto beans completely. Build the same aromatic base — onion, garlic, cumin, paprika — in lard or oil. Add the canned beans and half a cup of chicken or vegetable broth.
Mash thoroughly with reserved broth added gradually until you reach the right consistency. Season aggressively since canned beans are already partially bland from the canning liquid. The finished result using canned beans tastes genuinely good — not quite as deep and complex as the dried bean version, but absolutely respectable for a Tuesday night when time is short and the rest of dinner is already cooking.
Variations Worth Trying
Refried Black Beans
The refried black beans recipe easy version follows the identical method but uses dried black beans instead of pinto beans. Black beans produce a darker, slightly earthier result with a beautiful deep purple-black color that contrasts dramatically with toppings. The flavor is more mineral and complex than pinto beans — IMO equally delicious but different in character. Reduce the cooking time very slightly as black beans often cook slightly faster than pinto beans.
Vegan Refried Beans
The vegan refried beans recipe homemade version substitutes lard with refined coconut oil or a good quality plant-based butter. Use vegetable broth instead of the bean cooking liquid if you prefer a cleaner flavor. The vegan version tastes excellent — the coconut oil provides the fat richness that makes the beans creamy and satisfying without any animal products. Season slightly more assertively since plant-based fats carry spice flavor slightly differently than lard.
Common Mistakes to Avoid
For a perfect homemade refried beans from scratch result:
- Adding salt early during bean cooking: Hardens the skins and extends cooking time dramatically — always add salt only in the final 30 minutes
- Discarding the cooking liquid: The starchy liquid is what creates the creamy consistency — always reserve all of it before draining
- Under-cooking the beans before mashing: Produces a gritty, lumpy mash — beans must crush effortlessly between fingers before mashing begins
- Not building the aromatic base properly: Raw or under-cooked onion and garlic produce a sharp, pungent flavor — always cook until fully soft and golden
- Over-thinning the mash: Adding too much liquid makes runny, flat-tasting beans — add liquid gradually and stop when the consistency is correct
Restaurant Style Refried Beans Made in Your Own Kitchen
8
servings10
minutes2
hoursThis Homemade Refried Beans recipe slow-cooks dried pinto beans until perfectly tender, then mashes them into a seasoned lard and onion base with reserved starchy cooking liquid for an incredibly creamy, deeply flavored result. Serving six to eight people, it delivers restaurant-quality refried beans completely from scratch at home.
Ingredients
For Cooking the Beans:
500g dried pinto beans, soaked overnight
2 litres cold water
1 medium white onion, halved
6 cloves garlic, smashed
2 bay leaves
1 teaspoon salt (last 30 minutes only)
For Frying and Seasoning:
3 tablespoons lard or vegetable oil
1 medium white onion, finely diced
4 cloves garlic, finely minced
1 teaspoon ground cumin
1/2 teaspoon smoked paprika
1/2 teaspoon chili powder
1/2 teaspoon black pepper
1 teaspoon salt
1 to 1.5 cups reserved bean cooking liquid
2 tablespoons unsalted butter (optional)
Juice of half a lime (optional)
- Soak 500g dried pinto beans in cold water overnight for at least eight hours, then drain and rinse completely before cooking
- Place soaked beans in a large pot with fresh cold water, halved onion, smashed garlic, and bay leaves, bring to a boil, skim foam from the surface, then reduce heat and simmer gently for one hour thirty minutes to two hours
- Add one teaspoon of salt in the last thirty minutes of cooking, check that beans crush effortlessly between fingers, then drain while reserving all the cooking liquid
- Heat lard or oil in a wide skillet over medium heat, cook finely diced onion for seven to eight minutes until soft and golden
- Add minced garlic and stir constantly for 60 to 90 seconds, then add cumin, smoked paprika, chili powder, black pepper, and oregano and stir through for 30 seconds
- Add the drained cooked beans in two to three additions, stirring each through the aromatic base, and cook for two to three minutes over medium heat
- Begin mashing the beans with a potato masher, adding reserved warm bean cooking liquid gradually starting with half a cup, continuing to mash and add liquid until the desired consistency is reached
- Taste and adjust seasoning with more salt and a squeeze of lime juice if desired, stir in butter off the heat if using
- Serve immediately topped with a drizzle of oil, crumbled cotija cheese, fresh cilantro, and sliced jalapeños
Frequently Asked Questions
Q1: Can I make refried beans in a slow cooker? Yes — the slow cooked refried beans recipe method works beautifully. Place soaked dried beans, the halved onion, smashed garlic, bay leaves, and two litres of water in the slow cooker. Cook on low for eight hours or high for five hours until the beans are very tender. Reserve the cooking liquid, then build the aromatic base in a skillet and mash the slow-cooked beans into it exactly as the stovetop method describes. The slow cooker produces exceptionally tender, evenly cooked beans.
Q2: Why are they called refried beans if they are only fried once? The name comes from the Spanish term frijoles refritos — which actually means well-fried or thoroughly fried rather than fried twice. When translated into English, refritos was interpreted as refried, which stuck permanently despite being slightly inaccurate. The beans are indeed fried once in fat with aromatics before mashing — no second frying occurs. The name is one of those translation quirks that became so established nobody bothers correcting it anymore.
Q3: How long do homemade refried beans keep? Store cooled refried beans in an airtight container in the refrigerator for up to five days. They thicken significantly when cold — reheat in a pan over medium-low heat with a splash of water or broth, stirring constantly until warmed through and loosened back to the original spreading consistency. Refried beans also freeze very well for up to three months — freeze in portion-sized containers and thaw overnight in the refrigerator before reheating.
Make These and Never Open a Can Again
This refried beans recipe easy guide gives you everything you need to make genuinely outstanding beans from scratch that taste like the real thing — because they are the real thing. Rich, creamy, properly seasoned, and made with ingredients you control from start to finish.
Make a big batch on Sunday, refrigerate it, and use it throughout the week as a side, a spread, a dip, or a burrito filling. Your tortillas have been waiting for beans this good.