You put a glitter cake on a table and the room goes quiet for about three seconds before everyone reaches for their phone camera simultaneously. I have seen it happen at birthdays, baby showers, and a very memorable office party that nobody at that company has ever stopped talking about. A Glitter Cake recipe homemade delivers that reaction every single time without requiring professional skills.
This is genuinely one of those cakes where the visual impact vastly outpaces the technical difficulty. The base is a classic vanilla layer cake. The real magic happens in the buttercream finish and edible glitter application — and once you understand the technique, you can recreate it on any flavor of cake for any occasion. Let us make something spectacular.
Servings: 12 to 16 slices Prep Time: 25 minutes Bake Time: 28 to 33 minutes per layer Decorating Time: 1 to 1.5 hours Total Time: Approximately 3 to 3.5 hours including cooling
What You Need — The Complete Ingredients List
This sparkling celebration cake recipe starts with a reliable, delicious vanilla base. Here is everything for a two-layer 20cm round cake:
For vanilla cake layers:
- 3 cups all-purpose flour, sifted
- 1 tablespoon baking powder
- 1/2 teaspoon baking soda
- 1 teaspoon salt
- 225g unsalted butter, room temperature
- 2 cups granulated white sugar
- 4 large eggs, room temperature
- 1 cup full-fat sour cream, room temperature
- 1/2 cup whole milk, room temperature
- 1/4 cup vegetable oil
- 1 tablespoon pure vanilla extract
Vanilla buttercream base:
- 450g unsalted butter, completely room temperature
- 6 cups powdered sugar, sifted
- 5 to 6 tablespoons heavy cream
- 1 tablespoon pure vanilla extract
- 1/4 teaspoon salt
- Gel food coloring of your choice (gold, white, black, or any color to match your glitter theme)
For the glitter decoration:
- Edible gold or silver luster dust (2 to 3 tablespoons — the more coverage you want, the more you need)
- Edible glitter in fine or chunky grades (separate from luster dust — both serve different purposes)
- 1 to 2 tablespoons clear alcohol such as vodka or lemon extract (for mixing with luster dust into paint)
- Edible gold or silver sugar pearls for additional sparkle
- Edible glitter spray (optional — for an all-over shimmer effect as a base layer)
The drip (optional but stunning):
- 100g white chocolate, finely chopped
- 3 tablespoons heavy cream
- Gel food coloring (gold, white, or your chosen color)
- 1 tablespoon edible gold luster dust stirred directly into the finished ganache
The Making Process — Every Step in Full Detail
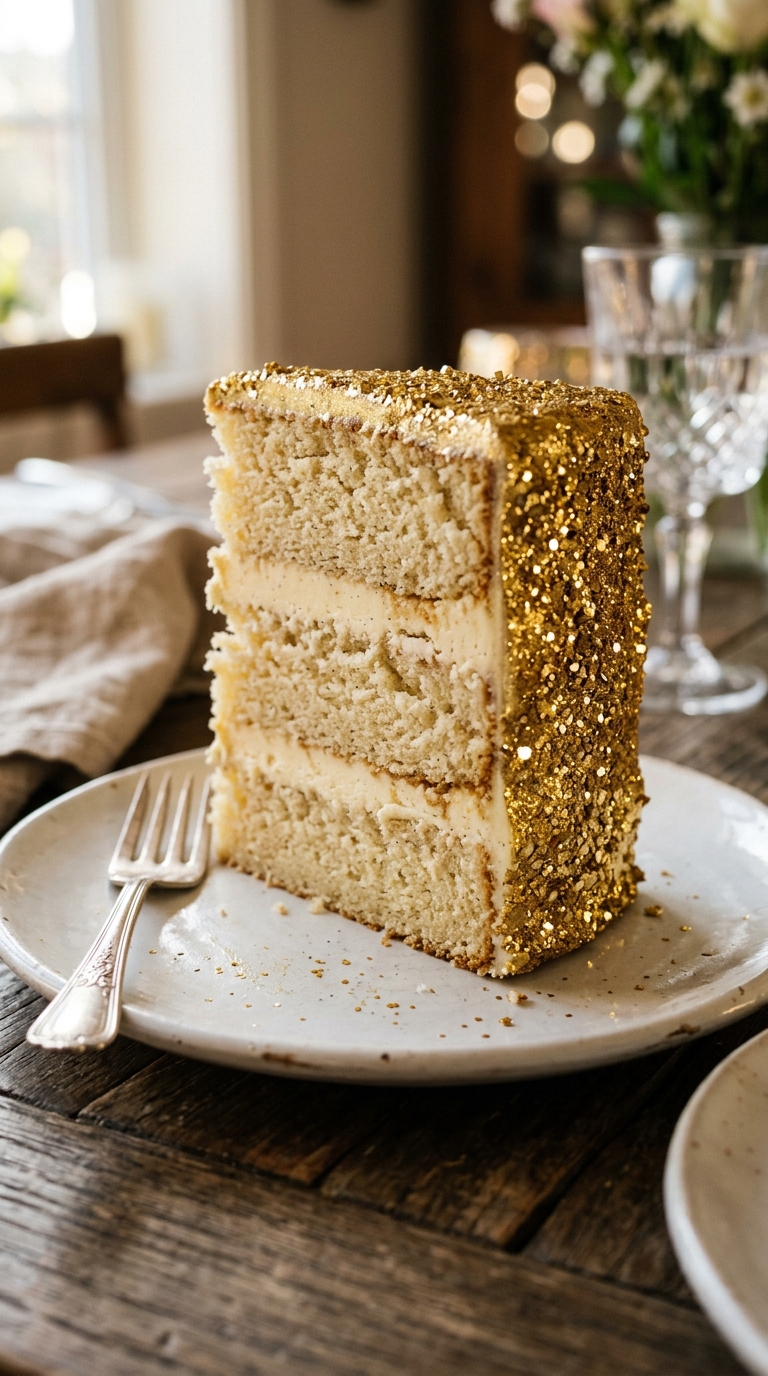
Step 1: Bake the Vanilla Cake Layers
Preheat your oven to 175 degrees Celsius. Grease two 20cm round cake pans, line the bottoms with parchment circles, grease the parchment, and flour the sides lightly. This complete preparation prevents sticking and ensures the layers release cleanly — you need intact, level layers for a glitter cake that looks as polished as it should.
Sift flour, baking powder, baking soda, and salt together in a bowl and set aside. Combine sour cream, whole milk, and vanilla extract in a separate small bowl or jug and stir together. Beat room-temperature butter and vegetable oil together on medium speed for two minutes until smooth. Add granulated sugar and beat on medium-high for four full minutes until very pale, almost white, and genuinely airy and fluffy.
Add the four room-temperature eggs one at a time, beating for 30 seconds after each addition. Alternate adding the flour mixture and sour cream mixture to the batter in three additions each — beginning and ending with flour — mixing on the lowest speed just until each addition disappears. Stop as soon as no visible dry streaks remain. Overmixing creates a tough crumb that does not represent the tender base a buttercream glitter cake design deserves underneath all that sparkle.
Divide the batter evenly between the two prepared pans, level the surfaces, and tap each pan three times on the counter. Bake at 175 degrees Celsius for 28 to 33 minutes until a toothpick comes out with just a few moist crumbs. Cool in pans for fifteen minutes, then invert onto wire racks, peel parchment away, and cool completely before any decorating begins.
Step 2: Make the Vanilla Buttercream
Beat 450g of completely room-temperature butter on medium-high speed for five full minutes until pale, whipped, and noticeably lighter in color. If your butter is still yellow and dense after five minutes, keep going — it will eventually turn almost white. This extended pre-beating creates the light, fluffy texture that makes buttercream look and feel professional rather than heavy and greasy.
Add sifted powdered sugar in three additions on the lowest speed, mixing briefly after each. Add vanilla, salt, and five tablespoons of heavy cream. Beat on medium-high for three more minutes until smooth, bright, and fluffy. If you plan to color the entire cake, add your chosen gel food coloring now and beat until the color distributes completely and evenly through the frosting.
For shiny gold glitter cake recipe, a warm champagne or ivory base color under the gold luster creates a more cohesive metallic look than white. For the rainbow glitter cake ideas birthday design, keep the base white and apply multiple glitter colors.Princess glitter cake decoration, pale pink base with gold and silver glitter creates a timeless, elegant palette.
Step 3: Level, Stack, and Crumb Coat
Level both cooled cake layers with a long serrated knife to create flat, even surfaces. Place a dab of buttercream on your cake board or serving plate. Position the first layer flat-side down on the board. Add a generous filling layer of buttercream — about half a centimeter thick — and spread evenly to the edges. Place the second layer flat-side up on top and press gently to adhere.
Apply a thin crumb coat of buttercream over the entire exterior — top and all sides. The crumb coat seals loose crumbs against the cake surface so they do not appear in the final smooth layer. For a glitter cake, surface quality matters more than for most decorated cakes — every imperfection in the base coat becomes more visible under reflective metallic finishes, not less.
Refrigerate the crumb-coated cake for 20 to 30 minutes until the buttercream feels completely firm and cold to the touch. This chilling step is genuinely non-negotiable for achieving a smooth, professional final coat. Trying to apply a second layer of buttercream over a soft crumb coat displaces and mixes the layers rather than adding cleanly on top of them :/
Step 4: Apply the Final Smooth Buttercream Layer
Apply a generous final layer of colored or white buttercream over the chilled crumb coat. Use an offset spatula to apply the frosting in sections — large scoops onto the sides and top — then smooth with a bench scraper held vertically against the side of the cake. Rotate the cake slowly while holding the scraper still, letting the turntable do the work of creating a smooth, even surface.
For the sides, make two to three passes with the bench scraper — each pass removes excess buttercream and smooths the surface further. Wipe the scraper clean between passes. The top edge is the most challenging area — use a clean offset spatula held at an angle and drag inward from the outer edge toward the center in short sections to create a clean, sharp top edge. Perfect smoothness is the goal for a sparkly glitter cake design easy finish because smooth surfaces reflect glitter most dramatically.
Refrigerate the fully frosted cake for another 20 minutes until the final buttercream layer is completely firm. The firmer and colder the frosted surface, the more cleanly the glitter adheres during application and the less the luster dust smears into the buttercream rather than sitting on top of it.
Step 5: Apply Edible Luster Dust as the Shimmer Base
This is where the glam glitter cake tutorial technique gets genuinely impressive. Mix two tablespoons of edible gold or silver luster dust with enough clear alcohol — vodka or lemon extract — to create a thin, paintable consistency. Start with half a teaspoon of alcohol and add more drop by drop until it reaches the consistency of watercolor paint — fluid but not watery.
Load a wide, soft pastry brush or a flat cake decorating brush with the luster dust mixture. Apply it to the chilled, firm buttercream surface using broad, sweeping strokes. Work in sections around the cake, covering the sides first and the top last. The alcohol evaporates almost immediately as you paint, leaving behind only the metallic luster dust adhered to the buttercream surface.
Build coverage in two thin coats rather than one thick one. Let the first coat set for three to four minutes before applying the second coat over it. Two thin coats produce a more even, uniform metallic sheen than one heavy application, which tends to clump the luster dust and create uneven patches. Stand back after each section and evaluate the coverage before moving forward — it is much easier to add more than to correct an over-applied area.
Step 6: Apply Edible Glitter for Sparkle
Once the luster dust has dried — which takes just a few minutes at room temperature — apply edible glitter over the top for the visible sparkling particle effect that photographs so dramatically. There are two methods depending on the look you want:
Method one — brush application: Load a dry, clean brush with fine edible glitter and flick it gently over the surface of the cake. The particles land and adhere to the slightly tacky luster dust surface. This method gives you control over placement and produces a natural-looking scatter of sparkle.
Method two — direct press: Scoop chunky edible glitter into your palm and gently press it against the side of the cake. The pressure adheres the larger glitter particles firmly to the buttercream and creates a more opaque, heavily glittered surface. This method works best for the lower half of the cake for an aesthetic glitter drip cake ideas look where the glitter graduates from heavy at the base to lighter toward the top.
For the edible glitter birthday cake ideas look that gets the most social media attention — apply glitter across the entire cake surface including the top for maximum sparkle from every angle. Add edible gold or silver sugar pearls pressed into the buttercream at irregular intervals for a layered texture effect that catches light differently from multiple directions.
Step 7: Add the Glitter Drip (Optional but Spectacular)
Heat heavy cream in a small saucepan until it just begins to steam but does not boil. Pour it over finely chopped white chocolate in a small bowl. Let it sit for one minute, then stir from the center outward until completely smooth and glossy. Add gel food coloring to match your glitter theme and stir one tablespoon of edible gold luster dust directly into the warm ganache.
Let the ganache cool to just above room temperature — approximately 32 to 35 degrees Celsius. It should flow slowly off a spoon rather than pouring like liquid. Too warm and it runs straight off the cake before setting. Too cool and it does not flow at all. Testing the temperature on the back of your hand — it should feel slightly warm but not hot — works reliably when a thermometer is not available.
Apply the drip using a squeeze bottle or a spoon. Place the squeeze bottle at the top edge of the cake and apply light pressure, allowing small amounts of ganache to run over the edge and drip down the side in organic, varying lengths. Space the drips unevenly — perfectly spaced drips look mechanical while organic spacing looks intentional and artistic. Fill the top of the cake with the remaining ganache and spread smoothly with an offset spatula, then immediately apply a final layer of edible glitter over the wet ganache before it sets.
Step 8: Final Decorations and Presentation
Add any remaining decorative elements while the ganache is still slightly tacky — sugar pearls, additional glitter clusters, edible gold leaf pieces, or fondant stars. Step back frequently during this stage and evaluate the overall composition from a distance before adding more elements. IMO, glitter cakes look most impressive when the decoration feels abundant but not chaotic — there is a fine line between glamorous and overwhelming.
For the final presentation, place the finished cake under a warm light source or near a window with good natural light before photographing. The sparkle of edible glitter and luster dust is entirely dependent on light — a cake that looks astonishing under good lighting looks remarkably ordinary under flat, cool, or dim light. Good lighting makes a sparkling celebration cake recipe look like a professional creation. Great lighting makes it look like witchcraft 🙂
Types of Edible Glitter — An Honest Guide
Not all glitter products perform the same way. Here is what you actually need to know:
- Edible luster dust: Ultra-fine metallic powder — creates a painted metallic sheen when mixed with alcohol. Gold and silver are the most popular. Fully edible and food-safe when labeled as such.
- Edible fine glitter: Tiny colored particles that scatter and catch light — apply dry with a brush. More subtle than chunky glitter. Great for all-over coverage.
- Edible chunky glitter: Larger particles — more visible sparkle points, more dramatic effect. Better for accent application than all-over coverage.
- Non-toxic craft glitter: NOT edible, NOT food-safe, despite what some sellers claim. Always verify your glitter explicitly states “edible” or “food grade” — non-toxic does not mean edible.
- Edible glitter spray: Aerosol cans that apply a fine mist of luster all over the cake surface quickly. Great for all-over shimmer base coat before hand-applying glitter details.
Glitter Cake Variations for Different Occasions
Gold and Black Glam Cake
Color the buttercream black or deep charcoal using black gel food coloring. Apply gold luster dust over the dark surface — the contrast between black and gold produces a dramatically glamorous effect that works for milestone birthdays, New Year celebrations, and elegant adult parties. Add gold drip ganache and chunky gold glitter for maximum impact.
Princess Pink Glitter Cake
Color the buttercream pale pink and apply pink and silver luster dust in alternating sections. Add a white chocolate drip with pink gel coloring. Finish with silver chunky glitter, edible silver pearls, and a tiara topper. This princess glitter cake decoration approach works beautifully for children’s birthdays while remaining elegant enough for adult celebrations.
Rainbow Glitter Explosion
Apply white buttercream as the base, then use a dry brush to apply five to six different colors of edible fine glitter in vertical sections around the cake — each section a different color creating a rainbow effect. The result is a vibrant, joyful, incredibly photogenic rainbow glitter cake ideas birthday cake that photographs beautifully and genuinely delights every child who sees it.
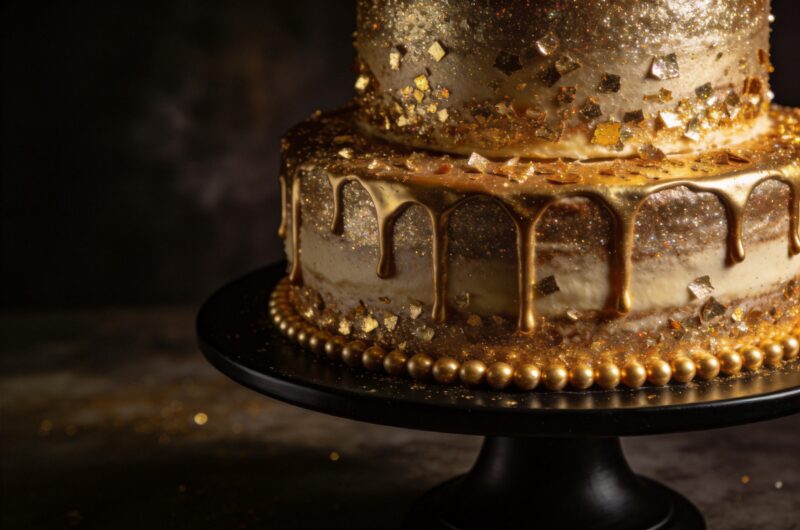
Glitter Cake That Makes Every Party Unforgettable
15
servings24
minutes30
minutesThis Glitter Cake layers moist vanilla cake with vanilla buttercream, finishes with metallic edible luster dust painted on and edible glitter pressed or scattered over the surface, and optionally topped with a shimmering gold ganache drip. Serving 12 to 16 people, it creates maximum visual impact with achievable home technique.
Ingredients
Vanilla Cake Layers:
3 cups all-purpose flour, sifted
1 tablespoon baking powder
1/2 teaspoon baking soda
1 teaspoon salt
225g unsalted butter, room temperature
2 cups granulated white sugar
4 large eggs, room temperature
1 cup full-fat sour cream, room temperature
1/2 cup whole milk, room temperature
1/4 cup vegetable oil
1 tablespoon pure vanilla extract
Vanilla Buttercream:
450g unsalted butter, room temperature
6 cups powdered sugar, sifted
5 to 6 tablespoons heavy cream
1 tablespoon pure vanilla extract
1/4 teaspoon salt
Gel food coloring of choice
Glitter Decoration:
2 to 3 tablespoons edible gold or silver luster dust
Edible fine and chunky glitter
1 to 2 tablespoons clear alcohol (vodka or lemon extract)
Edible gold or silver sugar pearls
Optional Gold Drip:
100g white chocolate, finely chopped
3 tablespoons heavy cream
Gel food coloring
1 tablespoon edible gold luster dust
- Preheat oven to 175 degrees Celsius and prepare two 20cm round cake pans with butter, parchment circles, and a light flour dusting
- Sift flour, baking powder, baking soda, and salt together and set aside, then combine sour cream, whole milk, and vanilla in a separate bowl
- Beat room-temperature butter and oil together for two minutes, add sugar and beat four minutes until pale and fluffy, then add eggs one at a time beating 30 seconds after each
- Add dry ingredients and sour cream mixture in three alternating additions on the lowest speed, mixing just until each addition disappears with no dry streaks
- Divide between prepared pans, level, tap three times each, and bake at 175 degrees Celsius for 28 to 33 minutes until a toothpick comes out with just a few moist crumbs
- Cool in pans fifteen minutes, invert onto wire racks, and cool completely before frosting
- Beat 450g room-temperature butter for five minutes until pale and whipped, add powdered sugar in additions, then vanilla, salt, and cream, and beat three more minutes until fluffy — add gel food coloring if using
- Level both layers, stack with buttercream filling between them, apply a thin crumb coat over the exterior, and refrigerate for 20 to 30 minutes until firm
- Apply the final buttercream layer smoothly using a bench scraper for the sides and an offset spatula for the top, then refrigerate another 20 minutes until completely firm
- Mix edible luster dust with clear alcohol to a thin watercolor consistency and paint it over the entire chilled buttercream surface in two thin coats using a wide soft brush, letting each coat dry for a few minutes
- Apply edible fine and chunky glitter over the luster dust surface using a dry brush for scatter application or palm pressing for heavier coverage, then add edible sugar pearls at irregular intervals
- For the optional drip: heat cream until steaming, pour over chopped white chocolate, stir smooth, add coloring and luster dust, cool to 32 to 35 degrees Celsius, then drip around the top edge with a squeeze bottle before filling and smoothing the top and immediately applying a final glitter layer over the wet ganache
- Add any final decorations, photograph under good lighting, and serve
Common Mistakes That Ruin Glitter Cakes
Avoid these for a professional, polished result:
- Using non-food-safe glitter: Always verify the label says edible or food grade — non-toxic does not mean safe to consume
- Applying glitter to warm buttercream: Warm frosting is too soft to hold glitter cleanly — always chill the cake thoroughly before glitter application
- Mixing luster dust too wet: A paste-like consistency smears rather than paints — aim for thin, watercolor consistency with the alcohol
- Applying too much ganache drip: Excess drip pools at the base rather than creating elegant drips — test on the back of the cake first
- Working in bad lighting: Glitter looks flat and unimpressive under poor light — always finish and photograph in good natural or warm artificial light
Frequently Asked Questions
Q1: Is edible glitter actually safe to eat? Genuine food-grade edible glitter is completely safe to eat — it is made from ingredients like sugar, starch, or mica that are approved for consumption by food safety authorities. The critical distinction is between products explicitly labeled edible or food grade and craft glitter labeled non-toxic. Non-toxic means it will not cause immediate harm if accidentally ingested but it is not formulated for consumption. Always buy from reputable cake decorating suppliers and verify the label explicitly states edible.
Q2: What is the difference between luster dust and edible glitter? Luster dust is an extremely fine powder that creates a metallic sheen when brushed or painted onto a surface — it adds shimmer and a metallic quality rather than visible sparkle particles. Edible glitter consists of visible particles that catch and reflect light as distinct sparkle points. The most dramatic glitter cakes use luster dust as the base shimmer layer and edible glitter on top for the visible sparkling particle effect — both products working together produce results neither can achieve alone.
Q3: Can I apply edible glitter to fondant instead of buttercream? Yes — fondant actually provides a slightly firmer, more stable surface for glitter application than buttercream. Brush the fondant surface very lightly with clear alcohol or water immediately before applying luster dust or glitter — the slight tackiness helps the particles adhere. For chunky glitter, pressing it gently into the fondant surface with your palm works excellently. Fondant also holds glitter decoration without refrigeration affecting the adhesion the way buttercream can.
Make This Cake and Own Every Party You Attend
This Glitter Cake recipe homemade proves that the most visually spectacular results do not require professional training — they require the right materials and the right technique. A smooth buttercream base, well-applied luster dust, strategically placed edible glitter, and good lighting at serving time combine into something that looks genuinely extraordinary.
Make it for the next birthday, celebration, or honestly any occasion that deserves a little extra sparkle. The reactions when you carry it into the room are worth every minute of the process. Just make sure you take a photo before people descend on it with forks.