Honey lemon pepper wings occupy a very specific place in the wing universe — they are neither purely sweet nor purely spicy, neither simple nor complicated. They are the flavour combination that makes people reach for a second wing before they have finished swallowing the first. I have served these at three separate gatherings and watched the bowl empty before any other food on the table moved.
This honey lemon pepper wings recipe gives you genuinely crispy oven-baked wings coated in a warm honey glaze sharpened with fresh lemon and bold cracked black pepper. The baking powder trick gives you the crispy skin without a deep fryer. The sauce takes five minutes. The whole process makes wings that rival any restaurant style lemon pepper wings recipe you have ever ordered.
What You’ll Need (Ingredients)
Clean, accessible ingredients. Fresh lemon makes a genuine difference here over bottled juice.
For the crispy wings:
- 1.2kg (2.6 lbs) chicken wings, separated into drumettes and flats
- 1 tablespoon baking powder — not baking soda
- 1 teaspoon salt
- 1 teaspoon black pepper
- 1 teaspoon garlic powder
- 1/2 teaspoon smoked paprika
For the honey lemon pepper glaze:
- 80ml (1/3 cup) honey
- Zest of 2 lemons
- 3 tablespoons fresh lemon juice — from approximately 2 lemons
- 2 tablespoons unsalted butter
- 2 garlic cloves, finely minced
- 1.5 teaspoons coarsely cracked black pepper — the pepper must be cracked, not ground fine
- 1/4 teaspoon cayenne pepper — optional for the spicy honey lemon chicken wings crispy version
- 1/4 teaspoon salt
How to Make It — Full Step-by-Step Process
Step One: Dry the Wings Thoroughly
Remove the chicken wings from the fridge and place them on a clean surface. Pat each wing completely dry on all sides using multiple paper towel sheets — change paper towels as they become saturated rather than redistributing the moisture. Dry wings are essential for the crispy skin result this recipe delivers. Any surface moisture remaining on the wing creates steam in the oven that prevents the skin from crisping and instead produces a pale, soft, rubbery exterior.
For maximum dryness — and this is the step that serious wing cooks swear by — place the patted-dry wings on a wire rack over a baking tray and refrigerate them uncovered for 1 to 2 hours before cooking. The fridge air circulation draws additional moisture out of the skin and produces a noticeably crispier result than oven-dried wings alone. If you do not have the time, thoroughly patting dry with paper towels still produces excellent crispiness. However, the uncovered fridge rest takes the result from excellent to genuinely extraordinary.
Separate the wings at the joint if they came whole. Stand each wing upright on the cutting board and cut through the joint between the drumette and flat using a sharp knife. Discard the wing tip or save them for stock. Separated wings have more surface area exposed to the oven heat, which produces more evenly crispy skin across the entire wing rather than just on the portions directly facing the heat source.
Step Two: Season With the Baking Powder Blend
In a large bowl, combine 1 tablespoon of baking powder, 1 teaspoon of salt, 1 teaspoon of black pepper, 1 teaspoon of garlic powder, and 1/2 teaspoon of smoked paprika. Whisk together briefly to distribute evenly. Add the dried wings to the bowl and toss thoroughly until every wing looks evenly coated in the baking powder spice mixture on all visible surfaces.
The baking powder is the scientific engine of this crispy lemon pepper chicken wings recipe result. Baking powder is alkaline, and when it contacts the proteins in the chicken skin, it raises the skin’s pH level. This elevated pH causes the proteins to brown more readily and the fat in the skin to render out more completely during baking. The result is a deeply golden, shatteringly crispy skin that is genuinely indistinguishable from fried wings in texture — at a fraction of the oil and effort.
Do not substitute baking soda for baking powder. Baking soda is significantly more alkaline and produces a soapy, unpleasant flavour in the finished skin. Baking powder contains cream of tartar that buffers the alkalinity and prevents the soapy flavour while still delivering the pH-raising effect needed for maximum crispiness. FYI — this one ingredient is the single biggest technique difference between crispy oven wings and disappointing, rubbery oven wings.
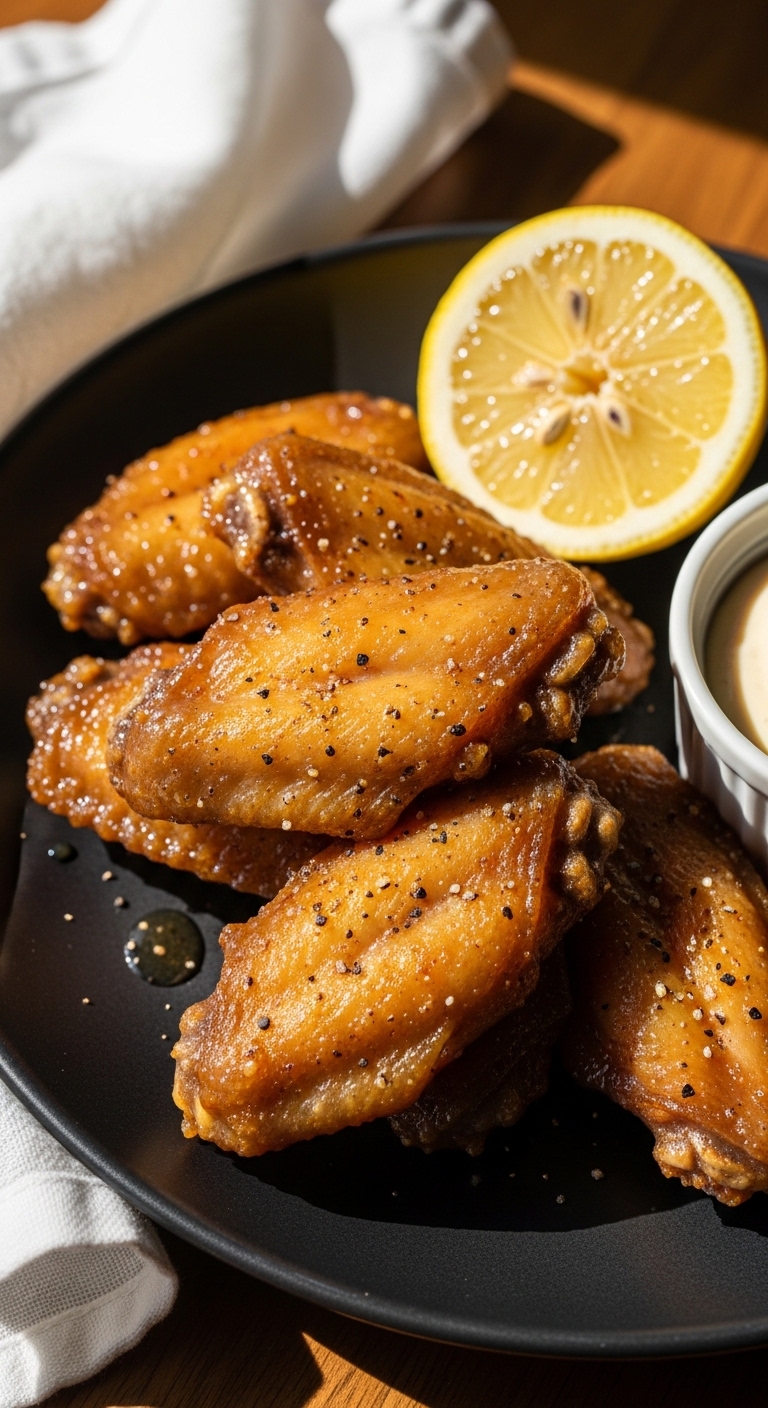
Step Three: Bake the Wings
Preheat your oven to 220°C (425°F) fan-forced or 230°C (450°F) conventional. Allow it to fully preheat for at least 20 minutes before the wings go in. Arrange a wire rack over a large rimmed baking tray. Place the seasoned wings in a single layer across the wire rack — wings must not touch or overlap. The rack elevates the wings above the tray, allowing hot air to circulate around the entire surface of each wing rather than just the top.
Place the tray on the centre rack of the oven. Bake for 25 minutes at full heat, then flip each wing using tongs and return to the oven for a further 20 to 25 minutes. The total baking time of 45 to 50 minutes is longer than most oven wing recipes because this extended time allows the fat in the skin to render out completely. Under-rendering leaves fat sitting beneath the skin and produces a rubbery rather than crispy texture even when the exterior looks golden.
At 45 minutes, check the wings visually — they should look deeply golden-brown, almost amber, with the skin looking tight, dry, and slightly blistered in places. Press one wing gently — the skin should feel firm and resist rather than collapsing under pressure. If any wings still look pale or feel soft, continue for 5 more minutes and check again. Remove from the oven and allow to rest on the rack for 2 minutes while you finish the sauce.
Step Four: Make the Honey Lemon Pepper Glaze
Place a small saucepan over medium heat. Add 2 tablespoons of unsalted butter and allow it to melt completely. Add the 2 minced garlic cloves and stir continuously for 60 seconds. Garlic burns fast on medium heat — 60 seconds is all it needs to become fragrant and golden without turning bitter.
Add 80ml of honey, 3 tablespoons of fresh lemon juice, the zest of 2 lemons, 1.5 teaspoons of coarsely cracked black pepper, and 1/4 teaspoon of salt. Stir everything together and allow the mixture to come to a gentle simmer over medium heat. The coarsely cracked pepper is important here — finely ground pepper dissolves into the sauce invisibly while coarsely cracked pepper remains as visible, textured pieces that deliver distinct pepper hits in every bite of the finished garlic honey lemon wings recipe homemade version.
Simmer the glaze for 2 to 3 minutes, stirring occasionally, until it thickens slightly and looks glossy. Remove from heat. The glaze will continue thickening as it cools — you want it pourable but not watery when it coats the wings. If it looks too thin after 3 minutes, simmer for another minute. If it already looks thick, remove from heat immediately and let it cool for 1 minute before tossing.
Step Five: Toss and Serve
Transfer the hot crispy wings immediately from the rack into a large mixing bowl. Pour the warm honey lemon pepper glaze over the wings. Use tongs to toss everything together thoroughly, ensuring every wing gets coated on all sides. Work quickly — the hot wings absorb the glaze more effectively than cool ones, and the glaze sticks better to freshly baked skin than skin that has cooled and become slightly tacky.
The glaze coating should look shiny, amber, and generous on each wing without pooling excessively at the bottom of the bowl. Transfer to a serving plate or large flat dish. For the full oven baked honey lemon pepper wings presentation, arrange the wings in a single layer on the plate — not piled high, which traps steam and softens the crispy skin. Scatter a small amount of extra lemon zest and cracked pepper over the top for visual appeal. Serve immediately with napkins — lots of napkins. 🙂
Why Cracked Pepper Beats Ground Pepper Here
Have you ever made lemon pepper wings with pre-ground fine black pepper and found the flavour diffuse and underwhelming? The texture of the pepper makes a dramatic difference to how the flavour registers on your palate.
Coarsely cracked black pepper — achieved by using a mortar and pestle or the coarsest setting on a pepper grinder — delivers an intense, immediate pepper flavour with each individual piece that fine ground pepper cannot replicate. Fine ground pepper disperses its flavour evenly and subtly through the sauce. Cracked pepper creates distinct pockets of intense pepper flavour that make each bite noticeably more exciting and complex.
For the baked lemon pepper wings honey sauce style result, buy whole black peppercorns and crack them yourself. The flavour volatiles in freshly cracked pepper are significantly more potent than pre-ground pepper that has been sitting in a jar losing its aromatic compounds for months.
Air Fryer Version
The air fryer produces the crispiest possible wing skin short of deep frying, and it reduces the cooking time significantly.
- Season wings with baking powder blend exactly as described
- Preheat air fryer to 200°C (400°F) for 3 minutes
- Cook wings in a single layer for 12 minutes, flip, then cook for another 10 to 12 minutes
- Check that skin looks deeply golden and feels crispy before removing
- Toss in the honey lemon pepper glaze and serve immediately
The air fryer version produces results that are genuinely difficult to distinguish from fried honey lemon pepper wings recipe results at a significantly lower oil commitment. IMO it is the best domestic cooking method for wings if you own an air fryer large enough to cook a full batch without overcrowding.
Making It Spicy
For a spicy honey lemon chicken wings crispy version that adds real heat alongside the sweetness and pepper, incorporate these additions:
- Add 1/4 to 1/2 teaspoon of cayenne pepper to the glaze
- Increase the cracked pepper to 2 teaspoons
- Add 1 teaspoon of hot sauce — Frank’s RedHot works brilliantly with honey and lemon
- Replace 1 tablespoon of the honey with chili honey if available
The heat and honey combination creates a sweet and tangy chicken wings recipe easy enough to adjust to any heat preference. Start with less and build upward — cayenne amplifies significantly once the glaze reduces.
Common Mistakes to Avoid
Using wet wings: Wet wings steam rather than crisp in the oven. Pat completely dry and ideally refrigerate uncovered for 1 to 2 hours for maximum crispiness.
Skipping the wire rack: Wings sitting flat on a baking tray sit in their own rendered fat and produce a greasy, soft underside. The rack elevates them and allows complete air circulation for even crispiness all around.
Adding glaze before baking: Honey-based glazes applied before baking burn within 15 minutes at the temperatures needed for crispy skin. Always bake first, glaze after. :/
Using bottled lemon juice: Bottled lemon juice lacks the bright, volatile aromatics of fresh juice and produces a flat, slightly chemical lemon flavour. Use fresh lemons every time — the difference is significant and immediate.
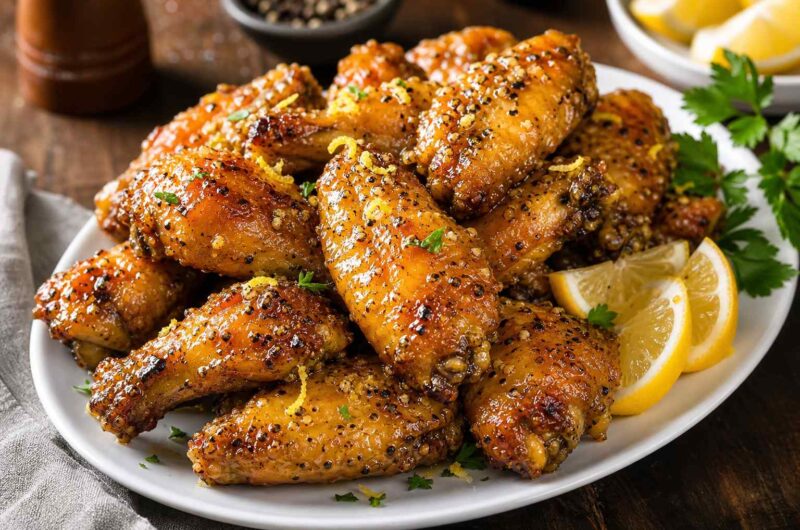
Garlic Honey Lemon Wings With Cracked Pepper Glaze
4
servings10
minutes45
minutes5
minutesThese honey lemon pepper wings use the baking powder method for genuinely crispy oven-baked skin, then toss the hot wings in a warm honey glaze with fresh lemon zest, coarsely cracked black pepper, butter, and garlic. Sweet, tangy, bold, and crispy — the complete wing experience from a single oven tray.
Ingredients
Crispy wings:
1.2kg chicken wings, separated
1 tablespoon baking powder
1 teaspoon salt
1 teaspoon black pepper
1 teaspoon garlic powder
1/2 teaspoon smoked paprika
Honey lemon pepper glaze:
80ml honey
Zest of 2 lemons
3 tablespoons fresh lemon juice
2 tablespoons unsalted butter
2 garlic cloves, finely minced
1.5 teaspoons coarsely cracked black pepper
1/4 teaspoon cayenne pepper (optional)
1/4 teaspoon salt
- Pat all wing surfaces completely dry with paper towels changing towels as they saturate
- Optionally refrigerate wings uncovered on a rack for 1 to 2 hours for maximum dryness
- Separate wings at the joint into drumettes and flats if not already separated
- Combine baking powder, salt, black pepper, garlic powder, and smoked paprika in a large bowl
- Add wings and toss thoroughly until every surface is evenly coated
- Preheat oven to 220°C fan or 230°C conventional for at least 20 minutes
- Arrange wire rack over a rimmed baking tray
- Place seasoned wings in a single layer on the rack without touching or overlapping
- Bake on centre rack for 25 minutes then flip each wing using tongs
- Bake for a further 20 to 25 minutes until deeply golden-brown and crispy
- Check by pressing — skin should feel firm and resist rather than collapse
- Rest wings on the rack for 2 minutes while making the glaze
- Melt butter in a small saucepan over medium heat
- Add minced garlic and stir continuously for 60 seconds until fragrant
- Add honey, fresh lemon juice, lemon zest, cracked black pepper, cayenne if using, and salt
- Stir to combine and bring to a gentle simmer for 2 to 3 minutes until slightly thickened and glossy
- Remove glaze from heat and cool for 1 minute until pourable but not watery
- Transfer hot wings to a large mixing bowl immediately
- Pour warm glaze over wings and toss thoroughly with tongs until every wing is coated
- Arrange in a single layer on a serving plate
- Scatter extra lemon zest and cracked pepper over the top
- Serve immediately while skin is still crispy and glaze is warm
FAQs
Q1: Can I make the wings ahead of time?
Bake the wings fully and allow to cool, but do not toss in the glaze. Store the plain baked wings in the fridge for up to 2 days. Reheat in the oven at 200°C (400°F) for 8 to 10 minutes until crispy and hot throughout, then toss in freshly made glaze immediately before serving. This approach maintains the crispy texture far better than reheating already-glazed wings.
Q2: Why are my oven wings not crispy?
Lack of crispiness almost always results from one of four causes — wings were not dried thoroughly before baking, baking powder was omitted or substituted, wings were placed directly on the tray rather than a rack, or the oven temperature was too low. Address all four and the results will transform dramatically. The wire rack and baking powder are the two most impactful changes.
Q3: Can I use this glaze on other proteins?
Yes — this honey lemon pepper glaze works brilliantly on grilled chicken thighs, salmon fillets, pork chops, and roasted cauliflower florets. Apply the glaze during the final 5 minutes of cooking for meat proteins to prevent burning. For salmon, brush it on immediately before serving rather than cooking with it, because the fish is delicate and the honey browns very quickly under direct heat.
Wrapping It Up
This honey lemon pepper wings recipe delivers genuinely crispy, restaurant-quality wings from a home oven using the baking powder technique, a wire rack, thorough drying, and a five-minute honey lemon glaze finished with coarsely cracked pepper. Dry the wings completely, season with baking powder, bake at high heat on a rack, make the glaze fresh, and toss immediately after baking. Those five habits produce a perfect result every single time.
Whether you make these for game day, a casual dinner party, or simply because you want the best wings your kitchen has ever produced — this recipe delivers completely. Now go crack some peppercorns and preheat that oven.