Red velvet cheesecake brownies exist in that rare category of recipes where combining two good things produces something dramatically better than either one alone. The first time I made this red velvet cheesecake brownies recipe, I brought the whole tray to a work meeting and watched them disappear in under eight minutes. Eight minutes. That is not a typo.
These easy red velvet cheesecake brownies give you the deep, fudgy, lightly chocolatey red velvet base layered under a thick, tangy cream cheese swirl that marbles dramatically as it bakes. The vivid red against the white cheesecake looks stunning when sliced, and the flavour combination of slightly tangy cream cheese against the rich, buttery brownie base is one of those combinations that just makes complete sense. You need to make these. That is the entire introduction.
What You’ll Need (Ingredients)
Simple, reliable baking ingredients. The only specialist item is red gel food colouring — always gel, never liquid.
For red velvet brownie base:
- 115g (1 stick) unsalted butter, melted and slightly cooled
- 200g (1 cup) caster sugar
- 2 large eggs, room temperature
- 1 teaspoon vanilla extract
- 1 teaspoon white wine vinegar
- 2 tablespoons unsweetened cocoa powder
- 160g (1.25 cups) plain flour
- 1/2 teaspoon bicarbonate of soda
- 1/4 teaspoon salt
- 1.5 tablespoons red gel food colouring
Cream cheese cheesecake layer:
- 225g (8 oz) full-fat cream cheese, softened at room temperature
- 60g (1/4 cup) caster sugar
- 1 large egg, room temperature
- 1/2 teaspoon vanilla extract
- 1 tablespoon plain flour
How to Make It — Full Step-by-Step Process
Step One: Prepare the Tin and Preheat
Set your oven to 175°C (350°F) fan-forced or 180°C (360°F) conventional. Allow a minimum of 15 minutes for full preheating before the tin goes in. A fully preheated oven ensures both layers bake evenly from the moment they enter — an under-heated oven causes the brownie base to bake unevenly and the cheesecake layer to set at an inconsistent rate, producing swirls that look muddy rather than clean and distinct.
Line a 20x20cm (8×8 inch) square baking tin with baking parchment, leaving overhanging edges on two opposite sides. These overhanging edges act as handles that allow you to lift the entire baked and cooled slab cleanly out of the tin without any cutting, breaking, or digging. Grease the parchment lightly with cooking spray or a small amount of softened butter. The lined tin takes 2 minutes to prepare and prevents every possible sticking issue during both baking and removal.
FYI — the square tin size matters for this recipe. A larger tin produces thinner layers that bake faster and risk over-drying before the cheesecake sets. A smaller tin produces thicker layers that can leave the centre underbaked. A 20x20cm tin gives you the ideal balance between layer thickness, baking time, and the clean, photogenic slice profile that makes these homemade red velvet cheesecake bars easy to cut and serve.
Step Two: Make the Red Velvet Brownie Batter
Melt 115g of unsalted butter in a medium saucepan over low heat or in a microwave in 30-second intervals. Pour the melted butter into a large mixing bowl and allow it to cool for 5 minutes — hot butter added to eggs scrambles them rather than incorporating them smoothly. Add 200g of caster sugar to the cooled butter and whisk together vigorously for about 1 minute until the mixture looks slightly pale and the sugar has mostly dissolved into the butter.
Now add the 2 room temperature eggs one at a time, whisking for 20 seconds after each addition. Add 1 teaspoon of vanilla extract and 1 teaspoon of white wine vinegar and whisk briefly to incorporate. The vinegar is a small but important addition — it activates the bicarbonate of soda and contributes to the characteristic tender, slightly tangy quality of a proper red velvet brownie base. Add 1.5 tablespoons of red gel food colouring and whisk until the mixture turns a vivid, uniform red throughout.
Sift 160g of plain flour, 2 tablespoons of cocoa powder, 1/2 teaspoon of bicarbonate of soda, and 1/4 teaspoon of salt directly into the red wet mixture. Fold together with a spatula using wide, slow circular motions until no dry flour streaks remain. Stop folding immediately when the flour disappears — over-mixing develops gluten and produces a tough, cakey brownie rather than the dense, fudgy texture that defines the best red velvet brownies cheesecake recipe result. Reserve approximately 3 tablespoons of the red brownie batter in a separate small bowl for the swirling step later.
Step Three: Make the Cream Cheese Layer
Place 225g of room temperature cream cheese in a medium bowl and beat on medium speed for 1 minute until completely smooth with no lumps. Room temperature cream cheese is non-negotiable here — cold cream cheese does not beat smooth and leaves lumps throughout the cheesecake layer that bake into uneven, slightly curdled patches rather than the clean, silky swirl this swirled red velvet brownie cheesecake recipe needs.
Add 60g of caster sugar and beat for a further 30 seconds until fully incorporated. Add 1 room temperature egg, 1/2 teaspoon of vanilla extract, and 1 tablespoon of plain flour. Beat on low speed until just combined — low speed prevents excess air from incorporating into the cheesecake layer, which would cause it to puff dramatically during baking and then crack and sink as it cools. The finished cheesecake mixture should look smooth, creamy, and just pourable.
The 1 tablespoon of plain flour in the cheesecake layer performs a specific structural role. It binds the cream cheese mixture and prevents it from becoming too soft or runny when it heats in the oven, which keeps the layers cleanly separated rather than merging into an indistinct mixed layer. Without it, the cheesecake layer sinks into the brownie base during baking and the swirl effect disappears entirely.
Step Four: Assemble and Swirl the Layers
Pour the red velvet brownie batter into the lined tin, reserving the 3 tablespoons you set aside earlier. Use an offset spatula to spread the batter into an even layer across the entire base, reaching all four corners. The batter is thick — work it into the corners deliberately rather than assuming it will spread under its own weight. An uneven base layer produces uneven slices where some squares have more brownie than others.
Pour the cream cheese mixture evenly over the red velvet base layer. Use the offset spatula to spread it gently to the edges, covering the red layer almost completely. Drop the reserved 3 tablespoons of red brownie batter in small dots across the surface of the cream cheese layer — use a teaspoon to drop 8 to 10 evenly spaced dots across the white surface.
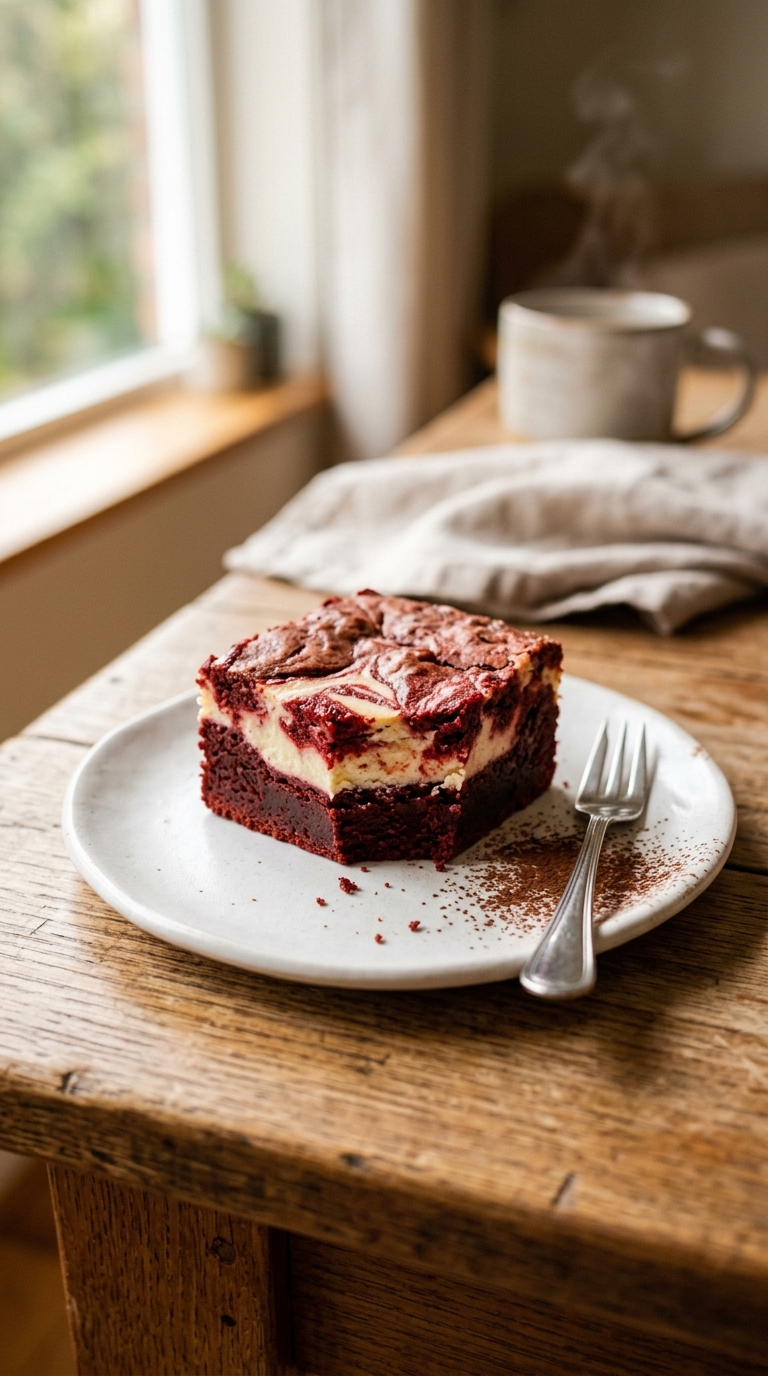
Take a clean skewer or toothpick and draw it slowly through the dots in long, sweeping figure-of-eight motions across the entire surface. Do not drag the skewer too deeply — the goal is to marble only the cream cheese surface layer and the dots of red batter sitting on top of it, not to pull the brownie base up from the bottom. 4 to 6 sweeping passes produces the best marble effect. More passes blend the colours into a muddy brown result that loses the visual impact of the vivid red against white that makes layered red velvet cheesecake brownies so striking.
Step Five: Bake and Check Doneness
Place the assembled tin on the centre rack of the preheated oven. Bake for 32 to 38 minutes. At 30 minutes, check the brownies by gently nudging the tin side to side — the cheesecake layer should look mostly set with a very slight wobble only in the very centre. Insert a skewer into the brownie portion — it should come out with a few moist, fudgy crumbs attached rather than wet batter. Moist fudgy crumbs indicate perfect doneness for a brownie.
Do not overbake in pursuit of a completely clean skewer. A completely clean skewer from a brownie means it has dried out past the ideal fudgy consistency and will taste slightly cakey rather than dense and moist when cooled. The brownie continues cooking from residual heat for several minutes after leaving the oven. Removing it slightly underdone produces a perfectly fudgy result after cooling.
Remove from the oven and allow the tin to cool on a wire rack at room temperature for 1 hour. After 1 hour, transfer to the fridge for a minimum of 1 more hour before cutting. IMO, chilling these brownies completely before slicing produces dramatically cleaner cuts — the cold firms both the brownie layer and the cheesecake layer simultaneously, which prevents them from pulling or smearing against each other during slicing. 🙂
Why the Swirl Technique Matters So Much
Have you ever seen a marbled brownie where the swirl looks muddy and grey rather than vivid and distinct? The problem is almost always one of two things — either the swirl lines ran too deep into the brownie base and pulled dark batter up into the white cheesecake layer, or the swirling continued past the point where the colours remained distinct.
The key to a clean, dramatic swirl in this moist red velvet cheesecake brownies dessert is keeping the skewer movement confined to the surface and stopping while the red and white still look clearly separated. The heat of the oven will blend the colours slightly at their borders during baking — so leaving them more distinct than you want before baking produces exactly the effect you are aiming for once baked.
Cutting and Serving for the Best Results
Clean, precise slicing makes a genuine visual difference with these cream cheese red velvet brownies recipe squares. Follow these steps every single time:
- Refrigerate the fully cooled brownies for at least 1 hour before slicing
- Lift the entire slab out of the tin using the parchment overhang and place on a flat chopping board
- Use a long, sharp knife dipped in hot water and wiped completely dry between every cut
- Cut into 16 equal squares using confident single downward strokes rather than a sawing motion
- Wipe the knife clean after every cut to prevent red crumbs transferring to the white cheesecake layer of subsequent squares
The warm knife blade melts through the cold cream cheese layer cleanly rather than dragging it. This single technique produces the clean, photogenic cross-section that makes these valentine red velvet brownies cheesecake squares look so impressive when photographed or plated.
Storing These Brownies Properly
These brownies contain a cream cheese layer and therefore require refrigeration for storage. Place the cut squares in a single layer in an airtight container and refrigerate for up to 4 days. The cream cheese layer stays smooth and firm, and the brownie base actually improves in fudginess over 24 hours as the moisture redistributes through the crumb.
For longer storage, freeze individual squares on a flat tray until solid, then transfer to a freezer bag for up to 2 months. Thaw individual squares in the fridge overnight or at room temperature for 30 minutes before serving. The cheesecake layer retains its texture well after thawing.
Variation: White Chocolate Swirl Addition
For an extra layer of richness in the fudgy red velvet brownie cheesecake bars, melt 60g of white chocolate and fold it into the cream cheese mixture before spreading. The white chocolate deepens the flavour of the cheesecake layer, adds a subtle sweetness, and makes the white layer look more opaque and vivid against the red — which enhances the marbling effect significantly.
This addition works particularly well for the valentine red velvet brownies cheesecake version because the combination of white chocolate, cream cheese, and vivid red creates a colour contrast and flavour profile that feels noticeably more luxurious than the standard version.
Common Mistakes to Avoid
Using liquid food colouring: Liquid colouring adds excess moisture to the brownie batter and produces a faded, inconsistent red that shifts during baking. Gel colouring delivers a vivid, stable colour with a fraction of the volume needed. Always use gel for any red velvet application.
Over-swirling the batter: More than 6 passes with the skewer blends the colours into a uniform brownish-red smear rather than a clean marble. The restraint required here goes against every instinct, but it produces the best visual result. Stop early and trust the oven.
Cutting before fully chilled: Warm brownie and warm cream cheese produce messy, smeared cuts that destroy the visual distinction between layers. Always chill for a minimum of 1 hour in the fridge before slicing — the cold is what gives you clean, distinct layers in every square. :/
Under-softening the cream cheese: Even 15 minutes out of the fridge is not enough. Cream cheese needs a full 45 minutes to reach a temperature where it beats smooth without leaving lumps. Lumpy cheesecake batter looks and bakes poorly regardless of how long you beat it.
Fudgy Red Velvet Cheesecake Brownies From Scratch
16
servings20
minutes35
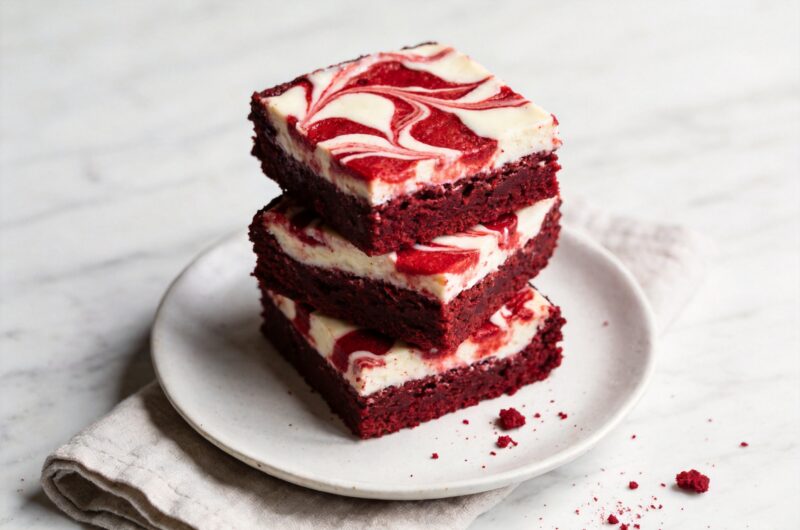
minutesThese red velvet cheesecake brownies layer a dense, fudgy red velvet brownie base with a smooth tangy cream cheese swirl baked together into vivid, dramatic squares. Ready in 45 minutes of active work, they deliver the best of two desserts simultaneously — and look extraordinary when sliced and plated.
Ingredients
Red velvet brownie base:
115g unsalted butter, melted and cooled
200g caster sugar
2 large eggs, room temperature
1 teaspoon vanilla extract
1 teaspoon white wine vinegar
2 tablespoons unsweetened cocoa powder
160g plain flour
1/2 teaspoon bicarbonate of soda
1/4 teaspoon salt
1.5 tablespoons red gel food colouring
Cream cheese layer:
225g full-fat cream cheese, room temperature
60g caster sugar
1 large egg, room temperature
1/2 teaspoon vanilla extract
1 tablespoon plain flour
- Preheat oven to 175°C fan or 180°C conventional for at least 15 minutes
- Line a 20x20cm square tin with parchment leaving overhang on two opposite sides
- Grease parchment lightly with butter or cooking spray
- Melt butter and allow to cool for 5 minutes in a large mixing bowl
- Add caster sugar and whisk vigorously for 1 minute until slightly pale
- Add room temperature eggs one at a time whisking for 20 seconds after each
- Add vanilla extract and white wine vinegar and whisk briefly
- Add red gel food colouring and whisk until the mixture is vivid uniform red throughout
- Sift plain flour, cocoa powder, bicarbonate of soda, and salt into the red mixture
- Fold with a spatula until just combined with no dry flour streaks — stop immediately
- Reserve 3 tablespoons of brownie batter in a small bowl and set aside
- Beat room temperature cream cheese on medium speed for 1 minute until completely smooth
- Add caster sugar and beat for 30 seconds until incorporated
- Add room temperature egg, vanilla extract, and plain flour
- Beat on low speed until just combined and smooth
- Pour the brownie batter into the lined tin and spread evenly to all four corners
- Pour cream cheese mixture over the brownie base and spread gently to the edges
- Drop the reserved brownie batter in 8 to 10 small dots across the cream cheese surface
- Draw a skewer through the dots in 4 to 6 long sweeping figure-of-eight motions
- Stop swirling while the red and white still look clearly distinct
- Bake on centre rack for 32 to 38 minutes
- Check at 30 minutes — cheesecake should look mostly set with a slight central wobble
- Insert skewer into brownie area — moist fudgy crumbs means done
- Remove from oven and cool in the tin on a wire rack for 1 hour
- Transfer to fridge and chill for a minimum of 1 more hour before cutting
- Lift the slab from the tin using the parchment overhang and place on a chopping board
- Dip a long sharp knife in hot water and wipe completely dry
- Cut into 16 equal squares using single confident downward strokes
- Wipe the knife clean after every single cut
- Serve at room temperature or cold from the fridge
FAQs
Q1: Can I double this recipe for a larger batch?
Yes — double all ingredient quantities and use a 23x33cm (9×13 inch) tin instead of the 20x20cm one. The baking time increases slightly to 38 to 44 minutes — check at 38 minutes with the skewer test and add time in 3-minute increments. Everything else in the method stays identical. Doubling works reliably because this recipe scales proportionally without any adjustment to ratios.
Q2: Can I use low-fat cream cheese?
Technically yes, but the result is noticeably different. Low-fat cream cheese contains more moisture and less fat than full-fat, which produces a softer, less stable cheesecake layer that can sink into the brownie base during baking. Full-fat cream cheese produces a firmer, cleaner layer with a richer flavour and a better-defined swirl pattern. Use full-fat for the best result every time.
Q3: Why did my cheesecake layer sink into the brownie base?
Sinking almost always happens because the cream cheese mixture was too runny — either from using low-fat cream cheese, from over-beating which incorporates too much air, or from omitting the stabilising tablespoon of flour. Additionally, pouring the cream cheese layer too quickly can break through the thick brownie base rather than floating on top of it. Pour slowly and spread gently.
Wrapping It Up
This red velvet cheesecake brownies recipe delivers a genuinely stunning, deeply flavoured bake in just 45 minutes of active work. Use red gel colouring for a vivid base, beat the cream cheese at room temperature for a smooth layer, fold the brownie batter to just combined, swirl with restraint, check doneness with a fudgy crumb skewer test, and chill completely before cutting. Those six habits produce a perfect result every single time.
Whether you make these for Valentine’s Day, a bake sale, a birthday, or simply a very good Tuesday, they consistently impress. Now preheat the oven and make the most dramatic brownie your kitchen has ever produced.