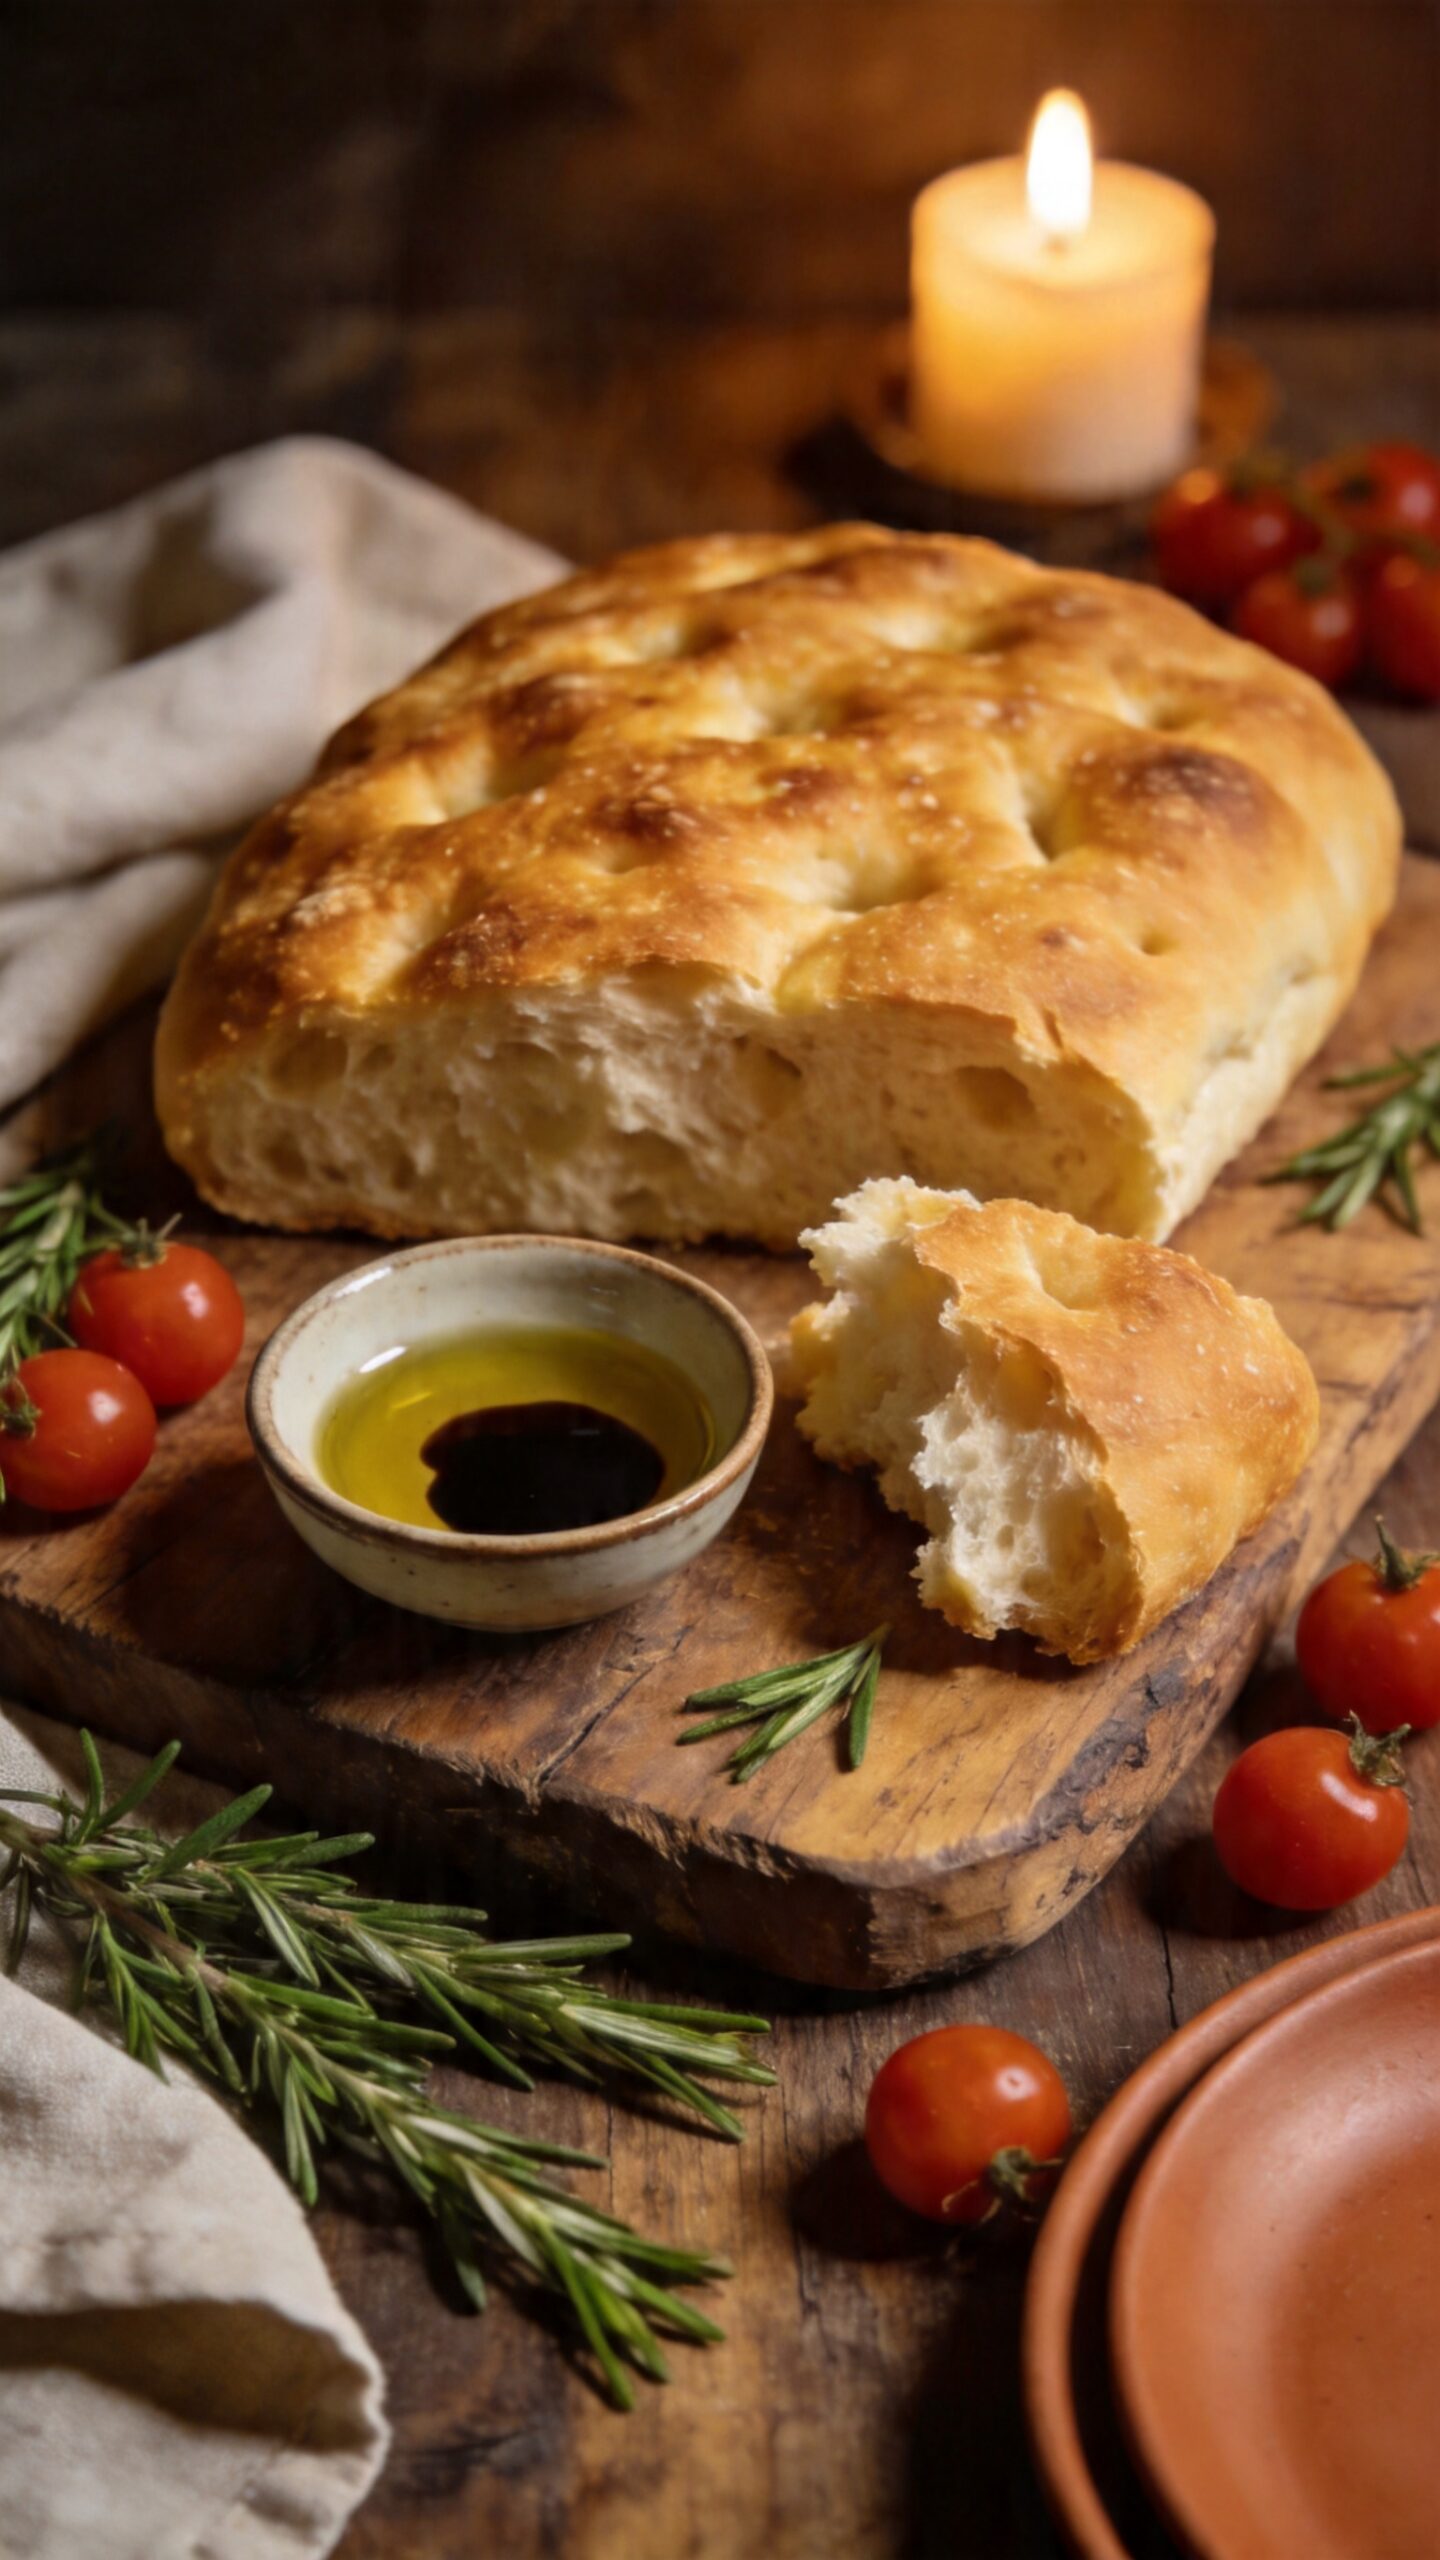
This Focaccia Bread Recipe is the one that makes you look like a serious baker without requiring any serious baking skills. Golden, crispy bottom, pillowy soft interior, and pools of olive oil in every dimple — it is one of the most forgiving and satisfying breads you will ever pull out of your own oven at home.
Why This Focaccia Bread Recipe Is Perfect for Beginners
Most bread recipes intimidate people with precise shaping, scoring, and complicated techniques. However, focaccia requires absolutely none of that. You simply mix, rest, dimple, top, and bake — and the result genuinely impresses every single time.
Furthermore, the high olive oil content makes the dough incredibly forgiving. Even a slightly over or under-proofed focaccia still tastes wonderful because the oil keeps everything moist and flavorful throughout. Have you ever wanted to make homemade bread but felt too nervous to try? Focaccia is genuinely the best possible starting point.
Nutrition Per Serving (Approximate)
- Calories: 280 kcal
- Protein: 6g
- Carbohydrates: 38g
- Fat: 11g
- Fiber: 2g
- Sodium: 480mg
Values are approximate and vary based on specific toppings and ingredients used.
Ingredients You Will Need
For the Focaccia Dough:
- 3 and 1/2 cups bread flour or all-purpose flour
- 2 and 1/4 teaspoons instant yeast (1 standard packet)
- 1 and 1/2 teaspoons fine sea salt
- 1 teaspoon sugar
- 1 and 1/4 cups warm water (around 40C or 105F)
- 4 tablespoons extra virgin olive oil (2 for the dough, 2 for the pan)
For the Dimple Topping:
- 3 tablespoons extra virgin olive oil for drizzling
- 1 teaspoon flaky sea salt
- 1 teaspoon dried rosemary or fresh rosemary sprigs
- 1/2 teaspoon black pepper
Optional Focaccia Bread Toppings:
- Cherry tomatoes, halved
- Sliced black or green olives
- Thinly sliced red onion
- Roasted garlic cloves
- Fresh thyme or oregano sprigs
- Crumbled feta cheese
How to Make Focaccia Bread Recipe Step by Step
Step 1 — Activate the Yeast and Mix the Dough
Combine the warm water and sugar together in a large mixing bowl and stir briefly to dissolve the sugar. Next, sprinkle the instant yeast over the top of the warm liquid and allow it to sit undisturbed for 5 full minutes.
After 5 minutes, the surface should look slightly foamy and bubbly — that confirms the yeast is active and ready to use. However, if no foam appears at all, the water temperature was likely off and the yeast needs replacing before you continue.
Step 2 — Bring the Dough Together
Add the flour, fine sea salt, and 2 tablespoons of olive oil to the activated yeast mixture all at once. Then stir everything together using a wooden spoon or your hand until no dry flour patches remain anywhere in the bowl.
The focaccia dough will feel quite wet and sticky at this stage — that is completely intentional. Furthermore, do not add extra flour to make it less sticky because that wetness creates the signature airy, open crumb that makes Homemade Focaccia so special.
Step 3 — Stretch and Fold the Dough
Instead of traditional kneading, focaccia uses a simpler technique called stretch and fold to build gluten structure. First, wet your hand lightly with water and reach under one side of the dough in the bowl.
Stretch that portion upward as far as it goes without tearing, then fold it firmly over to the opposite side. After that, rotate the bowl a quarter turn and repeat the same stretch and fold on the next side. Continue until you complete all four sides — that counts as one full set.
Step 4 — Complete All Stretch and Fold Sets
Perform 3 to 4 complete sets total, resting the dough for 10 minutes between each one. During each rest, cover the bowl loosely so the surface does not dry out.
After the final set, the dough should feel noticeably smoother, more elastic, and significantly less sticky than when you first mixed it. Moreover, you will see visible air bubbles forming beneath the surface — that means the gluten is developing exactly as it should.
Pro Tip: The stretch and fold method works perfectly with wet sticky focaccia dough. Never try to knead focaccia the traditional way because it sticks to everything and produces a worse result than the simple stretch and fold technique every single time.
Step 5 — First Rise
Drizzle 1 tablespoon of olive oil over the surface of the dough and turn it gently to coat all sides evenly. Then cover the bowl tightly with plastic wrap or a clean kitchen towel.
Place the covered bowl in a warm spot at room temperature and allow the dough to rise for 1 to 1.5 hours. Meanwhile, choose a warm location — near a warm oven or inside an oven with just the light switched on both work perfectly well for this rise.
Step 6 — Prepare the Baking Pan
Pour 2 tablespoons of extra virgin olive oil into a 9×13 inch rimmed baking pan. Then spread the oil evenly across the entire base and up the sides using your fingers until every surface is generously coated.
The generous oil coating is what creates the signature crispy, golden bottom crust that makes Italian Focaccia Recipe so distinctive and deeply satisfying. Additionally, the well-oiled pan prevents any sticking and allows the focaccia to slide out cleanly and easily after baking.
Step 7 — Transfer and Stretch the Dough Into the Pan
Gently tip the risen dough out of the bowl and into the center of the prepared oiled pan. Immediately drizzle another tablespoon of olive oil over the top surface of the dough.
Next, use your fingertips to press and stretch the dough outward toward the corners of the pan in gentle, even strokes. However, if the dough springs back and resists stretching, leave it to rest for 5 minutes and then continue — the gluten simply needs a little time to relax before it will cooperate.
Step 8 — Second Rise in the Pan
Cover the pan loosely with oiled plastic wrap or a clean damp towel. Allow the dough to rise again in the pan for 45 minutes to 1 hour at room temperature.
After this second rise, the dough should look noticeably puffed, pillowy, and slightly jiggly when you gently shake the pan. Furthermore, preheat your oven to 220C or 425F during the last 20 minutes of this rise so it reaches full temperature before the focaccia goes in.
Step 9 — Dimple the Focaccia
Once the dough has puffed beautifully, drizzle the remaining olive oil generously over the entire surface. Then press your fingers firmly all the way down to the bottom of the pan to create deep dimples across the whole surface.
Work in rows from one end to the other, making dimples roughly every 3 to 4 centimeters apart. Moreover, the dimples trap pools of olive oil which creates those incredible golden, slightly crispy spots that make Simple Homemade Focaccia look and taste so authentically Italian.
Pro Tip: Press the dimples confidently and deeply — all the way to the bottom of the pan. Shallow dimples fill back in during baking and you lose the characteristic rustic texture that defines great focaccia. Deep dimples always produce a dramatically better result.
Step 10 — Add Toppings and Bake
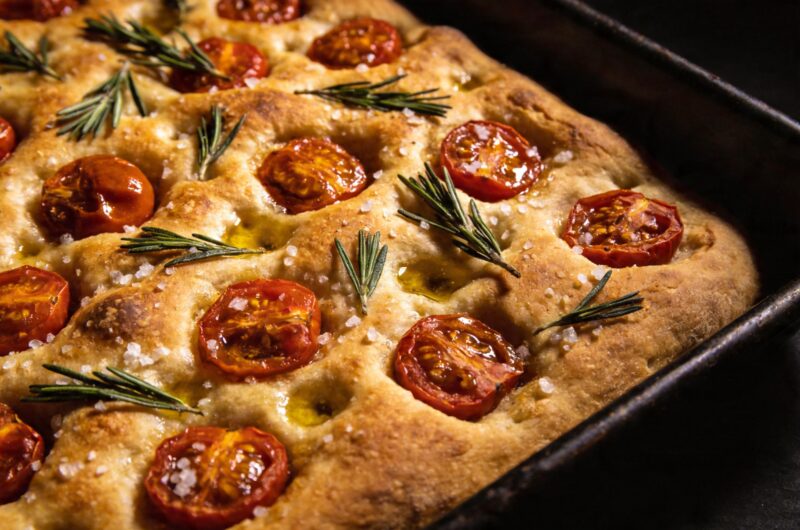
Scatter your chosen toppings evenly across the dimpled surface immediately after dimpling. Then press cherry tomatoes, olives, or rosemary gently into the dimples so they stay firmly in place during the entire baking time.
Sprinkle flaky sea salt and black pepper generously over the top before placing in the oven. After that, place the pan on the middle rack of the fully preheated oven and bake at 220C for 22 to 25 minutes until the top turns a deep, even golden brown all over.
Focaccia Bread Topping Ideas Worth Trying
Classic Rosemary and Sea Salt
- Press fresh rosemary sprigs into the dimples before baking for maximum flavor infusion
- Finish with flaky Maldon sea salt scattered generously over the entire dimpled surface
- This classic combination defines Italian Focaccia Recipe at its most traditional and genuinely beautiful
Cherry Tomato and Olive Focaccia
- Press halved cherry tomatoes cut-side up into the dimples so they caramelize beautifully during baking
- Then scatter sliced black olives and fresh oregano over the tomatoes before placing in the oven
- This Focaccia Bread Toppings combination produces a vibrant, colorful result that looks stunning on any table
Focaccia Bread Art Style
- Arrange thinly sliced vegetables, fresh herbs, and edible flowers across the surface in deliberate patterns
- Use cherry tomatoes for red, asparagus for green, and thinly sliced red onion rings for purple contrast
- This Focaccia Bread Art approach looks extraordinary and takes only a few extra minutes of arrangement
Why This Focaccia Bread Recipe Works Every Time
Three clear reasons make this recipe consistently reliable and impressive:
- High olive oil content in both the dough and the pan creates the crispy bottom and rich flavor that defines authentic focaccia
- Stretch and fold method develops sufficient gluten without overworking the wet dough which would tighten it and reduce the open crumb
- Deep confident dimpling traps olive oil pools that create signature golden spots and prevent the surface from puffing up flat
Serving Ideas
Turn this into a full Homemade Focaccia Bread Ideas spread with these suggestions:
- Tear into large pieces and serve alongside soups, stews, or pasta dishes for a complete Italian meal
- Slice horizontally and fill with prosciutto, burrata, and rocket for a spectacular sandwich
- Serve on a board with olive oil and balsamic vinegar for dipping as a dinner party starter
- Cut into small squares as Focaccia Ideas for party finger food alongside hummus and antipasto
- FYI, day-old focaccia makes incredible bruschetta when toasted in a dry pan with olive oil until crispy
Common Mistakes to Avoid
- Adding extra flour — the wet sticky dough is intentional and produces the open airy crumb focaccia needs
- Skipping the second rise — without it the focaccia bakes up dense and flat instead of light and pillowy
- Shallow dimples — always press all the way to the bottom of the pan for proper oil pooling and texture
- Under-oiling the pan — insufficient oil produces a pale soft bottom instead of the crispy golden crust needed
- Cutting before resting — slicing hot focaccia immediately makes the crumb gummy and collapses the structure
Storage Tips
- Room temperature: Wrap in a clean cloth and store for up to 2 days — reheat in a 180C oven for 5 minutes to restore crispiness
- Freezer: Slice and freeze individual pieces for up to 1 month — toast directly from frozen in a dry pan
- Same day: This Same Day Focaccia Bread tastes best eaten within 6 hours of baking when the crust is at peak crispiness
Frequently Asked Questions
Q1: Can I make this focaccia bread recipe the same day without overnight resting? Yes, completely. This recipe uses a same-day method that produces excellent results in under 3 hours total. However, if you want even more complex flavor, mix the dough the night before, cover it, and refrigerate overnight for a slow cold rise. The next morning, bring it to room temperature for 1 hour before transferring to the pan.
Q2: What flour works best for homemade focaccia? Bread flour produces a chewier, more structured result with a slightly better crust overall. However, all-purpose flour works perfectly well and produces a softer, more tender focaccia that many people actually prefer for everyday baking. Furthermore, the difference between the two flours is subtle enough that you should simply use whichever one you already have available.
Q3: Can I make a sourdough focaccia version with this recipe? Yes. Replace the instant yeast with 150 grams of active sourdough starter and increase the rest time to 4 to 6 hours for the first rise. The Sourdough Focaccia Recipe version produces a more complex, slightly tangy flavor and an even more open crumb structure that many experienced bakers genuinely prefer over the commercial yeast version.
Q4: How do I get the bottom of my focaccia really crispy? Use more olive oil in the pan than feels comfortable — at least 2 to 3 tablespoons coating the entire base generously. Additionally, bake at the full 220C temperature on the middle rack rather than the top. IMO, the crispy bottom crust is genuinely the best part of the whole focaccia and it deserves every drop of oil it receives.
Q5: Can I use this focaccia recipe as a pizza base? Yes, absolutely. After the second rise, dimple the dough as normal, then spread tomato sauce over the surface before adding cheese and your chosen toppings. Bake at 220C for 20 to 22 minutes until golden and bubbling. The result is a thick, pillowy Focaccia Pizza with a crispy base that tastes completely spectacular.
Final Thoughts
This Focaccia Bread Recipe delivers everything a great homemade bread should — a crispy golden crust, a soft and airy interior, pools of olive oil in every dimple, and endless topping possibilities that make every single bake feel completely different. Moreover, the whole process is approachable enough for a complete first-time bread baker to follow with real confidence from the very beginning.
Whether you make the Classic Rosemary and Sea Salt version, go creative with Focaccia Bread Art toppings, or use the dough as a thick pizza base, this recipe always produces something genuinely worth being proud of. Make it this weekend and discover exactly why homemade focaccia is one of the most satisfying things you can ever pull out of your own oven.
Focaccia Bread Recipe Crispy Outside Fluffy Inside Always
10
servings20
minutes25
minutes280
kcal2
hoursThis Focaccia Bread Recipe uses a simple wet yeast dough stretched into an olive-oil-coated pan, dimpled deeply, topped with rosemary and flaky salt, then baked until golden and crispy. Soft inside, crispy outside, and deeply flavorful. Ready in 2 hours 45 minutes and serves 8 to 10 people perfectly.
Ingredients
For the Dough:
3 and 1/2 cups bread flour or all-purpose flour
2 and 1/4 tsp instant yeast
1 and 1/2 tsp fine sea salt
1 tsp sugar
1 and 1/4 cups warm water
4 tbsp extra virgin olive oil
For the Dimple Topping:
3 tbsp extra virgin olive oil for drizzling
1 tsp flaky sea salt
1 tsp dried or fresh rosemary
1/2 tsp black pepper
Optional Toppings:
Cherry tomatoes, halved
Sliced black or green olives
Thinly sliced red onion
Roasted garlic cloves
Fresh thyme or oregano
Crumbled feta cheese
- Step 1 — Combine Warm Water and Sugar
- Pour the warm water into a large mixing bowl and add the sugar. Stir briefly until the sugar dissolves completely into the liquid before adding anything else.
- Step 2 — Activate the Yeast
- Sprinkle the instant yeast over the warm sugar water. Allow it to sit undisturbed for 5 full minutes until the surface looks foamy and slightly bubbly.
- Step 3 — Add the Flour and Oil
- Pour the flour, fine sea salt, and 2 tablespoons of olive oil into the yeast mixture. Stir everything together until no dry flour patches remain visible anywhere in the bowl.
- Step 4 — Check the Dough Consistency
- The dough will feel wet and sticky at this stage — that is completely correct and intentional. Do not add extra flour because the stickiness is what creates the open airy crumb during baking.
- Step 5 — First Stretch and Fold
- Wet your hand lightly with water and reach under one side of the dough. Stretch it upward as far as possible without tearing, then fold it firmly over to the opposite side of the bowl.
- Step 6 — Complete One Full Set
- Rotate the bowl a quarter turn after each fold and repeat the stretch and fold on all four sides. After completing all four sides you have finished one complete set.
- Step 7 — Rest Between Sets
- Cover the bowl loosely and allow the dough to rest for 10 minutes before the next set. During this rest the gluten relaxes and becomes more extensible for the following stretch and fold.
- Step 8 — Repeat Three to Four Total Sets
- Perform 3 to 4 complete stretch and fold sets total with 10 minutes of rest between each one. After the final set the dough should feel noticeably smoother and more elastic throughout.
- Step 9 — Oil the Dough and Cover
- Drizzle 1 tablespoon of olive oil over the surface of the dough and turn it gently to coat all sides. Then cover the bowl tightly with plastic wrap or a clean kitchen towel.
- Step 10 — First Rise
- Place the covered bowl in a warm spot at room temperature for 1 to 1.5 hours. Allow the dough to rise undisturbed until it doubles in size and looks noticeably airy and puffed.
- Step 11 — Prepare the Baking Pan
- Pour 2 tablespoons of olive oil into a 9×13 inch rimmed baking pan. Spread it evenly across the entire base and up all sides using your fingers until every surface is generously coated.
- Step 12 — Transfer the Dough
- Tip the risen dough gently out of the bowl and into the center of the oiled pan. Drizzle another tablespoon of olive oil over the top of the dough immediately after transferring it.
- Step 13 — Stretch Dough Into the Pan
- Use your fingertips to press and stretch the dough outward toward the corners of the pan. If it springs back and resists, rest for 5 minutes and then continue stretching until it fills the pan evenly.
- Step 14 — Second Rise in the Pan
- Cover the pan loosely with oiled plastic wrap and allow the dough to rise again for 45 minutes to 1 hour. Meanwhile preheat your oven to 220C or 425F during the last 20 minutes of this rise.
- Step 15 — Drizzle Olive Oil Over the Surface
- Once the dough looks puffed and pillowy, drizzle the remaining olive oil generously over the entire surface. Make sure the oil reaches every corner and edge of the dough before dimpling.
- Step 16 — Create the Dimples
- Press your fingers firmly all the way down to the bottom of the pan to create deep dimples across the whole surface. Work in rows from one end to the other spacing dimples roughly every 3 to 4 centimeters apart.
- Step 17 — Add the Toppings
- Scatter your chosen toppings evenly across the dimpled surface immediately after dimpling. Press cherry tomatoes, rosemary, or olives gently into the dimples so they stay in place throughout baking.
- Step 18 — Season the Top
- Sprinkle flaky sea salt generously over the entire surface of the topped focaccia. Then add black pepper and any additional dried herbs before placing the pan in the oven.
- Step 19 — Bake Until Golden
- Place the pan on the middle rack of the preheated oven. Bake at 220C for 22 to 25 minutes until the top turns a deep even golden brown and the edges look visibly crispy all around.
- Step 20 — Rest and Serve
- Remove the pan from the oven and allow the focaccia to cool for 5 minutes inside the pan. Then transfer to a wire rack, rest for 10 more minutes, slice into squares, and serve warm.