Buying a Valentine cake from a shop is fine. Making one yourself tells a completely different story. The first time I baked a heart shaped cake recipe Valentine style for someone I cared about, the reaction was worth every minute of effort — and honestly, it was not even that difficult.
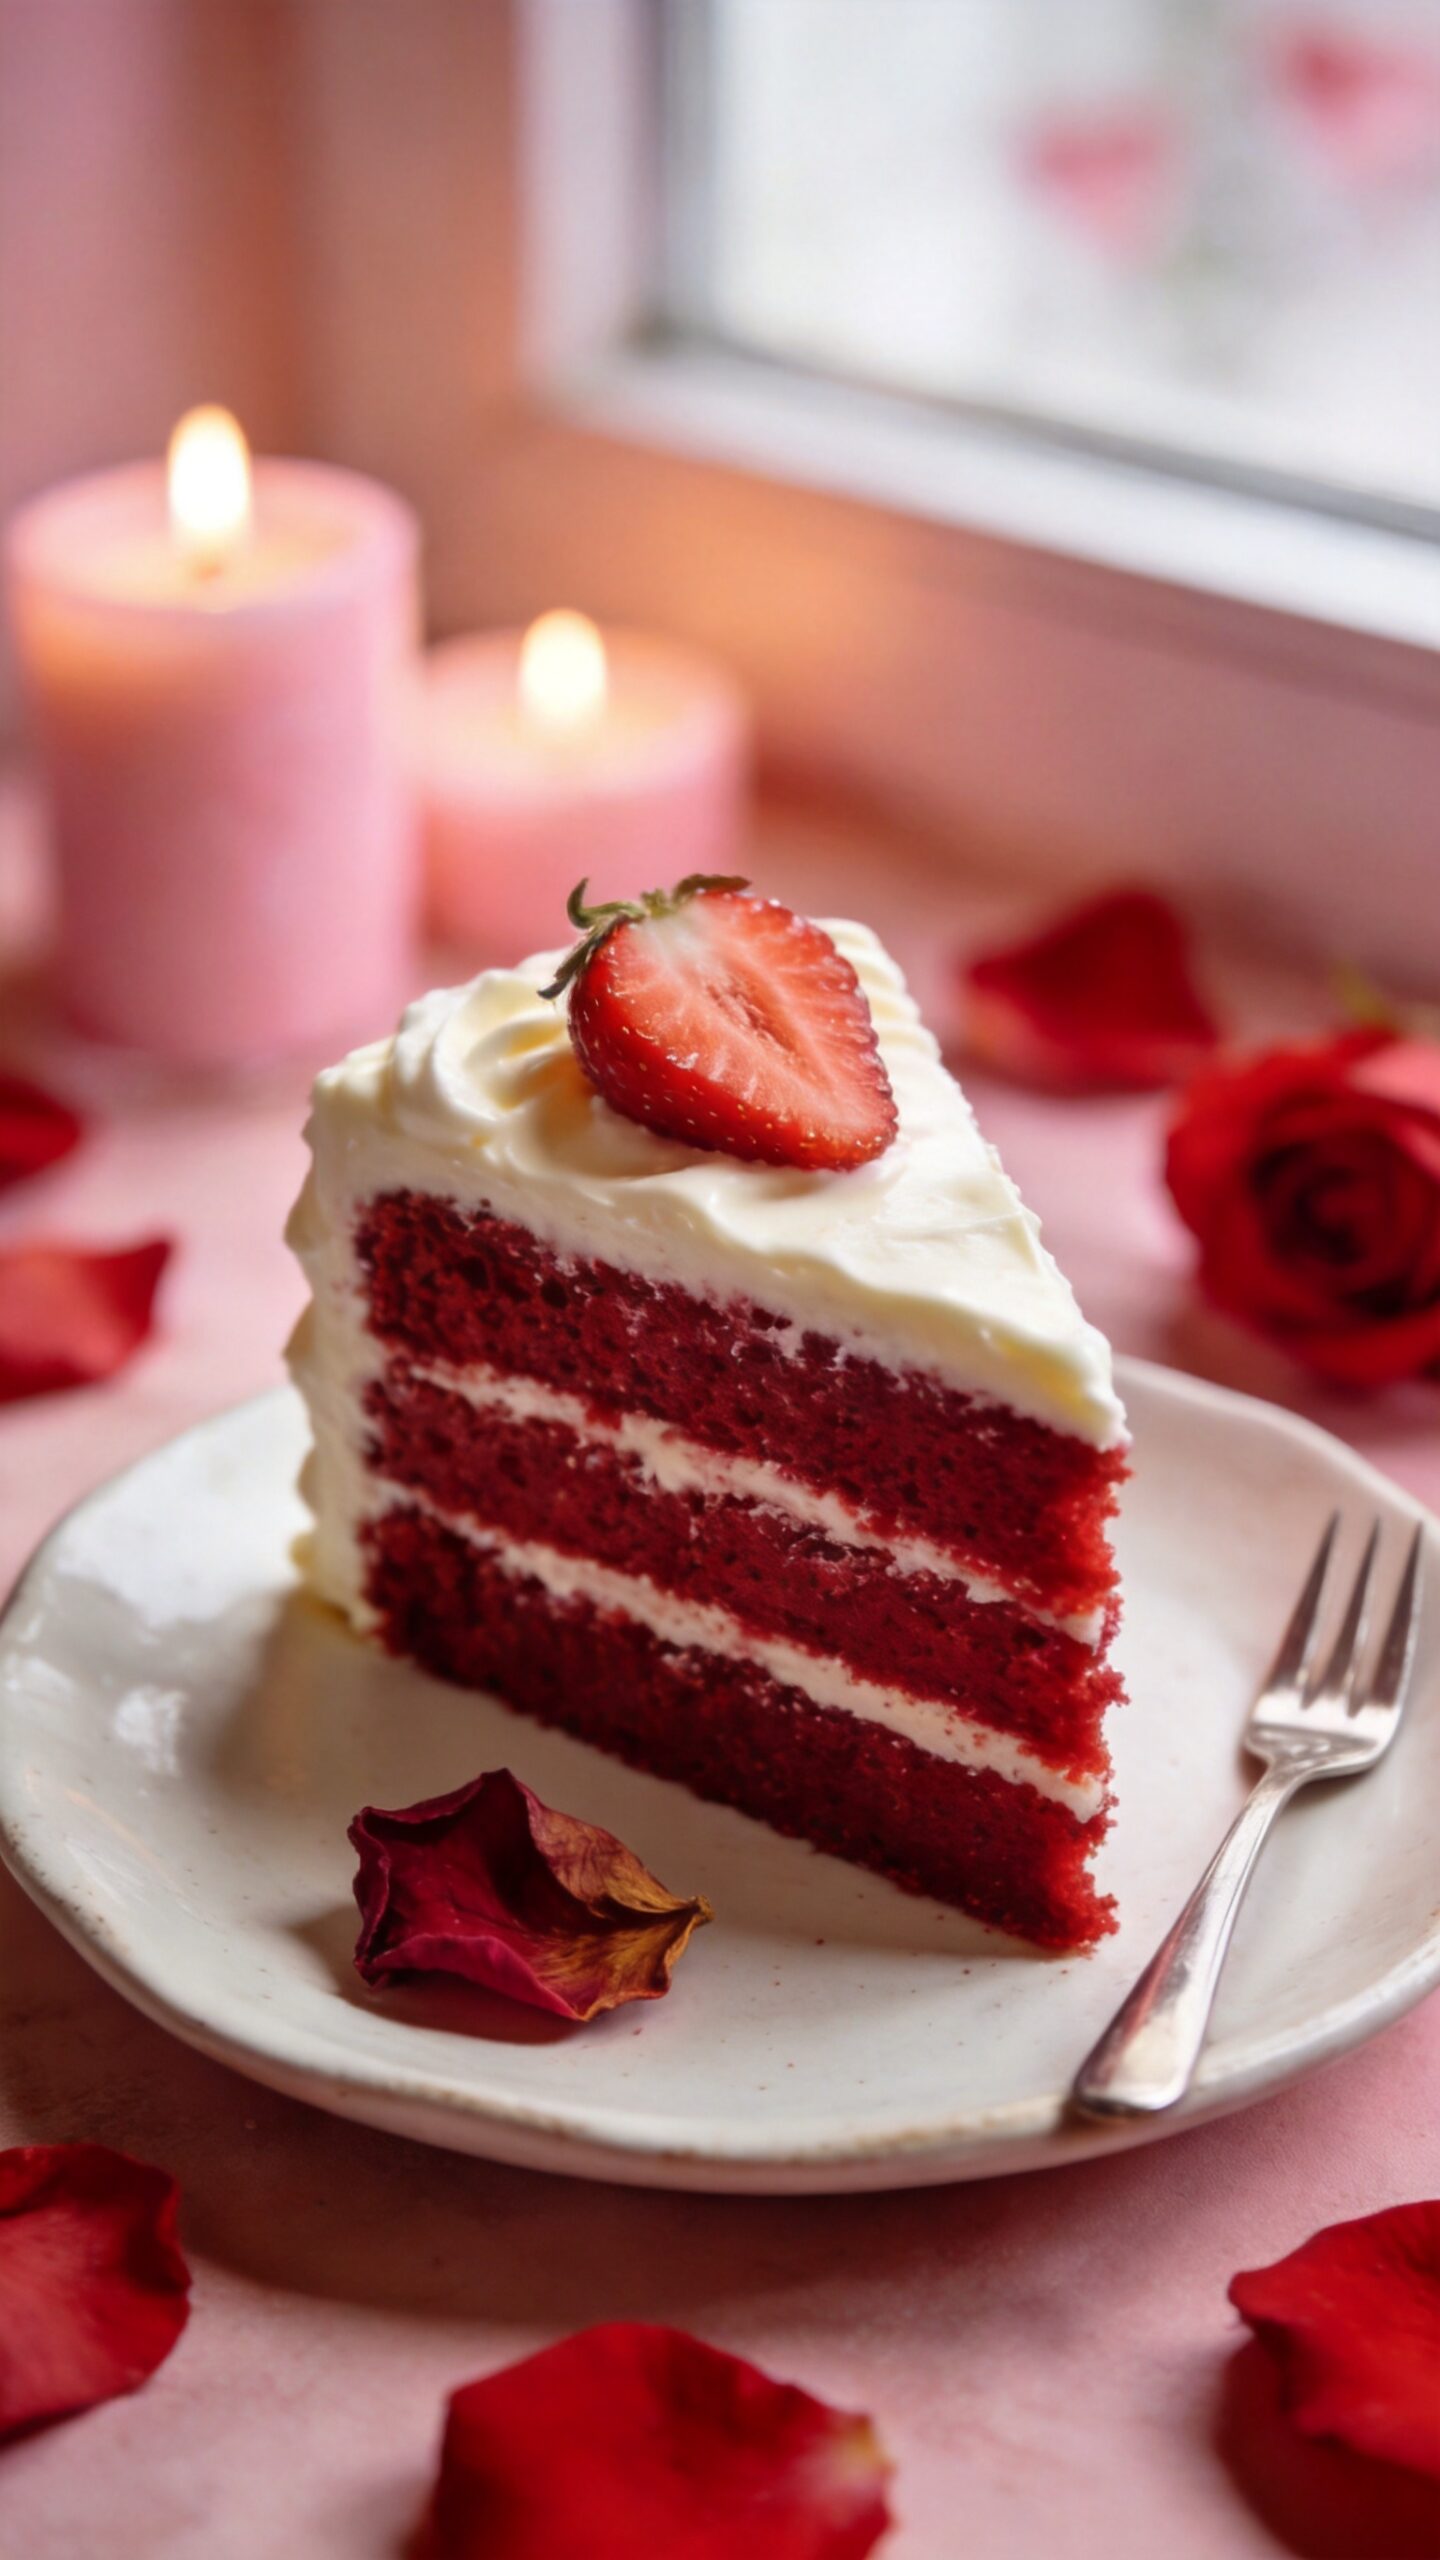
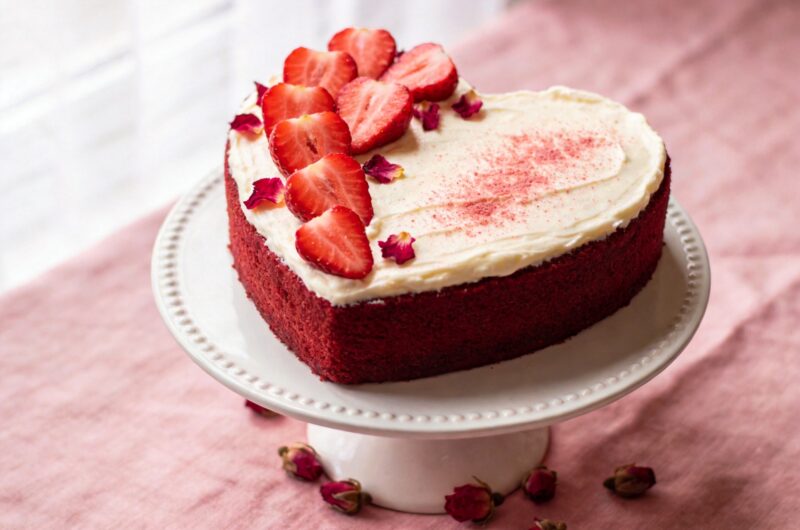
This Valentine cake recipe homemade version gives you a classic red velvet cake with cream cheese frosting, shaped into a heart, decorated with fresh strawberries and rose petals, and assembled to look genuinely beautiful. It takes about 2 hours total from start to finish, costs a fraction of a bakery price, and tastes significantly better than most things sold in a box. 🙂
What You’ll Need (Ingredients)
Everything here comes from a standard supermarket. Nothing specialist, nothing that requires advance ordering.
For red velvet cake layers:
- 250g (2 cups) plain flour
- 2 tablespoons unsweetened cocoa powder
- 1 teaspoon baking powder
- 1 teaspoon bicarbonate of soda
- 1/2 teaspoon salt
- 200g (1 cup) caster sugar
- 120ml (1/2 cup) vegetable oil
- 2 large eggs, room temperature
- 240ml (1 cup) buttermilk, room temperature
- 1 teaspoon white wine vinegar
- 1.5 teaspoons vanilla extract
- 2 tablespoons red gel food colouring — gel gives the most vivid, stable red colour
Cream cheese frosting:
- 300g (10.5 oz) full-fat cream cheese, softened at room temperature
- 120g (1 stick) unsalted butter, softened at room temperature
- 380g (3.5 cups) icing sugar, sifted
- 1.5 teaspoons vanilla extract
- 1 pinch salt
For decoration:
- 150g (5 oz) fresh strawberries, halved or sliced
- Edible dried rose petals — available at cake decorating suppliers
- 1 tablespoon freeze-dried strawberry powder for dusting — optional
- Heart-shaped sprinkles or edible gold stars — optional
How to Make It — Full Step-by-Step Process
Step One: Prepare the Tins and Preheat
Set your oven to 175°C (350°F) fan-forced or 180°C (360°F) conventional. Allow the oven to preheat fully for a minimum of 20 minutes before placing anything inside. An oven that has not reached full temperature when the batter goes in rises unevenly and often produces a domed top that makes assembling a neat heart shape significantly more difficult.
For the heart shape, you have two options. Option one uses a dedicated heart-shaped cake tin — grease it generously and line the base with parchment cut to fit. Option two uses a round 20cm tin and a square 20cm tin of the same depth. Bake one layer in each tin, then cut the round layer in half and position the two semicircles against two adjacent sides of the square layer to form a heart shape. The square-and-round method works reliably and requires no specialist equipment at all.
Grease and line whichever tins you use, making sure to grease the parchment as well as the tin sides. This double layer of protection guarantees clean release after baking without tearing any part of the cake surface.
Step Two: Mix the Dry Ingredients
Sift 250g of plain flour, 2 tablespoons of cocoa powder, 1 teaspoon of baking powder, 1 teaspoon of bicarbonate of soda, and 1/2 teaspoon of salt into a medium bowl. Add 200g of caster sugar and whisk briefly with a balloon whisk to distribute all dry ingredients evenly. Proper mixing at this stage prevents pockets of raising agent from sitting unevenly in the batter, which can cause uneven rising and unexpected dome shapes during baking.
Set the dry ingredients aside. In a separate large mixing bowl, combine all the wet ingredients in the next step before bringing the two together. Keeping wet and dry separate until the moment of combining prevents premature gluten development, which toughens the crumb before the batter even reaches the oven.
Step Three: Mix the Wet Ingredients
In a large bowl, whisk together 120ml of vegetable oil and the 2 room temperature eggs until the mixture looks pale yellow and slightly thickened — about 30 seconds of vigorous whisking. Add 240ml of buttermilk, 1.5 teaspoons of vanilla extract, and 1 teaspoon of white wine vinegar. Whisk until everything combines into a smooth, uniform liquid.
Add 2 tablespoons of red gel food colouring to the wet ingredients now and whisk it through until the mixture turns a deep, vivid red throughout. Gel food colouring produces a far more intense, stable colour than liquid colouring — the same amount of liquid colouring produces a dull pink result that bakes to a brownish-red rather than the classic vivid colour that defines a proper red velvet Valentine chocolate cake recipe. Use gel colouring every time without exception.
Step Four: Combine and Make the Batter
Pour the wet red mixture into the bowl of dry ingredients. Use a large spatula to fold everything together in wide, slow circular motions until no dry streaks of flour remain visible. Count your folds as you go and stop between 15 and 20 folds — the batter should look just combined with a few small lumps remaining, and it should be coloured a uniform deep red throughout.
Over-mixing activates the gluten in the flour and produces a tough, dense cake that rises poorly and chews rather than melts. The folding motion — rather than stirring or beating — keeps gluten development to the absolute minimum. A slightly lumpy, just-combined batter produces a significantly more tender crumb than a smooth, over-worked one. Trust the process and put the spatula down when the flour disappears.
Step Five: Bake the Cake
Divide the batter evenly between your prepared tins. If you use two different tin shapes — round and square — fill them to roughly the same depth rather than the same volume, so both layers bake in approximately the same time. Pour slowly and tap each tin 3 to 4 times firmly on the counter to release air bubbles before placing in the oven.
Bake on the centre rack for 30 to 34 minutes without opening the oven door during the first 25 minutes. Opening early releases heat and causes the partially set batter to sink in the middle — a problem that no amount of additional baking time can fully correct. At the 30-minute mark, insert a skewer into the deepest part of each layer. Moist crumbs on the skewer mean the cake is done. Wet batter means 3 to 4 more minutes are needed.
Remove from the oven and cool in the tins on a wire rack for 15 minutes. Run a thin knife around the edge of each tin to loosen the sides before inverting. Peel off the parchment gently and allow the layers to cool completely on the rack — a minimum of 45 minutes. Frosting a warm cake melts the cream cheese frosting on contact and causes the layers to slide apart during assembly. Patience at this stage pays off significantly in the final result.
Step Six: Make the Cream Cheese Frosting
Place 300g of room temperature cream cheese and 120g of softened butter into a large mixing bowl. Beat on medium speed using a hand mixer or stand mixer for 2 minutes until the mixture looks smooth, uniform, and fully combined with no visible lumps of either ingredient.
Add the sifted icing sugar in three separate additions, mixing on low speed after each addition until the sugar incorporates before adding more. Adding all the sugar at once creates a fine white cloud that coats everything nearby and produces a lumpy, uneven frosting. After all the sugar goes in, add 1.5 teaspoons of vanilla extract and a pinch of salt. Increase the mixer speed to medium and beat for a final 2 minutes until the frosting looks smooth, creamy, and just firm enough to hold its shape when you lift the beaters.
FYI — cream cheese frosting is softer and more temperature-sensitive than regular buttercream. Keep it at room temperature during use but refrigerate the finished decorated cake within 2 hours of assembly. Room temperature frosting spreads beautifully — chilled frosting tears the cake surface as you spread it.
Step Seven: Assemble the Heart Shape
If you used a dedicated heart tin, your layers are already shaped. If you used the round-and-square method, work on a clean flat surface. Place the square layer as the base. Cut the round layer exactly in half through the centre. Position one semicircle against the top-left side of the square, with the curved side facing outward. Position the other semicircle against the top-right side of the square in the same way. The two curved sides form the top bumps of the heart and the bottom corner of the square becomes the point. Press the pieces gently together to ensure they sit flat and flush.
Spread a thin layer of cream cheese frosting — about 3 tablespoons — over the assembled heart to create the crumb coat. A crumb coat is a thin, imperfect first layer of frosting that seals any loose crumbs against the surface so they do not appear in the final frosting layer. Refrigerate the crumb-coated cake for 20 minutes to firm this initial layer before applying the final frosting.
Step Eight: Apply the Final Frosting and Decorate
Remove the crumb-coated cake from the fridge and apply the remaining cream cheese frosting in a generous, even layer across the top and sides using an offset spatula. Work from the centre outward across the top, then down and across the sides. Use smooth, confident strokes rather than many small tentative ones — hesitant spreading tears the crumb coat and pulls fragments of cake into the frosting.
For the simple Valentine cake at home decoration style, arrange halved fresh strawberries across the top surface in a decorative pattern — concentric rows, a spiral from the centre outward, or a cluster in the middle surrounded by a ring of whole berries. Scatter edible dried rose petals around the strawberries for a romantic, soft finish. Dust lightly with freeze-dried strawberry powder through a fine sieve for a subtle pink flush across the frosting surface. Add heart-shaped sprinkles or edible gold stars as a final touch if you want a more celebratory finish. Refrigerate for 20 minutes to firm everything before slicing and serving.
Romantic Valentine Cake Design Ideas
Have you ever looked at a beautifully decorated cake and assumed it required professional training to achieve? Most impressive cake decorations come down to a handful of simple techniques applied consistently. Here are the romantic Valentine cake design approaches that look genuinely stunning without requiring any specialist skills.
Strawberry rose arrangement: Slice strawberries vertically from tip to base, keeping the slices attached at the top. Fan the slices outward to create a petal effect and arrange several of these fanned strawberries together to create a rose shape on top of the cake. A cluster of three or four strawberry roses surrounded by edible rose petals looks exceptional.
Drip decoration: Melt 60g of white chocolate with 1 teaspoon of coconut oil and tint it pink with a small amount of red gel colouring. Spoon the mixture slowly around the edge of the chilled frosted cake, allowing small drips to fall naturally down the sides. The contrast between the white-pink drip and the cream frosting creates a love theme cake decoration idea that looks professional with minimal effort.
Piped hearts: Fill a small piping bag with a little leftover frosting and pipe small heart outlines or solid hearts across the top surface. Use a small round nozzle or simply cut a tiny hole in the corner of a piping bag. The piped hearts add detail and a handmade quality that resonates more personally than any purchased decoration.
Strawberry Variation
For a strawberry Valentine cake recipe alternative, replace the red velvet base with a strawberry flavoured sponge. Add 2 tablespoons of freeze-dried strawberry powder to the dry ingredients and replace the buttermilk with 240ml of fresh strawberry puree made by blending 200g of fresh strawberries until completely smooth. The resulting batter bakes to a naturally pink crumb with a genuine fresh strawberry flavour rather than artificial extract.
Mix 2 tablespoons of strawberry jam into the cream cheese frosting for the strawberry version. The jam adds flavour and a pale pink tint to the frosting without requiring food colouring. This strawberry Valentine cake recipe version tastes lighter and fresher than the red velvet base while remaining just as visually beautiful with the same heart shape and strawberry topping.
Common Mistakes to Avoid
Using liquid food colouring instead of gel: Liquid colouring dilutes the batter and produces an inconsistent, faded red that turns brownish during baking. Gel colouring delivers a vivid, stable red with a fraction of the volume. Always use gel colouring for any red velvet Valentine cake recipe.
Skipping the crumb coat: Applying final frosting directly over an uncoated cake drags crumbs through the white frosting and produces a visibly dirty, uneven surface. A 20-minute crumb coat and chill takes very little time and produces a dramatically cleaner final result.
Assembling with warm layers: Warm cake melts cream cheese frosting on contact. The layers slide, the frosting absorbs into the crumb, and the heart shape loses its clean edges entirely. Always cool completely — 45 minutes minimum — before any frosting touches the cake surface.
Over-beating the cream cheese frosting: Unlike regular buttercream, cream cheese frosting becomes softer and runnier the more you beat it. Mix only until smooth and just firm — stop as soon as the texture looks right and resist the urge to keep beating. :/
Cute Heart Cake Recipe for Valentine’s Day at Home
12
servings30
minutes32
minutes1
hourThis Valentine cake combines moist red velvet layers with tangy cream cheese frosting, shaped into a heart and decorated with fresh strawberries and edible rose petals. Simple enough for home bakers and impressive enough to genuinely surprise someone, it delivers a beautiful, delicious, and deeply personal Valentine’s Day celebration cake.
Ingredients
Red velvet cake layers:
250g plain flour
2 tablespoons unsweetened cocoa powder
1 teaspoon baking powder
1 teaspoon bicarbonate of soda
1/2 teaspoon salt
200g caster sugar
120ml vegetable oil
2 large eggs, room temperature
240ml buttermilk, room temperature
1 teaspoon white wine vinegar
1.5 teaspoons vanilla extract
2 tablespoons red gel food colouring
Cream cheese frosting:
300g full-fat cream cheese, softened
120g unsalted butter, softened
380g icing sugar, sifted
1.5 teaspoons vanilla extract
1 pinch salt
Decoration:
150g fresh strawberries, halved or sliced
Edible dried rose petals
1 tablespoon freeze-dried strawberry powder (optional)
Heart-shaped sprinkles or edible gold stars (optional)
- Preheat oven to 175°C fan or 180°C conventional for at least 20 minutes
- Grease and line a heart-shaped tin or one 20cm round and one 20cm square tin
- Sift flour, cocoa powder, baking powder, bicarbonate of soda, and salt into a medium bowl
- Add caster sugar and whisk dry ingredients together briefly
- Whisk vegetable oil and eggs together in a large bowl until pale and slightly thickened
- Add buttermilk, vanilla extract, and white wine vinegar to the egg mixture
- Whisk wet ingredients together until smooth and uniform
- Add red gel food colouring to the wet ingredients and whisk until deep red throughout
- Pour wet mixture into the dry ingredients bowl
- Fold together gently with a spatula in 15 to 20 folds until just combined with no dry streaks
- Divide batter evenly between prepared tins and tap each tin on the counter 3 to 4 times
- Bake on centre rack for 30 to 34 minutes without opening door for the first 25 minutes
- Test with a skewer — moist crumbs means done, wet batter means 3 more minutes needed
- Cool in tins for 15 minutes then turn out onto a wire rack and peel off parchment
- Cool completely for at least 45 minutes before assembling or frosting
- For square-and-round method cut round layer in half and position both semicircles against the top two sides of the square layer to form a heart shape
- Beat softened cream cheese and butter together for 2 minutes until smooth and fully combined
- Add sifted icing sugar in three additions mixing on low between each addition
- Add vanilla extract and salt then beat on medium for 2 minutes until smooth and just firm
- Spread a thin crumb coat of frosting over the assembled heart cake
- Refrigerate for 20 minutes to firm the crumb coat
- Apply remaining frosting in a generous even layer using an offset spatula
- Use smooth confident strokes across the top then down the sides
- Arrange halved fresh strawberries across the top in a decorative pattern
- Scatter edible rose petals around the strawberries
- Dust lightly with freeze-dried strawberry powder through a fine sieve if using
- Add heart sprinkles or edible stars as a final touch if desired
- Refrigerate for 20 minutes to firm everything before slicing and serving
FAQs
Q1: Can I make this cake the day before Valentine’s Day?
Yes — this cake actually tastes better on day two because the moisture in the cream cheese frosting softens the crumb slightly overnight. Bake and cool the layers on the day before. Make and apply the frosting, decorate, then refrigerate the finished cake overnight covered loosely with cling film. Add the fresh strawberry decoration on the morning of serving to keep them looking fresh and vibrant.
Q2: How do I get a perfectly smooth frosting finish without a turntable?
Place the assembled cake on a flat plate and work from the top down. Use a long palette knife or offset spatula dipped in hot water and dried quickly — the warm metal glides through the frosting and leaves a smoother surface. Smooth the top first, then use the warm spatula on the sides in long single strokes rather than short back-and-forth motions that leave marks.
Q3: Can I make this recipe as cupcakes instead of a layer cake?
Yes — divide the same batter between 18 to 20 lined cupcake cases filled two-thirds full. Bake at 175°C fan for 18 to 22 minutes until a skewer comes out with moist crumbs. Cool completely before piping or spreading cream cheese frosting on top. Decorate each cupcake with a halved strawberry and a small edible rose petal for an easy Valentine cake ideas alternative.
Q4: What makes red velvet different from a regular chocolate cake?
Red velvet contains significantly less cocoa powder than a standard chocolate cake — typically 2 tablespoons versus 80 to 100 grams. The cocoa provides a subtle flavour rather than a dominant chocolate character. The combination of buttermilk and vinegar creates a slight tang and a particularly tender crumb that distinguishes red velvet from both chocolate cake and plain vanilla. The colour comes from food colouring rather than any natural red reaction.
Wrapping It Up
This Valentine cake recipe delivers a genuinely stunning, delicious, and personal homemade cake that no shop-bought version matches for meaning or flavour. Use gel food colouring, fold the batter gently, cool completely before frosting, apply a crumb coat before the final layer, and decorate with fresh strawberries and rose petals. Those five habits produce a beautiful result every single time.
Whether you make the classic red velvet version or the lighter strawberry variation, this cake communicates something that a purchased box simply cannot. Now preheat the oven and make something genuinely memorable this Valentine’s Day. IMO that is the most romantic thing you can do.