Dry, rubbery pork chops are a completely avoidable tragedy. Every single time I encounter one at a dinner table, I think about the three things that went wrong — and they are always the same three things. This garlic butter pork chops recipe fixes all three of them, and it does it in under 30 minutes using one pan and ingredients you almost certainly already have.
Pan seared pork chops garlic butter easy enough for a Tuesday night but impressive enough for guests — that is the ideal a good weeknight recipe should reach. This one gets there without any complicated technique, expensive equipment, or lengthy marinating time. Once you understand how the sear and baste method works together, you will cook every pork chop this way for the rest of your life.
What You’ll Need (Ingredients)
Simple and accessible. The fresh garlic and good quality butter are the two ingredients worth buying well.
For the pork chops:
- 4 bone-in pork chops — approximately 2.5cm (1 inch) thick, 220g (7.7 oz) each
- 1 teaspoon salt
- 1/2 teaspoon black pepper
- 1 teaspoon smoked paprika
- 1/2 teaspoon garlic powder
- 1/2 teaspoon onion powder
- 1 tablespoon vegetable oil or neutral cooking oil
For the garlic herb butter sauce:
- 60g (4 tablespoons) unsalted butter, cut into cubes
- 5 garlic cloves, peeled and lightly smashed
- 3 sprigs fresh thyme
- 2 sprigs fresh rosemary
- 1 tablespoon fresh flat-leaf parsley, finely chopped — for finishing
- 1/4 teaspoon salt
- Juice of half a lemon — added at the very end
How to Make It — Full Step-by-Step Process
Step One: Prepare the Pork Chops
Remove the pork chops from the fridge 20 minutes before cooking. Cold meat placed directly into a hot pan creates a significant temperature differential between the cool centre and the hot surface — the exterior overcooks trying to reach the centre’s temperature while the inside remains pale and undercooked. Room temperature chops cook more evenly from edge to edge throughout.
Pat each chop completely dry with paper towels on both sides. This step takes 30 seconds and makes a significant difference to the quality of the sear. Moisture on the surface of the pork creates steam on contact with the hot pan, which prevents the direct high-heat caramelisation that produces the deep, golden-brown crust this crispy seared pork chops garlic butter glaze recipe depends on. Wet meat steams rather than sears — and steamed pork chops are not what anyone wants for dinner.
Combine 1 teaspoon salt, 1/2 teaspoon black pepper, 1 teaspoon smoked paprika, 1/2 teaspoon garlic powder, and 1/2 teaspoon onion powder in a small bowl. Press this spice blend firmly onto both flat sides of each pork chop using your hands, covering the surface as evenly as possible. The spice crust not only adds flavour but also creates a dry, seasoned surface that sears more effectively than an unseasoned or wet one.
Step Two: Sear the First Side
Place a large heavy-bottomed skillet — cast iron or stainless steel works best — over high heat. Allow the pan to heat for a full 2 minutes before adding anything. A properly preheated pan produces an immediate, aggressive sear the moment the pork makes contact. An under-heated pan produces a slow, gradual warming that causes the meat to steam and grey rather than sear and brown.
Add 1 tablespoon of vegetable oil to the hot pan and swirl to coat the surface. The oil should shimmer and begin to smoke slightly within 10 seconds — this confirms the pan is at the right temperature. Place the pork chops flat in the pan using tongs, laying them away from you to prevent oil splatter. Press each chop gently with the tongs for 5 seconds after placing to ensure full contact between the meat and the hot surface.
Cook on the first side for 3 to 4 minutes without touching, moving, or pressing the chops. The pork will naturally release from the pan surface when the sear develops fully — any attempt to move it before this natural release point tears the crust and leaves it attached to the pan. After 3 to 4 minutes, check one chop by gently lifting the edge — the underside should look deeply golden-brown with a clearly defined crust. If it still looks pale, give it another 30 to 60 seconds.
Step Three: Sear the Second Side and Build the Butter Sauce
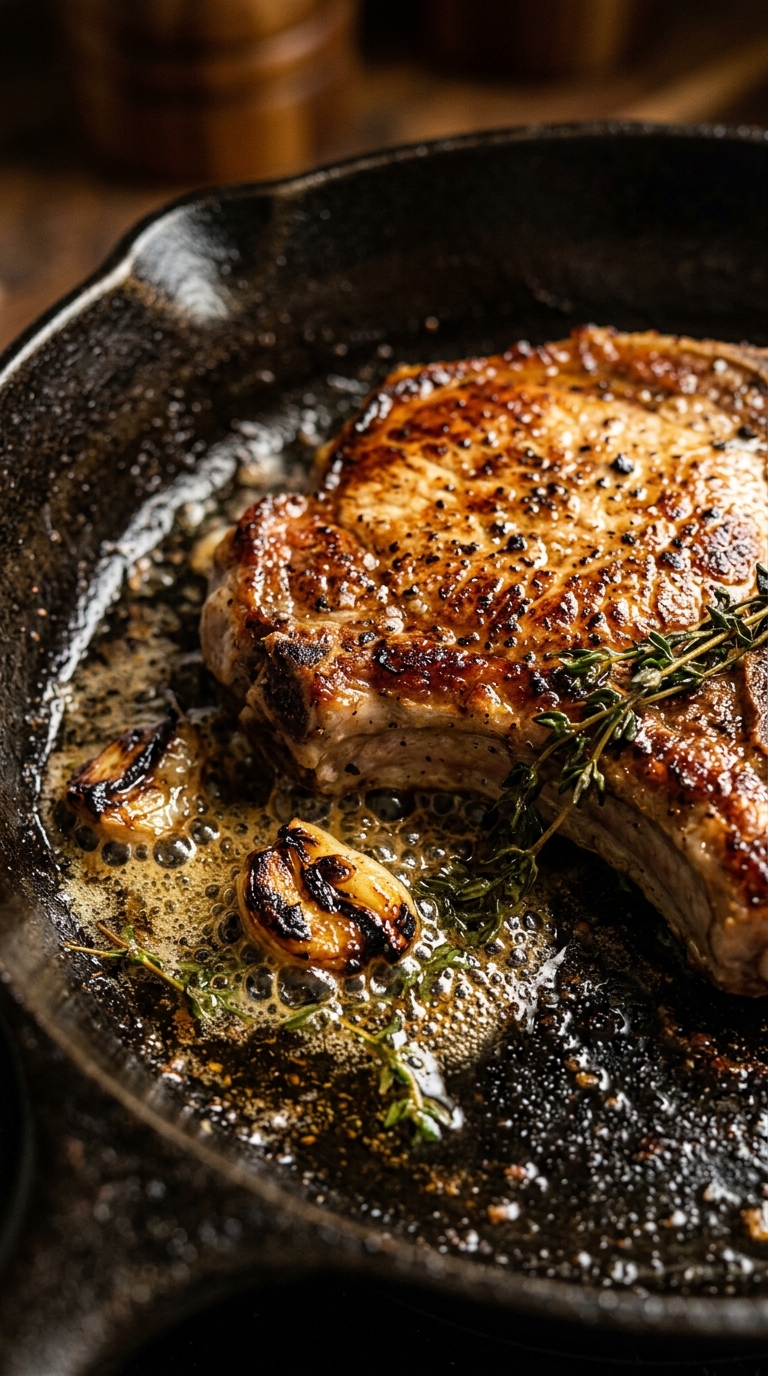
Flip each chop using tongs and immediately reduce the heat to medium. Add 60g of butter to the pan around and between the chops — not directly on top of them. The butter will melt quickly from the pan’s residual heat. As it melts, add the 5 smashed garlic cloves, 3 sprigs of fresh thyme, and 2 sprigs of fresh rosemary directly into the melting butter.
The smashed garlic — pressed flat with the side of a knife rather than minced — releases its flavour slowly into the butter without burning as quickly as minced garlic would. This distinction matters because you will cook these chops over direct heat for another 3 minutes and then baste continuously — minced garlic would burn and turn bitter within that time. Smashed whole cloves infuse the butter with a gentler, sweeter garlic flavour that defines the tender pork chops garlic herb butter sauce character of this recipe.
Begin basting the chops continuously by tilting the pan slightly toward you so the butter pools at the near edge. Use a large spoon to scoop the herb-infused butter and pour it repeatedly over the top surface of each chop. Baste every 15 to 20 seconds for the full 3 to 4 minutes of second-side cooking. This constant basting cooks the top of the chops through the heat of the butter without requiring any flipping, keeping both surfaces at peak temperature simultaneously and producing the juicy pork chops skillet recipe homemade result that makes this technique so effective.
Step Four: Check Doneness and Add the Lemon
At the 3-minute mark of the second side, check the internal temperature of the thickest chop using a meat thermometer inserted into the centre without touching the bone. The target temperature for perfectly cooked pork is 63°C (145°F) — not the 74°C (165°F) that older recipes recommend. Modern food safety guidelines have confirmed that pork at 63°C, followed by a 5-minute rest, is fully safe and significantly more moist than pork cooked to higher temperatures.
If the temperature reads below 63°C, continue basting over medium heat for 1 minute intervals, checking after each. If it reads above 70°C, the chops have already moved past the ideal juicy range — remove them immediately and rest them quickly to stop the residual cooking. FYI — overcooked pork at 74°C or above will feel firm and dry regardless of how well it was seared. The thermometer removes all guesswork and produces a consistently perfect result.
Once the target temperature is reached, squeeze half a lemon directly over all the chops while they remain in the pan. The lemon juice hits the hot butter and herbs and immediately produces a bright, sizzling, aromatic sauce. Tilt the pan once more and baste each chop with this final lemony butter mixture once before removing from the heat entirely.
Step Five: Rest and Serve
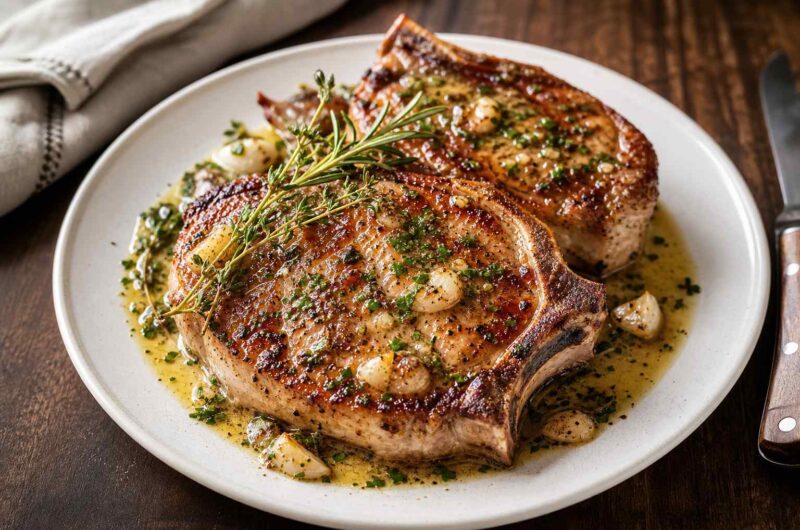
Transfer the pork chops to a clean plate or chopping board. Spoon the remaining garlic herb butter from the pan generously over the top of each chop, including the smashed garlic cloves and herb sprigs as garnish if desired. Allow the chops to rest for a full 5 minutes before cutting or serving.
The resting step allows the contracted muscle fibres in the hot pork to relax and the juices to redistribute evenly through the entire chop. Cutting immediately after cooking causes all the accumulated internal juices to run straight out onto the cutting board, leaving dry meat on the plate. Five minutes of resting retains those juices inside the meat, which is the difference between a pork chop that tastes perfectly moist and one that tastes disappointingly dry despite being properly cooked. Scatter 1 tablespoon of finely chopped fresh flat-leaf parsley over the rested chops and serve immediately.
Why High Heat and Resting Make All the Difference
Have you ever wondered why restaurant-quality pork chops taste so dramatically different from the ones you make at home — even when you use the same ingredients? The answer almost always comes down to two things: the initial sear temperature and the post-cook rest.
Restaurant kitchens run their pans at temperatures home cooks often avoid because they seem dangerously hot. That high heat produces the Maillard reaction — a chemical process that occurs between proteins and sugars in the meat surface when exposed to temperatures above 150°C. This reaction creates hundreds of new flavour compounds simultaneously, producing that complex, savoury, deeply caramelised flavour that seared meat delivers and that no amount of seasoning on under-seared meat can replicate.
Bone-In vs. Boneless Pork Chops
The best juicy pork chops recipe skillet result consistently comes from bone-in chops rather than boneless. Here is why that choice matters:
Bone-in chops:
- The bone insulates the meat immediately surrounding it from drying out during high-heat cooking
- They contain slightly more intramuscular fat, which contributes richness and moisture
- They take approximately 1 minute longer per side to cook than boneless at the same thickness
- The bone makes a genuinely impressive visual presentation on the plate
Boneless chops:
- Cook slightly faster and more evenly because there is no bone to conduct heat differently
- Work well for the one pan garlic butter pork chops recipe format when you need consistent cooking times
- Dry out faster than bone-in if even slightly overcooked because they lack the bone insulation
IMO, bone-in wins every time for flavour and juiciness. However, boneless works perfectly well with a thermometer and careful timing.
Building the Sauce Further
The garlic herb butter produced by the basting process is genuinely excellent on its own. However, if you want a proper pan sauce to spoon over the finished chops, here is how to build it:
After removing the cooked chops to rest, add 60ml of dry white wine or chicken stock to the hot pan with all the butter and herb residue. Scrape the bottom vigorously with a wooden spoon to incorporate all the browned bits — these carry enormous flavour. Allow the liquid to reduce by half over medium-high heat, then remove from heat and swirl in 1 tablespoon of cold butter. The cold butter emulsifies the sauce into a glossy, restaurant-style finish. Spoon this over the rested chops immediately before serving for a quick pork chops skillet recipe easy enough for weeknights but impressive enough for guests.
Serving Ideas
This easy garlic butter pork chops dinner works alongside a wide range of sides without any flavour conflict.
Classic pairings:
- Creamy mashed potatoes — the garlic butter sauce pools into the mash beautifully
- Roasted green beans with olive oil and lemon
- Steamed broccoli or asparagus with a small extra knob of butter
Lighter pairings:
- A simple green salad dressed with lemon vinaigrette for contrast
- Roasted cherry tomatoes with fresh basil
- Cauliflower rice for a lower-carb option that absorbs the sauce well
Crispy Seared Pork Chops With Garlic Butter Glaze
4
servings5
minutes18
minutesThese garlic butter pan seared pork chops use high-heat searing followed by continuous basting in a herb-infused garlic butter to produce deeply golden, juicy pork with a rich, aromatic sauce. Ready in under 30 minutes, they deliver restaurant-quality results from a single pan using five minutes of technique and five minutes of patience.
Ingredients
Pork chops:
4 bone-in pork chops (2.5cm thick, 220g each)
1 teaspoon salt
1/2 teaspoon black pepper
1 teaspoon smoked paprika
1/2 teaspoon garlic powder
1/2 teaspoon onion powder
1 tablespoon vegetable oil
Garlic herb butter sauce:
60g unsalted butter, cubed
5 garlic cloves, smashed
3 sprigs fresh thyme
2 sprigs fresh rosemary
1 tablespoon fresh flat-leaf parsley, chopped
1/4 teaspoon salt
Juice of half a lemon
- Remove pork chops from fridge 20 minutes before cooking to reach room temperature
- Pat both sides of each chop completely dry with paper towels
- Combine salt, black pepper, smoked paprika, garlic powder, and onion powder in a small bowl
- Press spice blend firmly onto both flat sides of each chop
- Heat a large heavy-bottomed skillet over high heat for 2 full minutes
- Add vegetable oil and swirl to coat — it should shimmer and begin to smoke slightly
- Place pork chops in the pan using tongs laying them away from you
- Press each chop gently for 5 seconds to ensure full surface contact
- Cook undisturbed on first side for 3 to 4 minutes until deeply golden-brown
- Check by lifting the edge — pale means 30 to 60 more seconds
- Flip each chop and immediately reduce heat to medium
- Add cubed butter to the pan around and between the chops
- Add smashed garlic cloves, fresh thyme sprigs, and rosemary sprigs into the melting butter
- Begin basting by tilting the pan and spooning the herb butter over each chop
- Baste continuously every 15 to 20 seconds for 3 to 4 minutes
- Check internal temperature with a meat thermometer at the 3-minute mark
- Target temperature is 63°C (145°F) — continue in 1-minute intervals if needed
- Squeeze half a lemon over the chops once target temperature is reached
- Baste once more with the lemony butter then remove pan from heat
- Transfer chops to a clean plate and spoon remaining garlic herb butter generously over each one
- Rest for 5 full minutes before cutting or serving
- Scatter fresh chopped parsley over the rested chops and serve immediately
Common Mistakes to Avoid
Cooking cold pork straight from the fridge: Cold chops cook unevenly and produce an overcooked exterior with an undercooked centre. Always rest at room temperature for 20 minutes before cooking.
Not drying the surface before searing: Wet pork steams rather than sears in a hot pan. Pat completely dry every single time without exception.
Adding butter to the pan too early: Butter burns at a lower temperature than the oil needed for the initial sear. Always sear in oil first, then add butter once the heat reduces to medium for basting. :/
Skipping the rest: Five minutes of resting prevents all the juices from running out on cutting. Skipping it consistently produces dry results despite technically correct cooking temperatures throughout.
FAQs
Q1: Can I use boneless pork chops for this recipe?
Yes — boneless pork chops work well in this recipe with one adjustment. Reduce the searing time on each side by 30 to 60 seconds because boneless chops cook faster than bone-in at the same thickness. Use a thermometer to verify the internal temperature reaches 63°C — visual doneness cues are less reliable with boneless chops because the lack of bone changes the heat distribution throughout the meat.
Q2: What pan works best for searing pork chops?
Cast iron produces the best sear because it retains heat extremely well and maintains its temperature when the cold meat is added. Stainless steel is the second best option. Non-stick pans do not generate enough heat for a proper sear and should be avoided for this specific application. The heavy mass of cast iron absorbs the temperature drop from adding cold meat more effectively than lighter pans.
Q3: How do I stop the garlic from burning during basting?
Use smashed whole garlic cloves rather than minced garlic. Smashed cloves release flavour more slowly and tolerate medium heat for 3 to 4 minutes without burning. Minced garlic at the same heat level burns within 60 to 90 seconds. Additionally, always reduce the heat to medium before adding the butter and garlic — basting happens over medium heat, not high heat.
Q4: Can I make this recipe with pork tenderloin instead?
Yes — pork tenderloin works well using the same technique. Slice the tenderloin into 2.5cm medallions, season the same way, and sear for 2 to 3 minutes per side over high heat. Reduce to medium for the butter basting and target the same internal temperature of 63°C. Tenderloin has a milder flavour than chops but absorbs the garlic herb butter beautifully.
Q5: Why does my pork always come out dry even when I follow the recipe?
Dryness in cooked pork almost always indicates one of three things — the internal temperature exceeded 70°C, the chops rested for less than 5 minutes before cutting, or the meat started cold from the fridge. All three cause moisture loss. Use a thermometer, always rest, and always bring to room temperature before cooking. Addressing all three produces a consistently juicy result every single time.
Wrapping It Up
This garlic butter pan seared pork chops recipe delivers restaurant-quality results in under 30 minutes using one pan and simple pantry ingredients. Bring chops to room temperature, dry them completely, sear on high heat in oil, add butter and aromatics on medium heat, baste continuously for the full cooking time, check temperature at 63°C, and rest for 5 minutes. Those seven habits produce a perfect result every time.
Whether you serve this as a quick weeknight dinner or a weekend showstopper alongside proper mashed potatoes, the results consistently impress. Now go dry those chops and heat that pan until it smokes.