A tuna melt has saved me on more tired lunch breaks than I can count. Three cans of tuna, a block of cheddar, and decent bread are all you need to make something genuinely satisfying in under 15 minutes. No special skills, no equipment beyond a pan, and zero disappointment.
This classic tuna melt sandwich recipe delivers everything the dish promises — creamy, well-seasoned tuna filling, boldly flavoured melted cheese, and bread that crisps to a deep golden brown with a proper crunch on every bite. Whether you make it open-faced or closed, this version beats anything you would order at a cafe.
What You’ll Need (Ingredients)
Affordable, accessible, and mostly pantry staples. The only fresh item you genuinely need is the cheese.
For the tuna filling:
- 2 cans (160g each) tuna in brine or spring water, drained thoroughly
- 3 tablespoons mayonnaise — full fat for best flavour
- 1 tablespoon Dijon mustard
- 2 spring onions, finely sliced
- 1 celery stalk, finely diced
- 1 tablespoon fresh lemon juice
- 1/4 teaspoon garlic powder
- 1/4 teaspoon black pepper
- 1/4 teaspoon smoked paprika
- Salt to taste
For assembly:
- 4 thick slices sourdough bread — or any sturdy bread that holds up to filling and heat
- 100g (3.5 oz) sharp cheddar cheese, freshly grated or sliced — divided across the sandwiches
- 2 tablespoons softened butter — for the bread exterior
Optional additions:
- 2 slices ripe tomato per sandwich
- 4 thin slices red onion
- 1 tablespoon capers, drained
How to Make It — Full Step-by-Step Process
Step One: Drain the Tuna Properly
Open both cans of tuna and drain the liquid as completely as possible. Place the drained tuna directly into a fine mesh sieve or colander and press firmly with the back of a spoon for about 20 seconds to force out any remaining liquid sitting inside the flakes. Excess moisture in the tuna filling makes the bread soggy during cooking and produces a wet, unpleasant texture in the finished sandwich.
After pressing through the sieve, transfer the tuna to a clean paper towel and press gently one more time to absorb any residual surface moisture. This extra step takes 30 seconds and makes a noticeable difference to the final filling consistency. Dry tuna holds the mayonnaise and seasonings without becoming watery and keeps the bread crispy throughout the cooking process rather than steaming from moisture released during heating.
Step Two: Make the Tuna Filling
Add the thoroughly drained tuna to a medium mixing bowl and break it into medium-sized flakes using a fork. Do not over-shred the tuna into tiny, paste-like pieces — keeping some texture in the flakes makes the filling more interesting to eat and prevents the finished sandwich from having a dense, heavy mouthfeel.
Add 3 tablespoons of mayonnaise and 1 tablespoon of Dijon mustard to the tuna. The mustard is important here — it adds a sharp, tangy note that cuts through the richness of the mayonnaise and amplifies the savoury quality of the tuna without making the mixture taste like it contains mustard specifically. Add the finely sliced spring onions, diced celery, 1 tablespoon of lemon juice, 1/4 teaspoon of garlic powder, 1/4 teaspoon of black pepper, and 1/4 teaspoon of smoked paprika.
Fold everything together gently using the fork until all the ingredients combine evenly. Taste the filling at this stage and adjust salt and pepper before assembling. The filling should taste noticeably well-seasoned because bread and cheese both dilute the seasoning once the sandwich comes together. An under-seasoned filling produces a finished sandwich that tastes bland no matter how good the cheese or bread quality is.
FYI — this tuna filling keeps well in the fridge in a sealed container for up to 2 days. Making a double batch lets you assemble sandwiches instantly over the next two days without any prep work whatsoever.
Step Three: Prepare the Bread
Take your 4 slices of sourdough bread and lay them flat on a clean surface. The tuna melt on sourdough bread recipe works particularly well because sourdough has a dense, chewy crumb that holds up to the weight of the filling and withstands the butter-frying process without turning limp or falling apart. However, any thick, sturdy bread works well here — thick white sandwich bread, ciabatta, or a crusty Italian loaf all produce excellent results.
Spread a generous, even layer of softened butter across one side of each bread slice — this is the side that goes face-down into the pan. Use room temperature softened butter rather than cold butter straight from the fridge — cold butter tears the bread surface rather than spreading smoothly, which creates uneven browning in the pan. Aim for a consistent layer that covers the entire surface right to the edges, because any unbuttered spot on the bread remains pale and soft rather than golden and crispy.
Step Four: Assemble the Sandwich
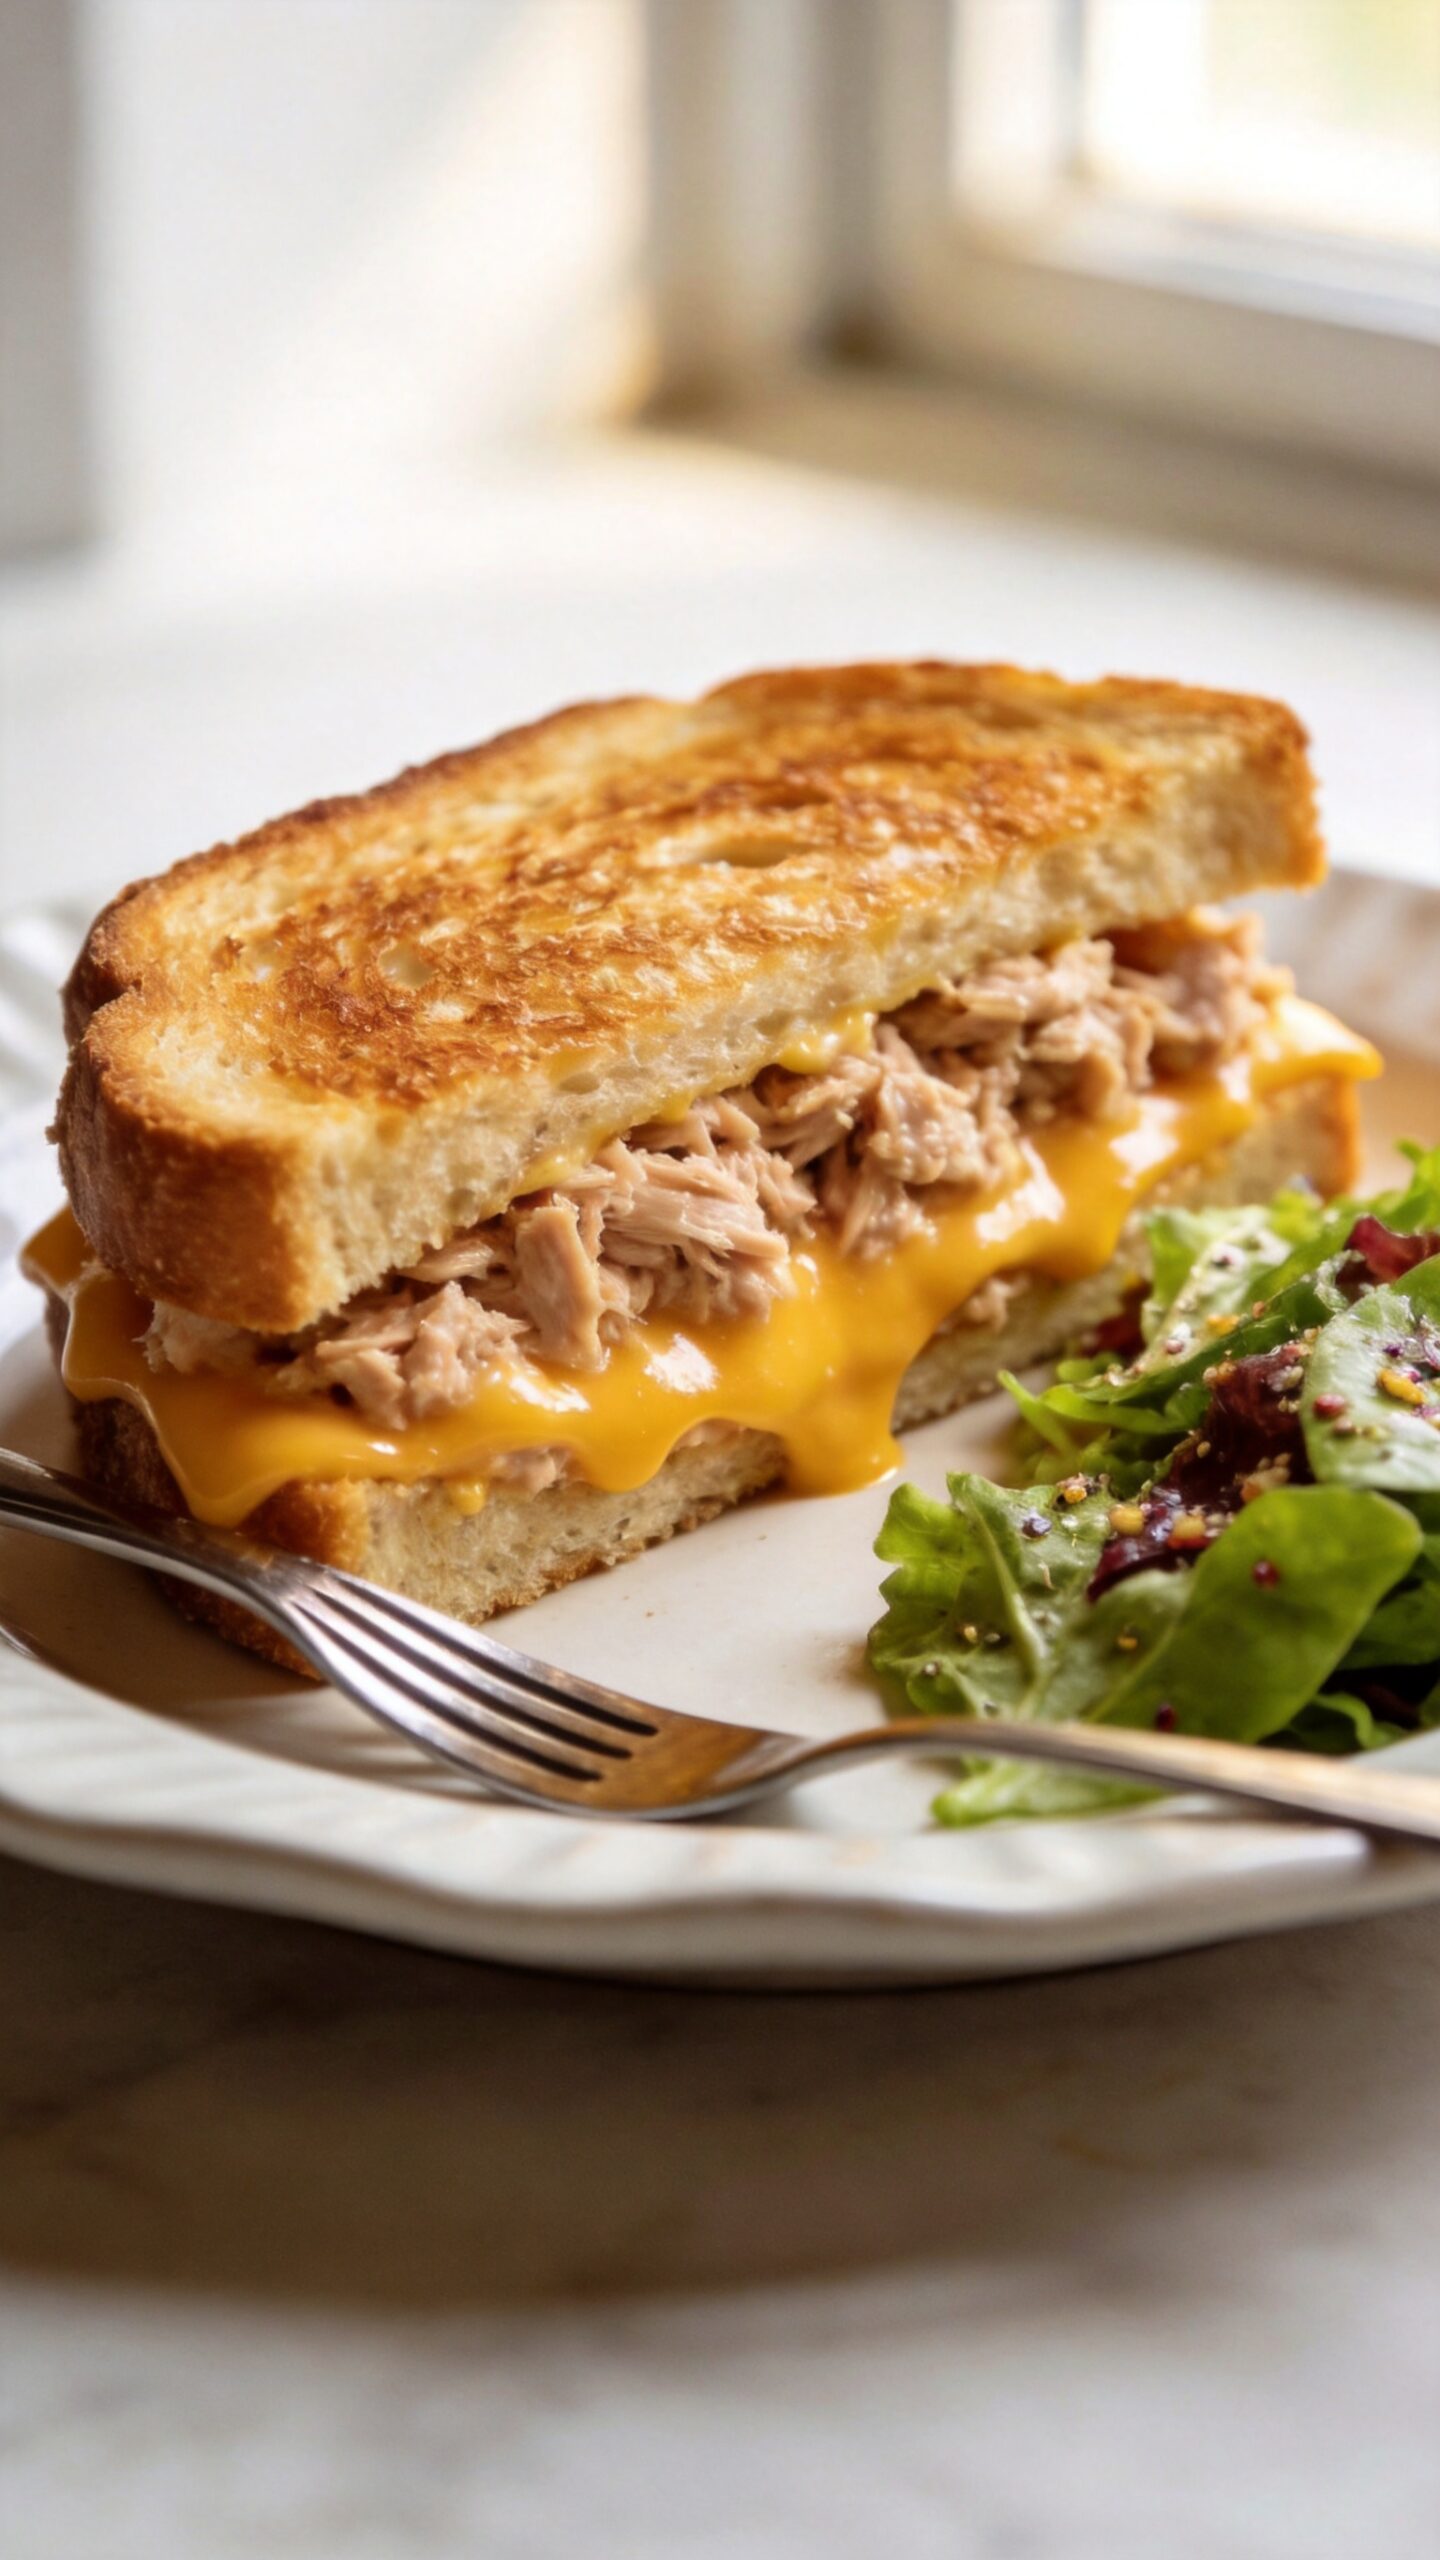
Flip all four bread slices so the buttered side faces down on your work surface. Divide the tuna filling evenly between two of the slices, spreading it in an even layer that reaches all the way to the edges of the bread. A thin or uneven filling layer means some bites taste mostly of bread with very little tuna, while others collapse under an excessive mound of filling.
If you want to add tomato slices or red onion, lay them directly on top of the tuna filling now. Add the sliced or grated cheddar cheese on top of the filling — use approximately 50g per sandwich for a properly cheesy result. Sharp cheddar delivers the most flavour in this application, though Gruyere, Emmental, or a mild cheddar all work well depending on your preference.
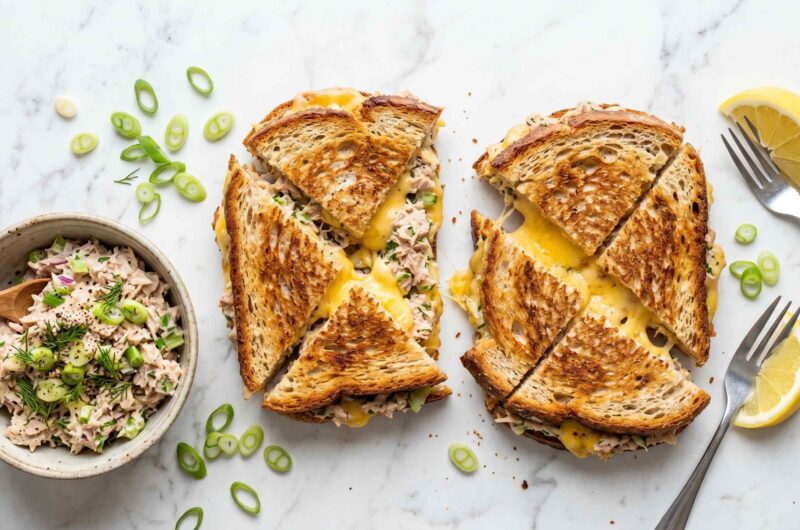
For an open faced tuna melt recipe, stop here and do not add a second bread slice on top. The filling and cheese sit exposed on a single slice and go directly under the grill or into the oven. For a closed sandwich version, place the remaining two buttered bread slices on top of the cheese layer with the buttered side facing outward and ready to make contact with the pan.
Step Five: Cook the Tuna Melt
Place a large non-stick skillet or cast iron pan over medium heat and allow it to heat up for a full 2 minutes before adding anything. A properly preheated pan develops an even, consistent golden crust on the bread within 3 minutes — an under-heated pan produces uneven browning with pale patches and requires longer cooking, which risks overheating the filling before the bread colours properly.
Place the assembled sandwiches butter-side down into the hot pan. You should hear a clear sizzle immediately on contact — if you hear nothing, the pan is not hot enough. Press each sandwich down firmly with a spatula for the first 30 seconds to ensure the entire bread surface makes full contact with the hot pan. Without pressing, the centre of the bread often arches away from the surface and browns more slowly than the edges.
Cook on the first side for 3 to 4 minutes over medium heat without moving or lifting the sandwiches. Resist the urge to check too early — lifting the sandwich before the crust forms tears the bread and removes the buttered surface from the pan before it has time to develop the deep golden colour that defines the best tuna melt recipe crispy bread result. At the 3-minute mark, carefully lift one edge with the spatula to check the colour. It should look deep golden-brown — the colour of well-toasted bread rather than pale honey yellow.
Flip each sandwich carefully using a wide spatula and press down again firmly for the first 30 seconds on the second side. Cook for a further 2 to 3 minutes until the second side matches the colour of the first and the cheese inside has fully melted. You can check whether the cheese has melted by pressing the centre of the sandwich gently with the spatula — a soft, yielding resistance tells you the cheese has gone fully molten inside.
Step Six: For the Open Faced Version
If you make the open faced tuna melt recipe version, spread the tuna filling on two slices of unbuttered bread and top with the cheddar cheese. Place the loaded slices on a baking tray lined with foil and position the rack in your oven as close to the grill element as possible — approximately 15 to 20cm away.
Grill on high for 3 to 4 minutes until the cheese bubbles, turns golden, and shows a few darker spots across the surface. Watch constantly during those 4 minutes — grill heat is intense and direct, and the cheese goes from perfectly bubbling to burnt very quickly. The bread edges should look toasted and the cheese should look deeply golden and slightly charred in places for the best flavour result.
Step Seven: Rest Briefly and Serve
Remove the finished tuna melts from the pan or oven and allow them to rest on a wire rack or chopping board for 60 seconds before cutting. Cutting immediately releases steam from the hot filling and makes the bread soften quickly from the inside. A brief rest keeps the bread crispy for significantly longer after plating.
Cut each closed sandwich diagonally with a sharp serrated knife — the diagonal cut exposes the cross-section of filling and melted cheese, which looks noticeably more appealing than a straight cut. Serve immediately while the cheese remains molten and the bread stays crispy. IMO, a tuna melt eaten within 3 minutes of cooking is one of the most satisfying quick lunches in existence. After 10 minutes it is still good, but that window of perfect crunch does not last forever. :/
Choosing the Right Cheese for Maximum Melt
Have you ever wondered why some tuna melts produce a satisfying, gooey, stretchy cheese pull while others produce a dry, crumbly layer that barely melts at all? The answer comes entirely down to cheese selection and moisture content.
Sharp cheddar delivers the strongest flavour and melts to a creamy, slightly oily consistency that coats the filling beautifully. It does not stretch significantly, but it produces the boldest flavour of any common tuna melt cheese.
Tuna melt with cheddar cheese is the classic American diner standard, and for good reason — the sharpness of aged cheddar plays directly against the richness of the mayo-based filling in a way milder cheeses simply cannot match.
Gruyere melts more smoothly than cheddar and produces a more elegant, nutty flavour. However, it costs significantly more per portion and the flavour difference, while real, is subtle enough that most people would not notice.
Mozzarella produces the best stretch and pull but contributes very little flavour on its own. Mixing half mozzarella and half sharp cheddar gives you both stretch and flavour simultaneously — this combination works brilliantly in the creamy tuna melt sandwich homemade version.
Making It Healthier Without Losing Flavour
The healthy tuna melt recipe easy approach starts with a few smart swaps that reduce calories and saturated fat without compromising the eating experience significantly.
Replace full-fat mayonnaise with a half-and-half mixture of light mayonnaise and plain Greek yogurt. The yogurt adds protein and tang while the reduced-fat mayo keeps the familiar creamy texture. Reduce the butter on the bread to a very thin layer — or replace it with a light spray of cooking oil for even less fat. Use a reduced-fat cheddar or simply use less of the full-fat version — 30g per sandwich still delivers noticeable cheesy flavour.
These swaps bring the calorie count down from approximately 480 to around 340 per serving while keeping the core flavour profile completely intact. The resulting quick tuna melt sandwich lunch tastes very close to the full version and works well for everyday eating.
Common Mistakes to Avoid
Not draining tuna thoroughly enough: Excess moisture makes the filling watery, soaks the bread from the inside, and prevents the bread from crisping properly. Press the tuna in a sieve and then pat with paper towels — both steps matter.
Using cold butter on the bread: Cold butter tears the bread surface rather than spreading evenly and creates hot spots during frying where the bread browns unevenly. Always use room temperature softened butter for an even, consistent golden crust.
Cooking on too high a heat: High heat burns the bread exterior before the cheese inside has time to melt fully. Medium heat gives the cheese 3 to 4 minutes to melt through completely while the bread browns at the right pace alongside it.
Cutting immediately after cooking: Steam trapped inside the hot sandwich softens the bread rapidly once released. A 60-second rest on a wire rack preserves the crispiness noticeably longer and makes the sandwich easier to cut cleanly.
Open Faced Tuna Melt With Crispy Golden Bread
2
servings8
minutes7
minutesThis tuna melt recipe combines a creamy, well-seasoned tuna filling made with mayonnaise, Dijon mustard, celery, and lemon juice, topped with sharp melted cheddar on buttered sourdough bread fried until deeply golden and crispy. Ready in 15 minutes, it delivers a genuinely satisfying classic tuna melt sandwich every single time.
Ingredients
Tuna filling:
2 cans (160g each) tuna in brine, drained thoroughly
3 tablespoons full-fat mayonnaise
1 tablespoon Dijon mustard
2 spring onions, finely sliced
1 celery stalk, finely diced
1 tablespoon fresh lemon juice
1/4 teaspoon garlic powder
1/4 teaspoon black pepper
1/4 teaspoon smoked paprika
Salt to taste
Assembly:
4 thick slices sourdough bread
100g sharp cheddar cheese, grated or sliced
2 tablespoons softened butter
Optional:
2 slices ripe tomato per sandwich
4 thin slices red onion
1 tablespoon capers, drained
- Open and drain both tuna cans completely through a fine mesh sieve
- Press the drained tuna firmly with the back of a spoon for 20 seconds to remove remaining liquid
- Transfer tuna to a paper towel and press gently to absorb surface moisture
- Add drained tuna to a mixing bowl and break into medium flakes with a fork
- Add mayonnaise, Dijon mustard, sliced spring onions, and diced celery to the bowl
- Add lemon juice, garlic powder, black pepper, and smoked paprika
- Fold all filling ingredients together gently until evenly combined
- Taste and adjust salt and pepper to ensure filling tastes well-seasoned
- Lay all four bread slices flat on a clean surface
- Spread softened butter evenly across one side of each slice right to the edges
- Flip all bread slices so buttered side faces down
- Divide tuna filling evenly between two slices and spread to the edges
- Add tomato or red onion slices on top of the filling if using
- Divide cheddar cheese evenly over the filling on both loaded slices
- Place remaining two bread slices on top with buttered side facing outward
- Heat a non-stick skillet over medium heat for 2 full minutes
- Place sandwiches butter-side down into the hot pan and press firmly with a spatula
- Cook undisturbed for 3 to 4 minutes until the underside turns deep golden brown
- Check colour by lifting one edge carefully before flipping
- Flip each sandwich and press down again firmly for the first 30 seconds
- Cook second side for 2 to 3 minutes until golden and cheese feels melted when pressed
- Remove from pan and rest on a wire rack for 60 seconds
- Cut each sandwich diagonally with a sharp serrated knife
- Serve immediately while bread is crispy and cheese remains fully molten
FAQs
Q1: What type of tuna works best in a tuna melt?
Tuna in brine or spring water works best because it drains more completely than tuna in oil and produces a cleaner, less greasy filling. Chunk light tuna and albacore both work well — albacore has a firmer texture and milder flavour, while chunk light has a stronger tuna taste that stands up better to bold seasonings. Avoid tuna in oil for this recipe as the excess fat makes the filling noticeably heavier.
Q2: Can I make tuna melt in the oven instead of a pan?
Yes. Assemble the closed sandwich, place on a baking tray, and bake at 200°C (400°F) for 10 minutes, flipping once halfway through. The crust develops more slowly than pan-frying and the colour is slightly less deep, but the cheese melts fully and the overall result tastes excellent. This method works particularly well when making four or more sandwiches simultaneously.
Q3: How do I stop the filling from falling out during cooking?
Spread the filling in an even, controlled layer that stops 5mm from the bread edges. Do not overfill — a filling layer more than 1.5cm thick slides out when the sandwich is pressed during cooking. Additionally, chilling the assembled sandwich in the fridge for 10 minutes before cooking firms the mayonnaise slightly and helps the filling hold together more securely during the cooking process.
Q4: Can I add vegetables to the tuna filling?
Yes — diced red bell pepper, sweet corn, grated carrot, and finely chopped pickled gherkin all work well in the filling. Add any vegetable in small, uniformly diced pieces so they distribute evenly rather than creating lumpy pockets throughout. Avoid high-moisture vegetables like cucumber or fresh tomato added directly into the filling mixture — they release water during mixing and make the filling watery.
Q5: What bread works best for a tuna melt if I do not have sourdough?
Thick white sandwich bread, ciabatta, or a sturdy Italian loaf all work excellently. The key requirement is thickness — bread thinner than 1.5cm compresses during frying and produces a flat, dense sandwich with very little structural integrity. Avoid very soft sandwich bread like brioche for the pan-fried version — it absorbs butter too quickly and burns before the cheese melts through fully.
Wrapping It Up
This tuna melt recipe easy enough for any weeknight delivers crispy bread, creamy well-seasoned filling, and perfectly melted cheese in just 15 minutes. Drain the tuna thoroughly, season the filling assertively, spread butter evenly on the bread, cook on medium heat without rushing, and rest briefly before cutting. Those five habits guarantee a consistently outstanding result every time.
Whether you make the classic closed version, the open faced tuna melt recipe on sourdough, or the lighter healthy swap build, this sandwich delivers. Now go make one while it is still lunchtime. 🙂