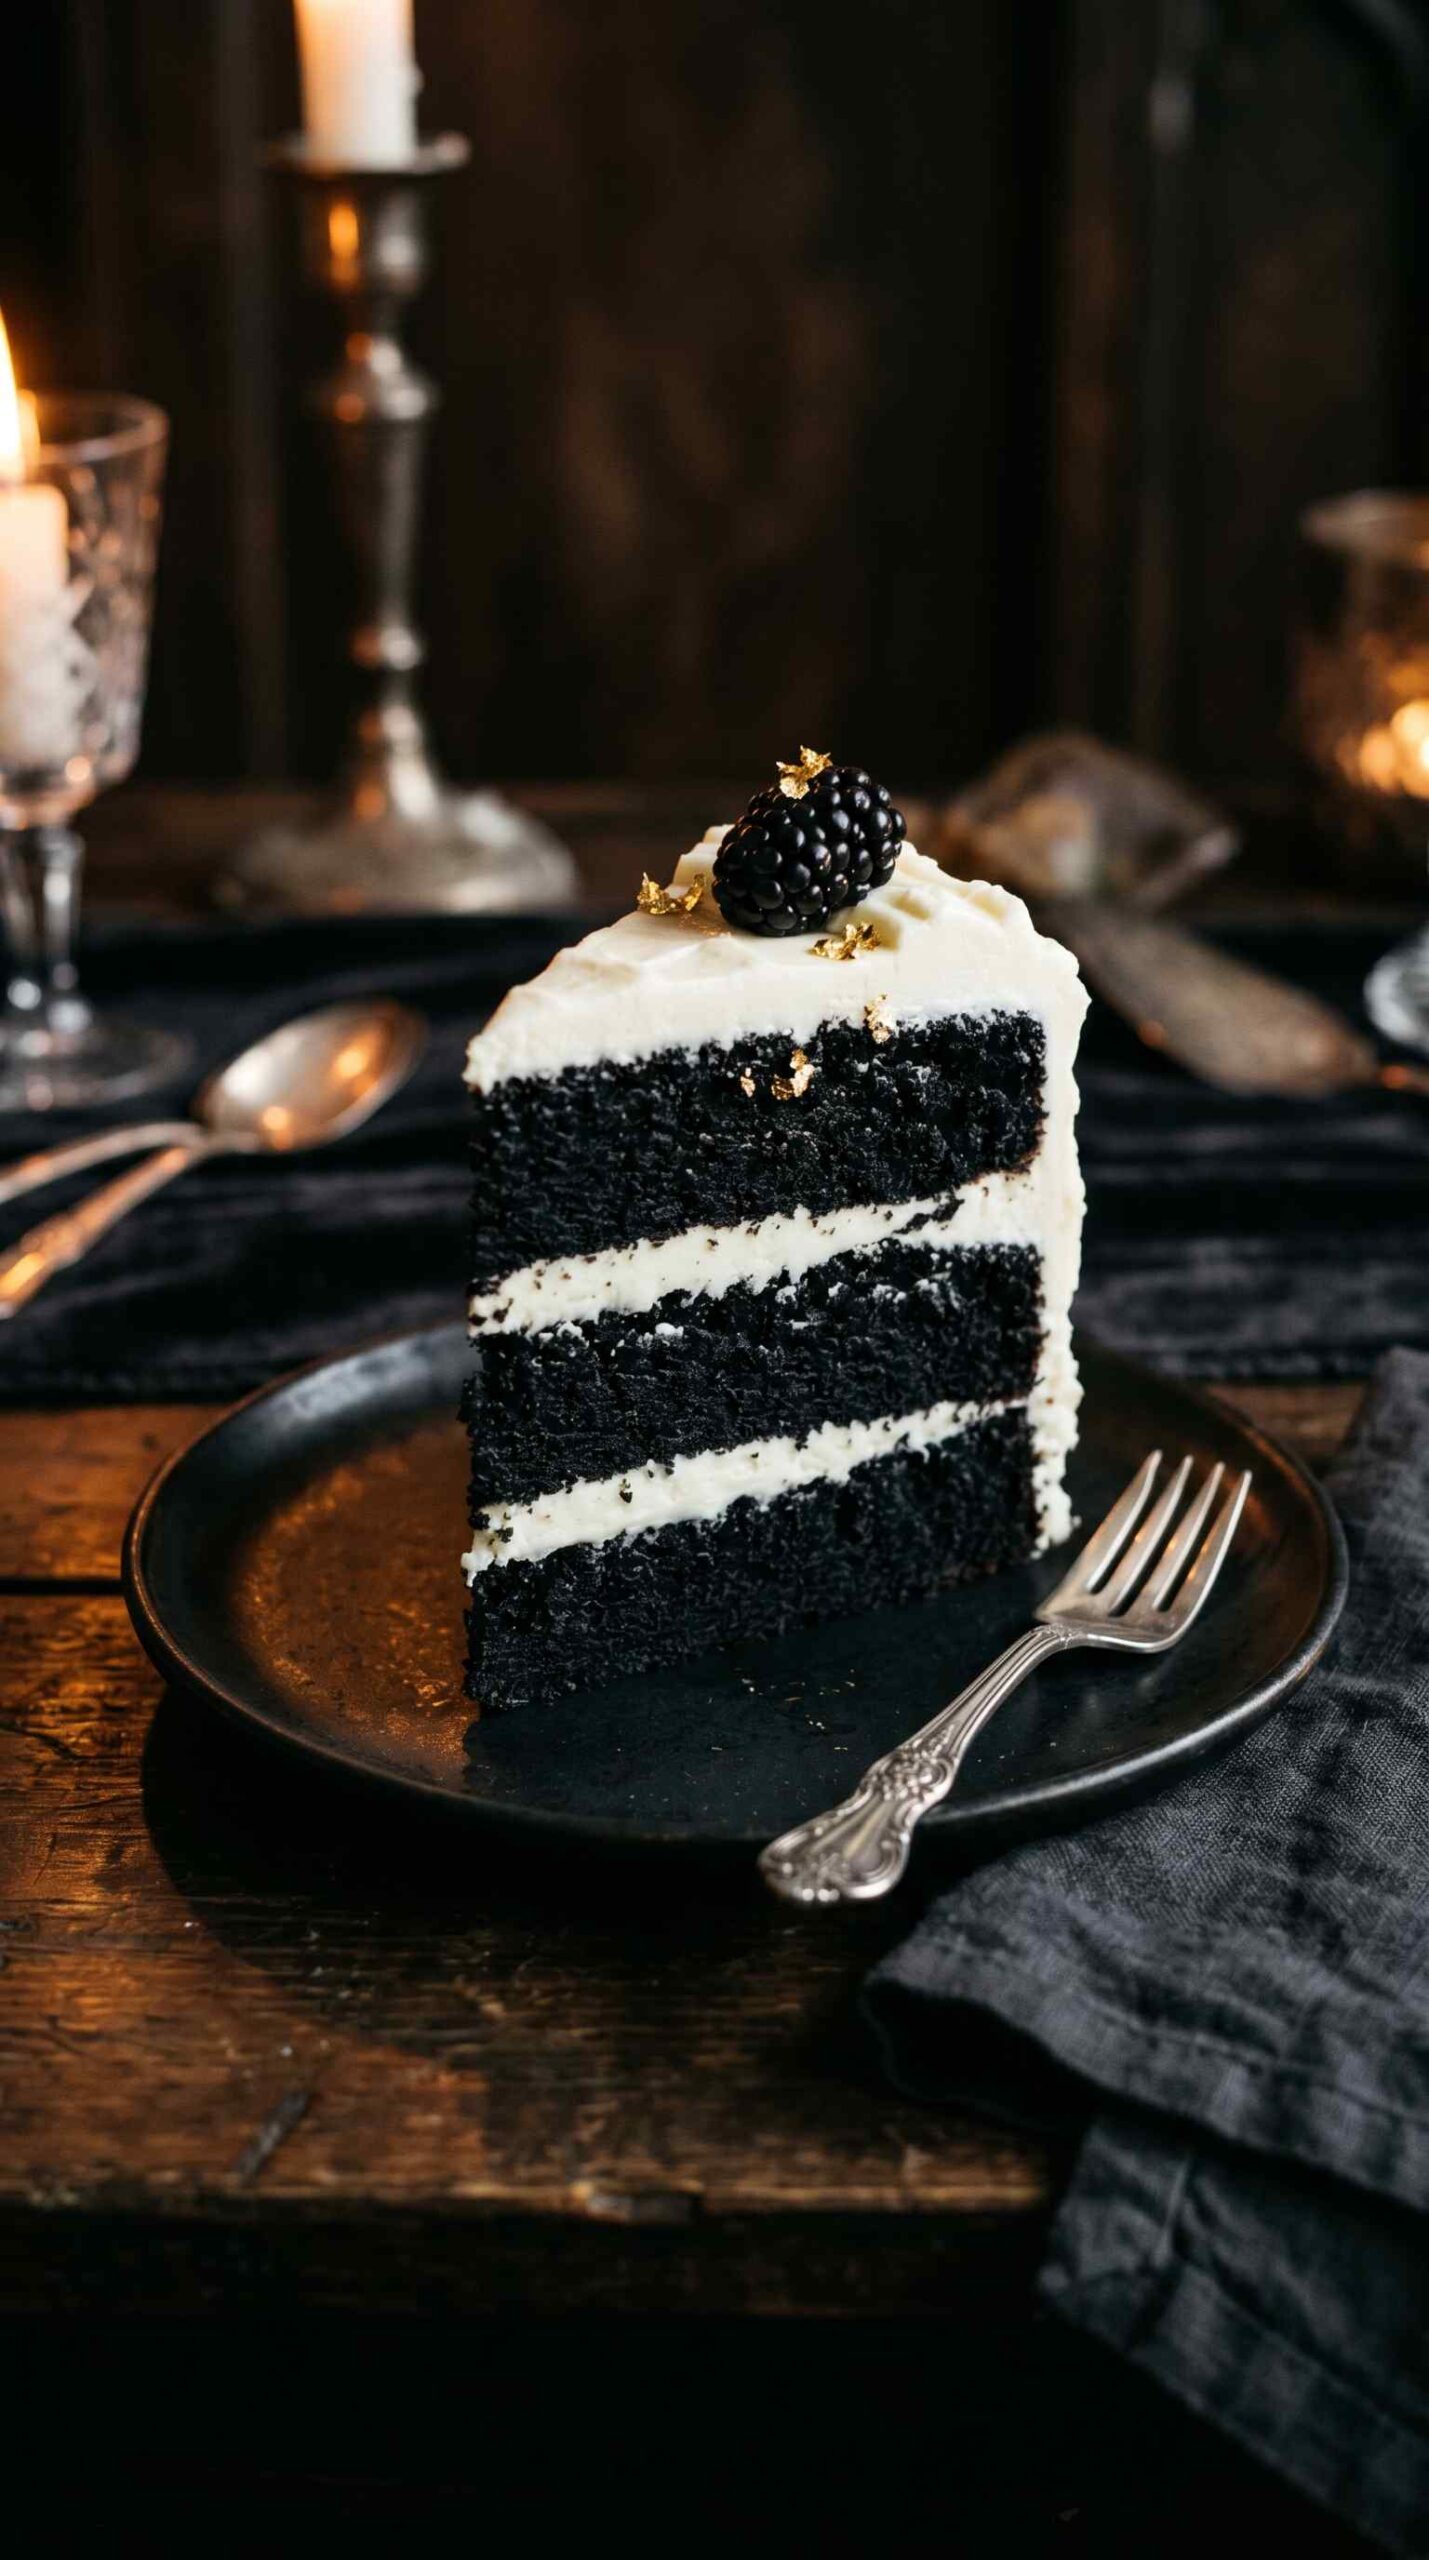
Black velvet cake is the kind of thing you bring to a party and watch every single head turn simultaneously. I made this for a Halloween dinner last year and three people refused to believe it was homemade until they saw the leftover crumbs in my kitchen. That is the power of a truly black cake.
This black velvet cake recipe homemade version uses black cocoa powder — the same deeply alkalized cocoa used in Oreo cookies — to achieve a genuinely dark, almost midnight-black crumb. The flavour is rich, smooth, and intensely chocolatey without being overwhelmingly bitter. Paired with silky white cream cheese frosting, the contrast looks absolutely extraordinary.
What You’ll Need (Ingredients)
Every ingredient here serves a specific purpose. Nothing appears on this list by accident.
For black velvet cake layers:
- 240g (2 cups) plain flour
- 80g (3/4 cup) black cocoa powder — this is non-negotiable for the true black colour
- 300g (1.5 cups) caster sugar
- 2 teaspoons baking powder
- 1 teaspoon bicarbonate of soda
- 1/2 teaspoon salt
- 3 large eggs, room temperature
- 240ml (1 cup) buttermilk, room temperature
- 120ml (1/2 cup) vegetable oil
- 240ml (1 cup) hot strong brewed coffee or hot water with 2 teaspoons instant espresso dissolved
- 2 teaspoons vanilla extract
- 1 teaspoon white wine vinegar
- 2 tablespoons black gel food colouring — deepens the colour further if needed
Cream cheese frosting:
- 300g (10.5 oz) full-fat cream cheese, softened at room temperature
- 150g (10.5 tablespoons) unsalted butter, softened at room temperature
- 450g (4 cups) icing sugar, sifted
- 2 teaspoons vanilla extract
- 1 pinch of salt
- 1 to 2 tablespoons heavy cream — only if needed to adjust consistency
For decoration:
- Black cocoa powder or activated charcoal powder for dusting
- Edible gold leaf or gold dust — for contrast against the dark frosting if desired
- Dark chocolate shavings or curls
- Fresh blackberries or black cherries
How to Make It — Full Step-by-Step Process
Step One: Preheat and Prepare the Tins
Set your oven to 175°C (350°F) fan-forced or 180°C (360°F) conventional. Preheat for at least 20 minutes before the batter goes in. Consistent oven temperature from the moment the tins enter produces even rise and a flat top on both layers, which makes assembly significantly easier.
Take two 20cm (8 inch) round cake tins and grease the base and sides thoroughly with softened butter or cooking spray. Cut two circles of baking parchment to fit the base of each tin and press flat. Grease the parchment circles as well. The double-grease method prevents sticking reliably — particularly important with black cocoa batter, which can cling to ungreased surfaces more aggressively than standard cocoa batter because of its highly alkalized, slightly drier nature.
Step Two: Combine the Dry Ingredients
Sift 240g of plain flour, 80g of black cocoa powder, 2 teaspoons of baking powder, 1 teaspoon of bicarbonate of soda, and 1/2 teaspoon of salt into a large mixing bowl. The sifting step is non-negotiable for black cocoa powder specifically — it clumps more severely than regular cocoa powder because of its low residual fat content after alkalization, and unsifted lumps produce visible dark spots in the finished batter.
Add 300g of caster sugar to the sifted dry ingredients and whisk everything together with a balloon whisk for about 20 seconds. This brief whisking step distributes the raising agents completely and evenly through the flour before any wet ingredients are added — preventing pockets of concentrated bicarbonate of soda that can leave a faintly soapy aftertaste in the finished cake.
Step Three: Mix the Wet Ingredients
In a large separate jug, whisk together 3 room temperature eggs, 240ml of buttermilk, 120ml of vegetable oil, and 2 teaspoons of vanilla extract. Whisk vigorously for about 30 seconds until the mixture looks uniform and slightly pale. Add 1 teaspoon of white wine vinegar and whisk briefly to incorporate.
The buttermilk and vinegar combination serves two purposes simultaneously. First, the acidity reacts with the bicarbonate of soda to produce carbon dioxide bubbles that create lift during baking. Second, the acidity tenderises the gluten structure in the flour, which produces a noticeably softer, more tender crumb than a recipe without an acidic component. Both of these effects contribute directly to the moist black velvet layer cake recipe texture this dish is known for.
If you want to deepen the black colour further, add 2 tablespoons of black gel food colouring to the wet ingredients now and whisk it through until the mixture turns completely dark throughout. The black cocoa powder alone produces a very deep, dark grey-brown batter — the gel colouring takes it to true black.
Step Four: Combine Wet and Dry
Pour the wet ingredient mixture into the bowl of sifted dry ingredients. Fold together with a large spatula using wide, slow circular motions until the batter looks just combined with no visible dry flour streaks remaining. The batter will appear very dark, almost black, and slightly thick at this stage — both of which are correct.
Do not over-mix. Every additional fold after the flour disappears develops more gluten and toughens the crumb. Fold only until combined, count your folds as you go, and stop firmly at 20 folds if in doubt. A few small lumps in the batter cause no problems — they disappear during baking without leaving any trace in the finished cake.
Step Five: Add the Hot Coffee
With the batter at just-combined stage, pour in 240ml of hot strong coffee slowly while folding very gently. The batter will thin significantly and look almost liquid after the coffee goes in. This is not only normal — it is exactly right. Do not add more flour to compensate for the thin consistency.
Hot coffee blooms the black cocoa powder by opening the cocoa particle structure and releasing its full flavour compounds. The same volume of cold liquid does not achieve this effect. Additionally, the hot coffee contributes to the exceptionally moist, fudgy texture that defines a properly made rich dark velvet cake dessert recipe. Thin batter going into the oven is what produces that dense, moist, almost brownie-like crumb texture after baking.
Divide the finished batter evenly between the two prepared tins. Pour slowly and tap each tin firmly on the counter 3 to 4 times after filling to release air bubbles from the batter before baking.
Step Six: Bake the Layers
Place both tins on the centre rack of the preheated oven with at least 5cm of space between them. This spacing allows hot air to circulate freely around both tins and prevents one side of each layer from baking faster than the other, which causes uneven rise and a tilted top.
Bake for 30 to 35 minutes without opening the oven door during the first 25 minutes. The black colour of this batter makes visual doneness cues much harder to read than with lighter cakes — you cannot rely on surface colour change as a reliable indicator. Instead, rely entirely on the skewer test. At 30 minutes, insert a clean skewer into the deepest centre point of each layer. A skewer that comes out with a few moist crumbs clinging to it means the cake is done. Wet batter on the skewer means 3 to 4 more minutes.
Remove both tins from the oven and set on a wire rack. Allow them to cool in the tins for 15 minutes. After 15 minutes, run a thin knife along the inside edge of each tin, invert onto the wire rack, and peel the parchment circles off carefully. Cool both layers completely — a minimum of 45 minutes at room temperature — before applying any frosting. FYI, this cooling time is genuinely critical with cream cheese frosting, which melts almost immediately on contact with a warm cake surface.
Step Seven: Make the Cream Cheese Frosting
Place 300g of softened room temperature cream cheese and 150g of softened room temperature butter into a large mixing bowl. Beat together on medium speed for 2 minutes until the mixture looks completely smooth, pale, and uniform with no visible lumps of either ingredient remaining. Both the cream cheese and butter must be genuinely soft — not partially melted and not still cold from the fridge.
Add the sifted icing sugar in four separate additions, mixing on low speed after each addition until the sugar incorporates fully before adding more. After the final addition, increase to medium speed and beat for 2 minutes until the frosting looks smooth, creamy, and just firm enough to hold soft peaks. Add 2 teaspoons of vanilla extract and a pinch of salt and beat for a final 30 seconds. The frosting should look bright white, hold its shape when you lift the beaters, and spread smoothly without tearing.
If the frosting looks too stiff to spread easily, add heavy cream one tablespoon at a time and beat briefly after each addition until the consistency reaches your preference. If it looks too soft, refrigerate for 15 minutes to firm slightly before using.
Step Eight: Apply a Crumb Coat
Place one completely cooled black velvet cake layer on a flat serving plate or cake board. Spread approximately 3 tablespoons of cream cheese frosting across the top surface in a thin, even layer. The white frosting against the black crumb creates an immediate, stark contrast — even this first thin layer looks visually dramatic. Place the second layer directly on top and press very gently to seat it flat.
Apply a thin crumb coat of frosting — approximately 4 tablespoons total — across the top and sides of the assembled cake using an offset spatula. The crumb coat seals all the loose black crumbs against the cake surface so they do not contaminate the bright white final frosting layer. Without a crumb coat, black crumbs from the cake surface drag through the white frosting and create a grey, smeared appearance rather than the clean, high-contrast finish that makes this gothic black velvet cake design so visually striking.
Refrigerate the crumb-coated cake for 20 minutes to firm this initial layer before proceeding.
Step Nine: Apply the Final Frosting Layer
Remove the crumb-coated cake from the fridge and apply the remaining cream cheese frosting in a generous, even layer across the top and sides. Use an offset spatula for the top, working from the centre outward to the edges. For the sides, hold the spatula vertically against the frosting and work around the cake in long, smooth strokes.
For a clean, professional finish, use a bench scraper or the flat side of a long palette knife held vertically against the frosting while slowly rotating the cake on the plate. This smoothing technique removes excess frosting and produces flat, even sides in one clean motion. For the elegant black birthday cake ideas approach, leave the sides slightly textured with visible spatula marks rather than perfectly smooth — the handmade texture adds visual interest and character that a machine-smooth surface does not have.
Step Ten: Decorate for Maximum Impact
The decoration of a black velvet cake works most effectively through contrast. White frosting against black cake is already visually powerful — adding a second contrasting element elevates it further into genuinely show-stopping territory.
Dust a light scatter of black cocoa powder or activated charcoal powder across the white frosting using a fine sieve. The dark dusting creates a subtle depth that makes the white frosting look dimensional rather than flat. Arrange fresh blackberries or dark cherries in a loose cluster on top for colour contrast — the deep purple-black fruit against the white frosting looks extraordinary.
For a luxury black velvet wedding cake ideas level of decoration, press small squares of edible gold leaf gently onto the frosting using a dry soft brush. The gold creates a three-way contrast — white frosting, black cake, gold detail — that looks genuinely luxurious and expensive while requiring no specialist skill beyond patience and a steady hand. Add a scatter of dark chocolate curls around the fruit cluster to complete the composition. Refrigerate the finished cake for 20 minutes to firm everything before slicing.
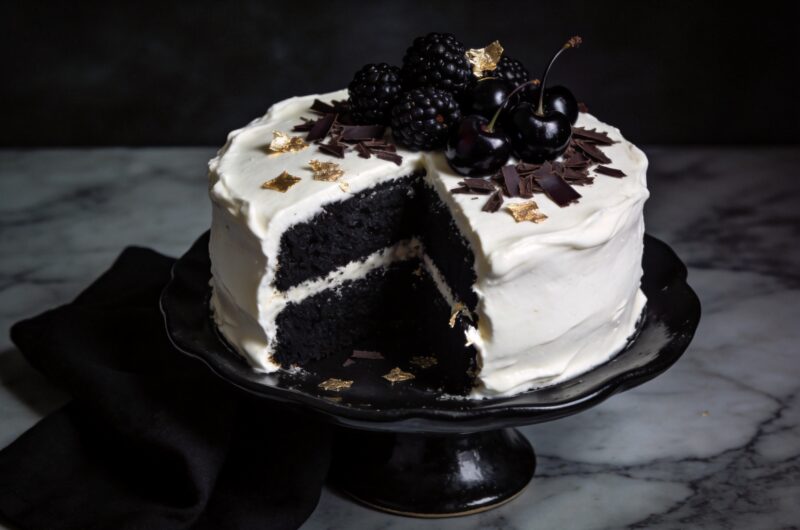
Moist Black Cocoa Velvet Cake With Cream Frosting
12
servings30
minutes33
minutes1
hour10
minutesThis black velvet cake uses black cocoa powder and hot coffee to create deeply dark, moist cake layers paired with bright white cream cheese frosting for a dramatic high-contrast finish. Rich, smooth, and genuinely black from crumb to crust, it delivers a visually stunning and deeply flavoured celebration cake every time.
Ingredients
Black velvet cake layers:
240g plain flour
80g black cocoa powder
300g caster sugar
2 teaspoons baking powder
1 teaspoon bicarbonate of soda
1/2 teaspoon salt
3 large eggs, room temperature
240ml buttermilk, room temperature
120ml vegetable oil
240ml hot strong brewed coffee
2 teaspoons vanilla extract
1 teaspoon white wine vinegar
2 tablespoons black gel food colouring (optional)
Cream cheese frosting:
300g full-fat cream cheese, softened
150g unsalted butter, softened
450g icing sugar, sifted
2 teaspoons vanilla extract
1 pinch salt
1 to 2 tablespoons heavy cream (if needed)
Decoration:
Black cocoa powder or activated charcoal for dusting
Edible gold leaf or gold dust
Dark chocolate shavings
Fresh blackberries or dark cherries
- Preheat oven to 175°C fan or 180°C conventional for at least 20 minutes
- Grease two 20cm round tins, line bases with parchment, and grease parchment
- Sift black cocoa powder, plain flour, baking powder, bicarbonate of soda, and salt into a large bowl
- Add caster sugar and whisk dry ingredients together briefly for 20 seconds
- Whisk eggs, buttermilk, vegetable oil, vanilla extract, and white wine vinegar together in a separate jug
- Add black gel food colouring to the wet ingredients and whisk until fully incorporated if using
- Pour wet mixture into the dry ingredients bowl
- Fold together with a spatula until just combined with no dry flour streaks remaining
- Pour hot strong brewed coffee into the batter slowly while folding gently
- Divide batter evenly between both prepared tins
- Tap each tin firmly on the counter 3 to 4 times to release air bubbles
- Bake on centre rack for 30 to 35 minutes without opening door in the first 25 minutes
- Test with a skewer at 30 minutes — moist crumbs means done, wet batter means 3 more minutes
- Cool in tins for 15 minutes then invert onto a wire rack and peel off parchment
- Cool completely for at least 45 minutes before assembling
- Beat softened cream cheese and softened butter together on medium speed for 2 minutes until smooth
- Add sifted icing sugar in four additions mixing on low between each addition
- Beat on medium speed for 2 minutes after final addition until smooth and firm
- Add vanilla extract and salt and beat for 30 seconds more
- Add heavy cream one tablespoon at a time if frosting needs loosening
- Place first cooled cake layer on a serving plate
- Spread 3 tablespoons of frosting across the top of the first layer
- Place second layer on top and press gently to seat flat
- Apply a thin crumb coat of frosting across the top and sides of the assembled cake
- Refrigerate for 20 minutes to firm the crumb coat
- Apply remaining frosting in a generous even layer across the top and sides
- Smooth sides using a bench scraper or long palette knife held vertically
- Dust the top lightly with black cocoa powder through a fine sieve
- Arrange fresh blackberries or dark cherries in a cluster on top
- Press edible gold leaf onto the frosting using a dry soft brush if using
- Add dark chocolate shavings around the fruit cluster
- Refrigerate for 20 minutes to firm everything before slicing and serving
Why Black Cocoa Powder Makes All the Difference
Have you ever tried to achieve a true black cake using regular Dutch-processed cocoa and ended up with a very dark brown result instead? That is because standard cocoa powder — even the darkest Dutch-processed variety — does not contain enough pigment to reach true black regardless of how much you use.
Black cocoa powder undergoes a much more intensive alkalization process than standard Dutch-processed cocoa. This extra process removes almost all residual acidity and most of the natural cocoa fat, which darkens the colour dramatically and produces a uniquely smooth, mild chocolate flavour without any bitterness. The result tastes more like a very smooth milk chocolate than a dark one — which is why the black cocoa velvet cake recipe easy version pairs so well with the tangy brightness of cream cheese frosting.
IMO, black cocoa powder is one of those specialist baking ingredients that produces a completely disproportionate improvement in the final result for the small effort of sourcing it. Once you use it, regular cocoa powder in this recipe feels like a genuine compromise.
Making This Into a Gothic or Halloween Showpiece
The easy black velvet cake from scratch base recipe adapts beautifully for Gothic-themed occasions with a few additions that require no specialist skills.
Spider web effect: Pipe concentric circles of dark chocolate ganache across the top of the white frosted cake, then drag a toothpick from the centre outward through the circles at regular intervals to create a classic spider web pattern. The contrast between dark ganache and white frosting creates an immediately recognisable Gothic decoration in under 5 minutes.
Drip effect: Melt 80g of dark chocolate with 2 tablespoons of heavy cream and allow to cool to room temperature until slightly thickened. Spoon around the edge of the chilled frosted cake, allowing controlled drips to fall naturally down the white frosted sides. The dark chocolate drips against white frosting create a dramatic, Gothic effect that suits this dark chocolate velvet cake recipe perfectly.
Midnight black frosting version: For a fully black exterior, add 2 tablespoons of black gel food colouring to the cream cheese frosting and beat until fully incorporated. The frosting turns deep black and the cake becomes entirely monochrome — an even more dramatic presentation that IMO belongs at the most dramatic dinner parties only.
Common Mistakes to Avoid
Using regular cocoa instead of black cocoa: Regular cocoa, even Dutch-processed, produces a dark brown cake rather than a true black one. Black cocoa powder is the only ingredient that achieves the genuine black colour this recipe promises. Substituting regular cocoa changes both the colour and the flavour profile significantly.
Skipping the crumb coat: Black cake crumbs dragged through white frosting create a grey, smeared surface rather than the crisp, high-contrast finish this cake depends on for its visual impact. The crumb coat step takes 5 minutes and produces a dramatically cleaner result.
Using cold cream cheese or butter in the frosting: Cold cream cheese beats unevenly and produces a lumpy frosting full of small white flecks that do not smooth out regardless of further beating. Both cream cheese and butter must reach genuine room temperature — not just slightly warmer than fridge temperature — before beating begins.
Frosting a warm cake: Cream cheese frosting melts almost immediately on contact with a warm cake surface. The layers slide, the frosting absorbs into the crumb, and the clean white surface turns grey from mixing with the black cake. Always cool completely — 45 minutes minimum. :/
FAQs
Q1: Where can I buy black cocoa powder?
Black cocoa powder is available from specialist baking supply shops, online retailers, and some well-stocked supermarkets in the baking section. Search for “Dutch-process black cocoa powder” or “ultra-dark cocoa powder” online — King Arthur Flour and Valrhona both produce widely available options. Activated charcoal powder works as a colour additive but does not contribute the same flavour as black cocoa.
Q2: Can I make this recipe without buttermilk?
Yes — make a buttermilk substitute by adding 1 tablespoon of white wine vinegar or lemon juice to 240ml of whole milk. Stir briefly and leave for 5 minutes until the milk curdles slightly. This homemade buttermilk substitute behaves identically to commercial buttermilk in the batter and produces the same tender, moist crumb result.
Q3: Why does my black cake look dark brown rather than true black after baking?
Dark brown results almost always mean regular cocoa or standard Dutch-process cocoa was used instead of true black cocoa. Additionally, insufficient black gel colouring in the batter can prevent the finished cake from reaching true black. Use black cocoa powder and supplement with 2 tablespoons of black gel colouring for the deepest, truest black result.
Q4: How do I stop the white frosting from going grey?
Two things prevent grey frosting. First, apply a proper crumb coat and refrigerate it before the final frosting layer — this seals black crumbs under the first layer so they cannot contaminate the white final coat. Second, keep your spatula clean during application by wiping it with a damp cloth every 2 to 3 strokes to remove any black crumbs that transfer onto the spatula during spreading.
Wrapping It Up
This black velvet cake recipe delivers a genuinely stunning, deeply flavoured, visually dramatic cake from a straightforward baking process. Use black cocoa powder, sift the dry ingredients thoroughly, fold to just combined, add hot coffee last, cool completely before frosting, apply a crumb coat before the final layer, and decorate with contrasting elements for maximum visual impact. Those seven habits produce a perfect result every single time.
Whether you make it for Halloween, a Gothic birthday, a dramatic dinner party, or simply because you want the most visually striking cake in the room — this recipe delivers completely. Now go find some black cocoa powder and make something genuinely unforgettable.