The first time I made a fluffy Japanese cotton cake roll, I fully expected to fail. The sponge looked too delicate, the rolling process looked terrifying, and the whole thing seemed designed to crack dramatically at the worst possible moment. It did not crack. It rolled perfectly, looked gorgeous, and tasted like a cloud filled with sweet cream.
This cotton candy Japanese cake roll recipe combines the signature airy Japanese sponge technique with a pastel cotton candy colour scheme and a lightly sweetened whipped cream filling. The result looks completely extraordinary on a plate — and once you understand why each step works, the whole process feels genuinely manageable even for a first attempt.
What You’ll Need (Ingredients)
Everything here comes from a standard supermarket. Cotton candy flavouring and pastel gel colours are the only items that may require an online order.
For Japanese sponge roll:
- 4 large eggs, separated — room temperature
- 80g (1/3 cup) caster sugar — divided into two equal portions of 40g each
- 60g (1/2 cup) plain flour, sifted twice
- 20g (2.5 tablespoons) cornstarch — this is what makes the sponge genuinely tender
- 1/4 teaspoon cream of tartar
- 2 tablespoons whole milk, room temperature
- 2 tablespoons vegetable oil or melted butter
- 1/2 teaspoon vanilla extract
- 1/4 teaspoon cotton candy flavouring — available online or at baking supply stores
- Pastel gel food colouring — pink, blue, and lavender work best for the cotton candy aesthetic
Cotton candy whipped cream filling:
- 350ml (1.5 cups) double cream or heavy whipping cream, very cold
- 3 tablespoons icing sugar, sifted
- 1/4 teaspoon cotton candy flavouring
- 1 drop pink gel food colouring — optional, for a soft pastel cream
For decoration:
- A small amount of actual cotton candy or candy floss — for the top
- Edible star or heart sprinkles
- A dusting of icing sugar through a fine sieve
How to Make It — Full Step-by-Step Process
Step One: Prepare the Tin and Preheat
Set your oven to 170°C (340°F) fan-forced or 175°C (350°F) conventional. Allow it to preheat for at least 15 minutes before the batter goes in. A Swiss roll or jelly roll tin measuring approximately 25x38cm (10×15 inches) works best here — a shallower, wider tin produces a thinner sponge that rolls easily without cracking.
Line the tin completely with baking parchment, pressing it firmly into all four corners so no gaps exist between the parchment and the tin walls. The parchment must extend at least 2cm above the rim of the tin on all sides — you will use these overhanging edges to lift the baked sponge out of the tin without touching the surface. Grease the parchment lightly with cooking spray or a tiny amount of butter, then dust with a very fine coating of plain flour and tap out any excess.
Step Two: Separate the Eggs and Prepare Two Bowls
Separate all 4 eggs carefully, placing the yolks in one large bowl and the whites in a second completely clean, grease-free bowl. Any trace of yolk in the whites prevents them from whipping to a proper stiff meringue — even a tiny amount of fat breaks the foam structure. If a small piece of yolk falls into the whites, remove it immediately using a clean piece of eggshell rather than a spoon, which pushes the yolk deeper.
Allow both the yolks and whites to sit at room temperature for 15 minutes before using. Room temperature egg whites whip to a significantly larger volume than cold whites, and room temperature yolks incorporate into the batter more smoothly. This small detail makes a real difference to the final texture of this airy Japanese Swiss roll cake easy method.
Step Three: Make the Yolk Batter
Add 40g of caster sugar to the egg yolk bowl and whisk vigorously for about 1 minute until the mixture turns pale yellow and slightly thickened. Add 2 tablespoons of vegetable oil, 2 tablespoons of whole milk, 1/2 teaspoon of vanilla extract, and 1/4 teaspoon of cotton candy flavouring. Whisk until fully combined and smooth.
Sift the 60g of plain flour and 20g of cornstarch directly into the yolk mixture. Fold gently using a spatula with wide, slow circular motions until no dry streaks remain. The batter at this stage looks thick and slightly sticky — this is correct. The meringue added in the next step will lighten it considerably. Set the yolk batter aside.
Step Four: Whip the Egg White Meringue
Add 1/4 teaspoon of cream of tartar to the bowl of room temperature egg whites. Begin whisking on medium speed using a hand mixer or stand mixer. The cream of tartar stabilises the meringue and helps it hold its structure more reliably during folding — without it, the meringue is more fragile and deflates faster.
Whisk until the whites look foamy and opaque, then begin adding the remaining 40g of caster sugar gradually, one tablespoon at a time, while the mixer continues running on medium-high speed. Adding the sugar too quickly collapses the foam before it has time to develop properly. After all the sugar goes in, continue whisking on medium-high for about 2 minutes until the meringue reaches stiff, glossy peaks that hold their shape clearly when you stop the mixer and lift the beaters. The peaks should stand upright without drooping or folding over.
Step Five: Fold Meringue Into Yolk Batter
Add one-third of the stiff meringue to the yolk batter and fold using a large spatula in confident, wide circular motions. This first addition lightens the thick yolk batter enough to accept the remaining meringue without deflating it. The first fold does not need to be particularly gentle — its job is purely to loosen the batter.
Add the remaining two-thirds of the meringue in one addition. Now fold gently and deliberately, turning the bowl as you fold, scraping from the bottom and folding over the top. Count approximately 30 to 40 folds total. Stop the moment no white streaks of meringue remain visible in the batter. The finished batter should look pale, airy, and slightly thick — almost like a very light mousse.
Over-folding knocks out the air bubbles that the meringue worked to create, producing a flat, dense sponge rather than the light, bouncy soft cotton sponge cake roll texture this recipe aims for. Under-folding leaves streaks of meringue that bake into uneven patches in the finished sponge. 35 folds is generally the sweet spot for most batters.
Step Six: Add the Pastel Cotton Candy Colours
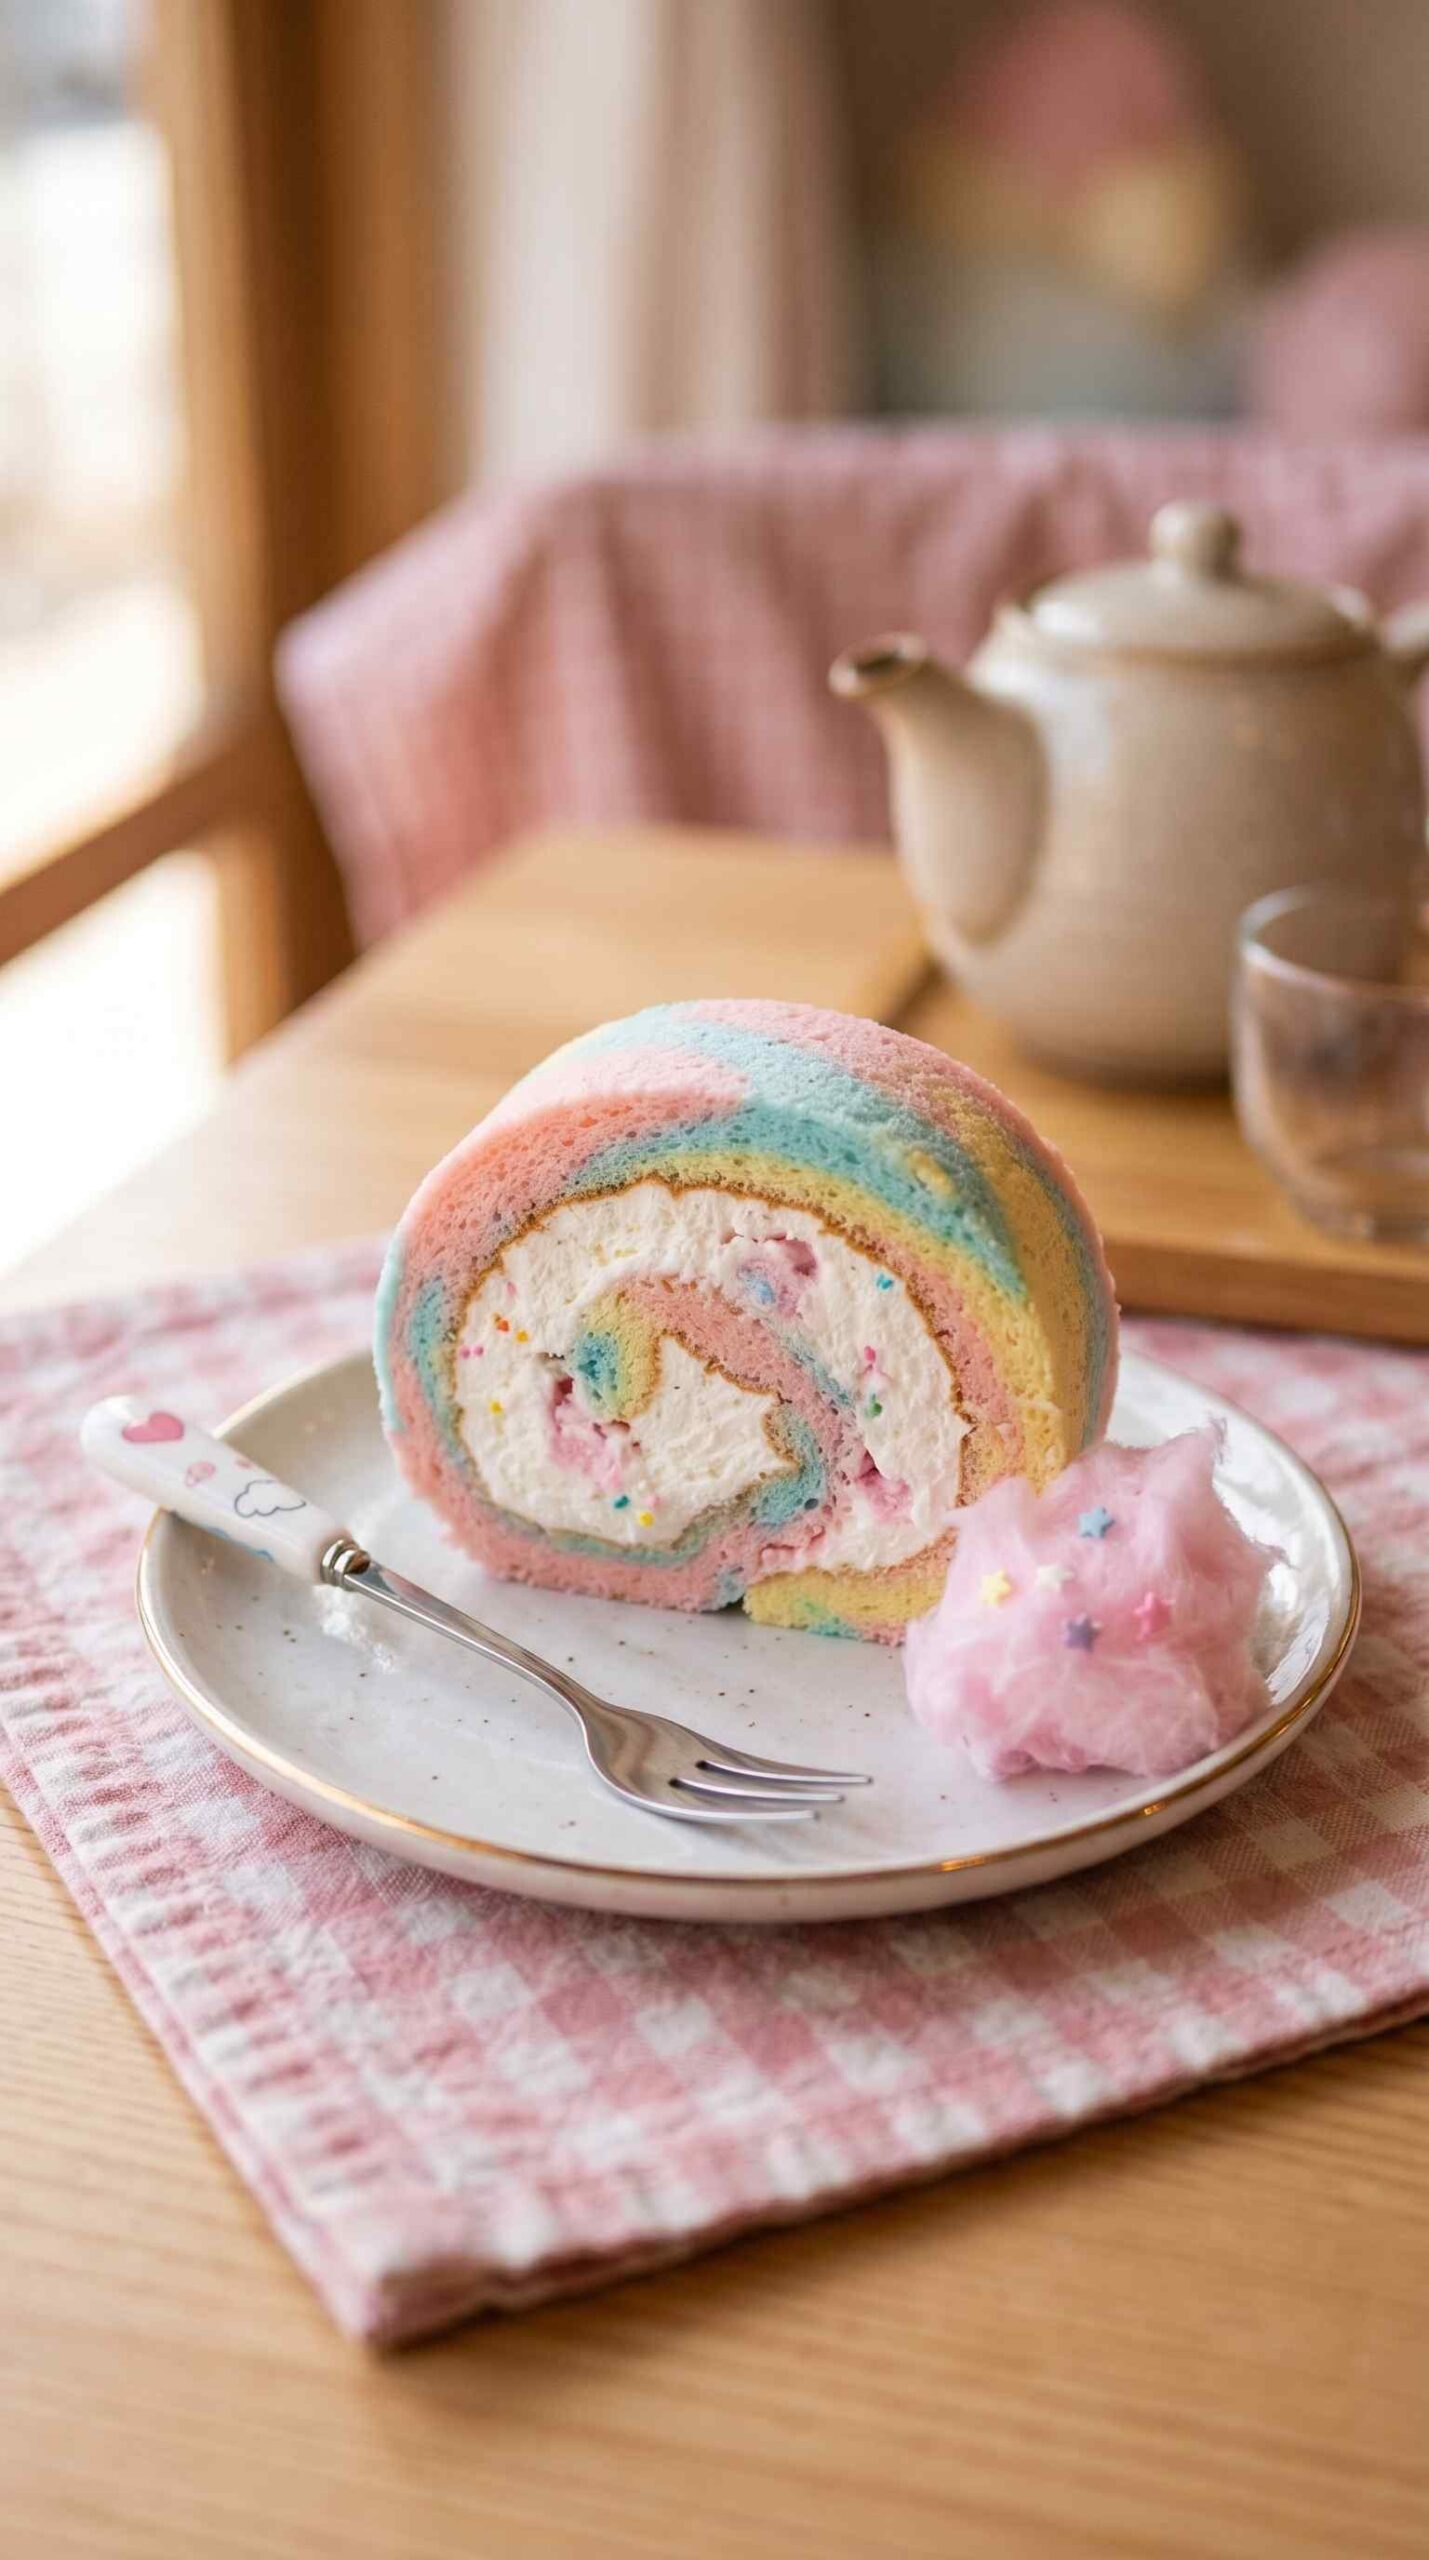
For the rainbow cotton candy cake roll dessert look, divide the finished batter into three or four portions in separate small bowls. Add a different pastel gel colour to each portion — one pink, one blue, one lavender, one yellow if using four portions. Fold each colour through its portion with 3 to 4 gentle folds — just enough to tint the batter without deflating it significantly.
Spoon the coloured batters in random, alternating blobs directly onto the lined tin. Do not spread them — simply drop spoonfuls of different colours side by side and slightly overlapping across the surface. The heat of the oven and the spreading of the batter during baking will blend the colours at their edges naturally, creating a soft pastel swirl effect without any additional swirling technique required. Use a toothpick to draw 2 to 3 gentle swirls through the colours if you want a slightly more blended finish.
For a simpler single-colour version, tint the entire batter soft pink or light blue and pour it directly into the tin. Both approaches produce the pastel cotton candy cake roll ideas aesthetic — the rainbow version simply requires 5 extra minutes of dividing and colouring.
Step Seven: Bake the Sponge
Pour or spoon the coloured batter into the prepared tin, spreading it gently with an offset spatula to create an even layer that reaches all four corners. Tap the tin once firmly on the counter to level the surface and release any large air bubbles sitting just below the surface.
Bake on the centre rack for 10 to 13 minutes. Japanese sponge rolls bake quickly because the layer is thin — a full 12 minutes is usually exactly right for most ovens. Check at 10 minutes by gently pressing the surface of the sponge with one fingertip. A properly baked sponge springs back immediately and completely without leaving an indent. An underbaked sponge stays compressed where you pressed it.
Do not overbake. An overbaked Japanese sponge loses elasticity and cracks immediately during rolling — the moisture content in the sponge is what gives it the flexibility to roll without breaking. Remove it from the oven while it still looks just slightly underdone rather than leaving it until it looks fully done. The residual heat inside the sponge finishes the cooking during the rolling process.
Step Eight: Roll the Sponge While Hot
This is the step that frightens most people the first time. However, rolling a Japanese sponge while it is still hot is what prevents it from cracking — not what causes cracking. A hot, fresh sponge has maximum flexibility. A cooled sponge loses that flexibility within minutes and becomes far more likely to crack under the stress of rolling.
Remove the tin from the oven immediately. Lay a fresh sheet of baking parchment on a flat surface and dust it lightly with icing sugar through a fine sieve. Lift the sponge by the overhanging parchment edges and flip it gently face-down onto the icing sugar dusted parchment. Peel the original lining parchment off the back of the sponge carefully, working slowly from one corner and pulling backward at a low angle rather than straight up.
Starting from one short end, roll the sponge tightly but gently around the clean parchment underneath — roll the parchment inside the sponge as you go. This parchment-inside method shapes the sponge into a roll and prevents the inner surface from sticking to itself during cooling. Wrap the rolled sponge in the outer parchment and leave it to cool completely at room temperature for a minimum of 40 minutes.
FYI — rolling the sponge while hot establishes the muscle memory of the roll shape. When you unroll it later to add the filling, it unrolls smoothly without resistance and rolls back into shape around the cream without cracking.
Step Nine: Make the Cotton Candy Whipped Cream
Place 350ml of very cold double cream into a cold mixing bowl. Add 3 tablespoons of sifted icing sugar and 1/4 teaspoon of cotton candy flavouring. Add a single drop of pink gel colouring if you want a soft pastel cream. Beat on medium-high speed for 2 to 3 minutes until the cream reaches firm peaks that hold their shape clearly.
The cream needs to be genuinely cold before whipping — take it directly from the fridge immediately before use. Warm cream whips to a much smaller volume, reaches soft peaks instead of firm ones, and collapses faster during spreading. Firm peaks spread more easily across the sponge and hold their shape during and after the final rolling step. Stop beating as soon as firm peaks form — over-beaten cream turns grainy and separates into butter and liquid.
Step Ten: Fill and Final Roll
Gently unroll the cooled sponge on a clean surface, removing the parchment from the inside as you go. The sponge should unroll smoothly with no cracking and no sticking. Spread the cotton candy whipped cream across the entire inner surface of the unrolled sponge in an even layer, leaving a 2cm border along the far short edge — this border prevents the filling from squeezing out as you roll.
Roll the sponge back up firmly but gently from the near short edge, peeling the outer parchment away as you roll forward. Use both hands and apply steady, even pressure across the full width of the roll rather than just pressing from the centre. A consistent pressure across the entire width prevents the filling from shifting to one side and creating an uneven spiral when sliced.
Wrap the finished roll tightly in fresh parchment and refrigerate for at least 30 minutes to firm the cream and allow the spiral to set into a clean, stable shape. The refrigerator sets the whipped cream filling against the sponge interior — without this resting time, slicing the roll produces an uneven spiral that collapses slightly on the plate.
Step Eleven: Decorate and Serve
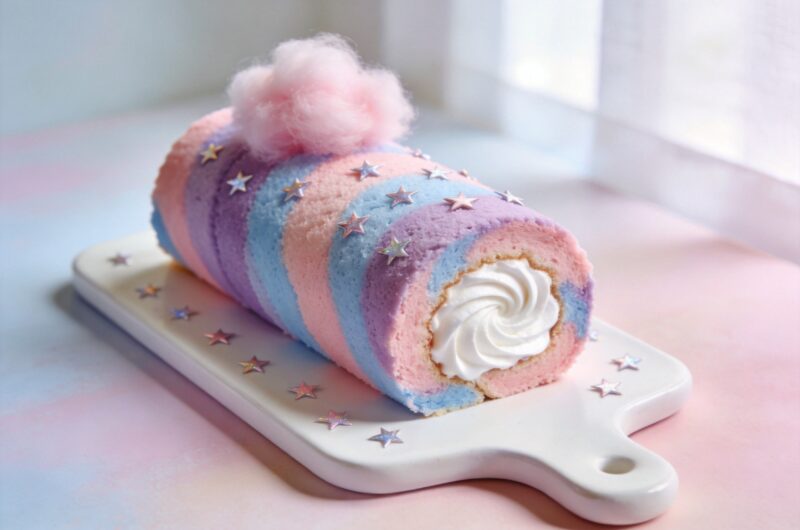
Remove the roll from the fridge and unwrap it carefully onto a serving board. Dust the top surface lightly with icing sugar through a fine sieve. Place a small, airy puff of real cotton candy or candy floss directly on top of the roll — position it towards one end for the most visually balanced presentation. Scatter a small number of edible star or heart sprinkles across the top.
Slice the roll using a sharp, clean knife wiped with a damp cloth between each cut. Clean cuts produce neat, even spirals that show the pastel sponge and cream filling beautifully. A dirty or dragging knife compresses the roll and smears the cream into the sponge spiral, obscuring the clean colour contrast that makes this aesthetic cotton candy dessert roll look so striking on a plate.
Why the Japanese Sponge Method Produces Such a Different Result
Have you ever made a standard Swiss roll and found it dense, dry, and almost cardboard-like in texture? The difference between a standard sponge roll and a kawaii Japanese cake roll dessert version comes entirely from technique — specifically the separated egg and meringue method.
Standard Swiss roll recipes cream whole eggs with sugar and fold in flour. Japanese roll cake recipes separate the eggs, whip the whites to a stiff meringue, and fold the two components together. The meringue introduces a far greater volume of air into the batter and produces a sponge that bakes lighter, stays moister, and rolls without cracking far more reliably than any whole-egg method.
The addition of cornstarch alongside the plain flour further tenderises the crumb by diluting the protein content of the flour. Less protein means less gluten develops during mixing — and less gluten means a softer, more delicate texture that genuinely melts on contact with the palate in a way that standard sponge simply cannot replicate.
Getting the Cotton Candy Flavour Right
Cotton candy flavouring is a synthetic flavour that mimics the airy sweetness of spun sugar. It tastes distinctly sweet, faintly vanilla-adjacent, and carries a subtle artificial quality that is actually part of its charm in the context of a pastel, kawaii-style dessert. A little goes a long way — 1/4 teaspoon in the sponge and 1/4 teaspoon in the cream is precisely enough to make the flavour present without becoming overwhelmingly artificial.
IMO, the combination of cotton candy flavouring and actual cotton candy decoration creates a genuinely playful, multi-sensory experience — you taste the cotton candy in the sponge and cream, and you see it on top as a decoration simultaneously. It is a small detail that makes the presentation feel considered and deliberate rather than accidental.
Tips for a Perfect Roll Every Time
Roll while hot without exception. A cooled sponge has lost its flexibility and will crack during rolling regardless of how carefully you work. The heat is not the enemy — it is the tool.
Use a thin, shallow tin. A deep tin produces a thick sponge that lacks the flexibility needed for tight rolling. A 25x38cm Swiss roll tin at maximum 2cm depth gives the right sponge thickness.
Fold the meringue in two stages. The first stage loosens the batter. The second stage incorporates the remaining meringue gently. Trying to fold all the meringue in one addition risks deflating it significantly before it has time to distribute.
Refrigerate before slicing. A freshly rolled cake with unchilled filling collapses slightly when cut. Thirty minutes in the fridge sets the cream against the sponge and produces clean, stable spirals that hold their shape on the plate.
Cotton Candy Japanese Cake Roll That Looks Magical
10
servings25
minutes12
minutes45
minutesThis cotton candy Japanese cake roll combines a light, airy separated-egg sponge tinted in pastel colours with a lightly sweetened cotton candy whipped cream filling. Rolled while hot for crack-free results and decorated with real cotton candy on top, it delivers a kawaii, visually stunning dessert with a genuinely delicate, cloud-like texture.
Ingredients
Japanese sponge roll:
4 large eggs, separated, room temperature
80g caster sugar, divided into two 40g portions
60g plain flour, sifted twice
20g cornstarch
1/4 teaspoon cream of tartar
2 tablespoons whole milk, room temperature
2 tablespoons vegetable oil
1/2 teaspoon vanilla extract
1/4 teaspoon cotton candy flavouring
Pastel gel food colouring — pink, blue, lavender
Cotton candy whipped cream:
350ml double cream, very cold
3 tablespoons icing sugar, sifted
1/4 teaspoon cotton candy flavouring
1 drop pink gel food colouring (optional)
Decoration:
Small puff of cotton candy or candy floss
Edible star or heart sprinkles
Icing sugar for dusting
- Preheat oven to 170°C fan or 175°C conventional for at least 15 minutes
- Line a 25x38cm Swiss roll tin with parchment extending 2cm above the rim on all sides
- Grease the parchment lightly and dust with a fine coating of flour
- Separate 4 room temperature eggs placing yolks in one bowl and whites in another clean bowl
- Leave both bowls at room temperature for 15 minutes before using
- Whisk egg yolks with 40g caster sugar for 1 minute until pale and slightly thickened
- Add vegetable oil, whole milk, vanilla extract, and cotton candy flavouring and whisk until smooth
- Sift plain flour and cornstarch into the yolk mixture and fold gently until no dry streaks remain
- Add cream of tartar to the egg white bowl and begin whisking on medium speed until foamy
- Add remaining 40g caster sugar gradually one tablespoon at a time while mixer runs on medium-high
- Continue whisking until stiff glossy peaks form that hold upright without drooping
- Add one-third of the meringue to the yolk batter and fold confidently to loosen the batter
- Add remaining meringue and fold gently for approximately 30 to 40 folds until just combined
- Divide batter into portions and tint each with a different pastel gel colour using 3 to 4 gentle folds
- Drop spoonfuls of different coloured batters in alternating blobs across the lined tin
- Draw 2 to 3 gentle swirls through the colours with a toothpick if desired
- Spread batter gently to reach all four corners and tap tin once on the counter
- Bake on centre rack for 10 to 13 minutes until surface springs back immediately when pressed
- While sponge bakes dust a fresh sheet of parchment with icing sugar and lay flat on a surface
- Remove sponge from oven immediately and flip face-down onto the icing sugar dusted parchment
- Peel original lining parchment off the back of the sponge slowly at a low angle
- Roll the sponge tightly from one short end around the clean parchment underneath
- Wrap in outer parchment and cool completely at room temperature for at least 40 minutes
- Beat very cold double cream with icing sugar, cotton candy flavouring, and optional pink colouring
- Beat on medium-high speed until firm peaks form then stop immediately
- Unroll the cooled sponge gently and remove inner parchment as you go
- Spread cotton candy whipped cream evenly across the inner surface leaving a 2cm border at the far edge
- Roll the sponge back up firmly from the near short edge peeling outer parchment away as you roll
- Wrap the finished roll in fresh parchment and refrigerate for at least 30 minutes
- Unwrap onto a serving board and dust the top with icing sugar through a fine sieve
- Place a small puff of cotton candy on top and scatter edible sprinkles across the surface
- Slice with a clean sharp knife wiped between each cut and serve immediately
Common Mistakes to Avoid
Waiting too long to roll after baking: Every minute of cooling reduces sponge flexibility. Move quickly from oven to rolling surface — a 30-second pause is fine, but waiting 5 minutes risks cracking.
Using cold eggs: Cold egg whites whip to a smaller volume and less stable meringue than room temperature whites. Always take eggs out of the fridge at least 15 minutes before starting.
Skipping the icing sugar dusting: Rolling onto bare parchment without an icing sugar dusting causes the outer sponge surface to stick slightly during the initial hot roll, which tears the surface when you unroll for filling. The icing sugar layer provides just enough non-stick protection. :/
Over-whipping the cream: Firm peaks spread beautifully and hold shape well during rolling. Over-whipped cream turns grainy and separates under the pressure of rolling, creating an unpleasant texture in the finished spiral.
FAQs
Q1: Can I make this without cotton candy flavouring?
Yes — replace the cotton candy flavouring with 1 teaspoon of vanilla extract in both the sponge and the cream. The texture and technique stay identical. The flavour shifts to a classic vanilla cream roll — still delicious, still visually beautiful with the pastel colours, and completely accessible if you cannot source cotton candy flavouring locally.
Q2: Why did my sponge crack during rolling?
Cracking almost always happens because the sponge cooled before rolling. The sponge must roll while still hot from the oven — within 1 to 2 minutes of removal. Additionally, overbaking removes the moisture that gives the sponge its flexibility. Check at 10 minutes and remove while the sponge still looks just barely set.
Q3: Can I make this roll the day before serving?
Yes — this is actually the ideal approach. Make and fill the roll, wrap tightly in parchment, and refrigerate overnight. The cream firms against the sponge during overnight refrigeration and produces cleaner, more stable slices the next day. Decorate with cotton candy immediately before serving because cotton candy dissolves in humidity and moisture.
Q4: What size tin do I need for this recipe?
A 25x38cm (10×15 inch) Swiss roll or jelly roll tin works best for this quantity of batter. A smaller tin produces a thicker sponge that is harder to roll without cracking. A larger tin produces a sponge too thin to hold the filling without tearing. If you only have a different sized tin, scale the batter quantity proportionally.
Q5: Can I use food colouring paste instead of gel?
Yes — paste and gel colourants behave almost identically in this application. Avoid liquid food colouring, which adds excess moisture to a batter where moisture balance is critical. Liquid colouring dilutes the batter consistency and can affect how the meringue structure holds during folding and baking.
Wrapping It Up
This cotton candy Japanese cake roll recipe delivers a genuinely stunning, flavour-packed dessert using careful Japanese sponge technique and a simple pastel colour scheme. Whip the meringue to stiff peaks, fold in two stages, bake without over-cooking, roll immediately while hot, chill before slicing, and decorate just before serving. Those six habits produce a beautiful, consistent result every single time.
Whether you make the rainbow pastel version or keep it simple with a single soft pink, this roll cake consistently stops people in their tracks before they even taste it. Now preheat the oven and get rolling — literally.