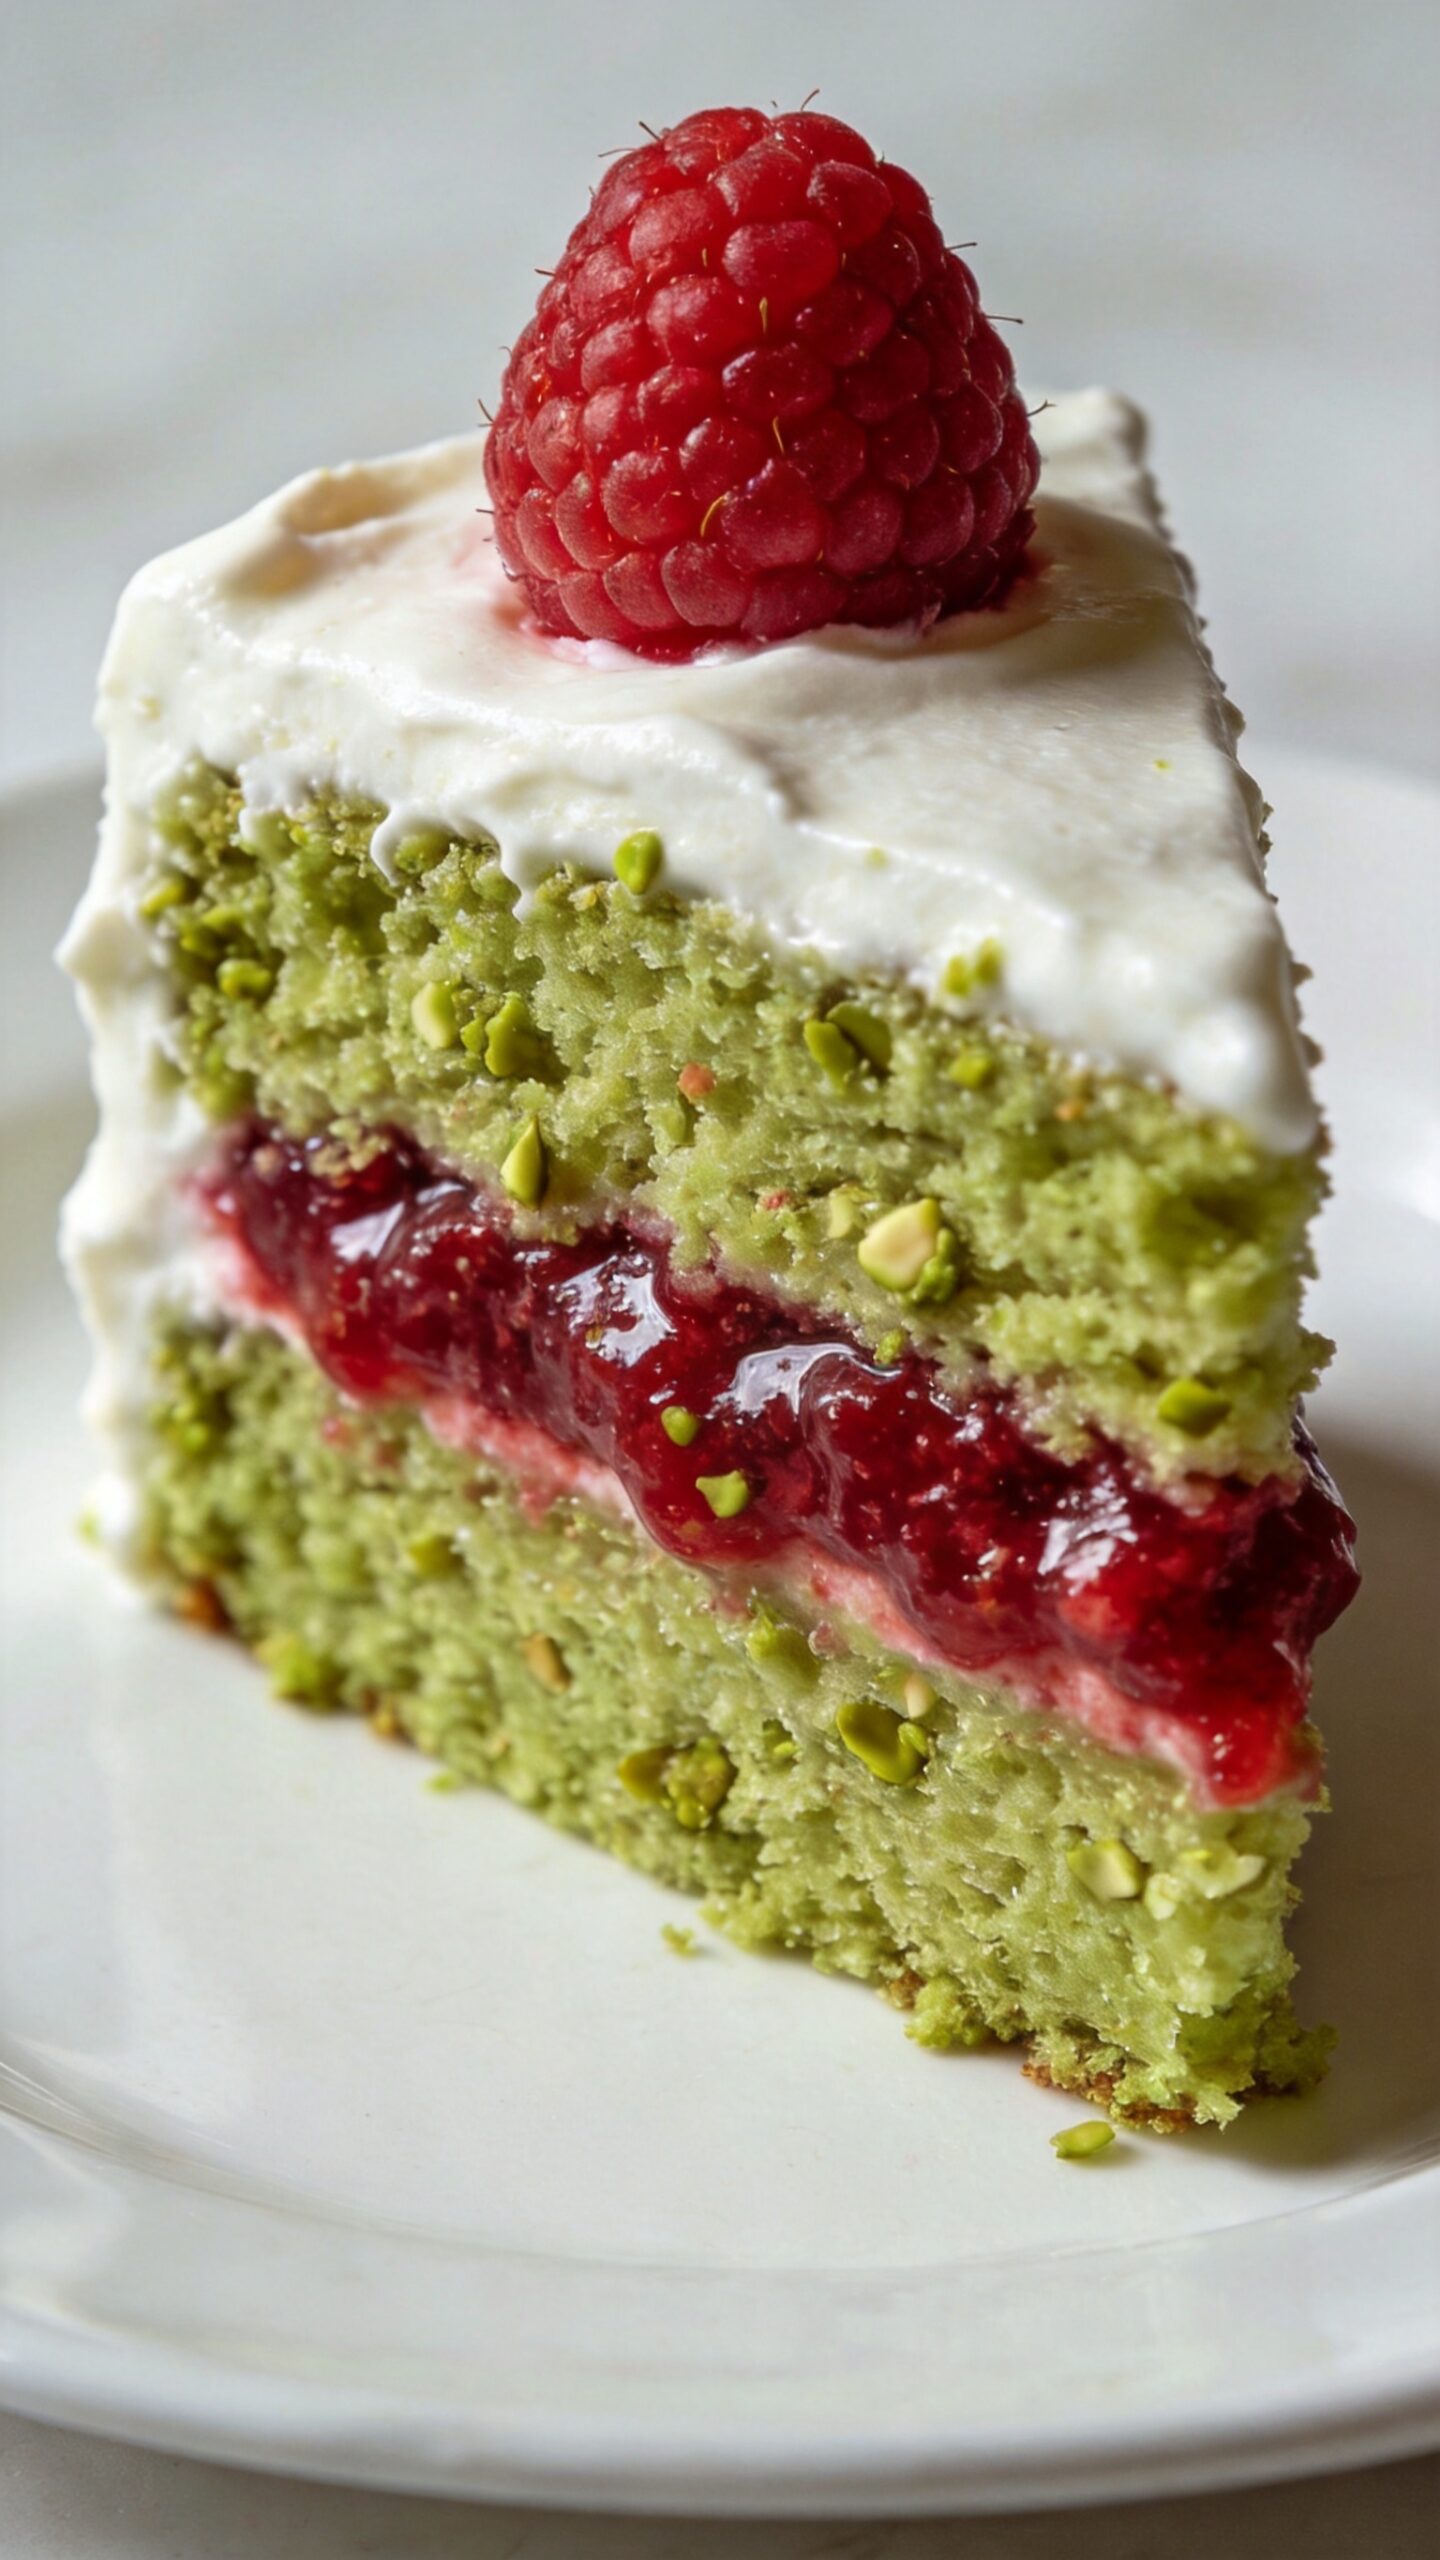
I made this pistachio raspberry cake recipe for a birthday dinner and three people at the table genuinely asked whether I had bought it from a patisserie. The green pistachio layers, the pink raspberry filling, and the cream frosting look extraordinary together — and the flavour is even better than it looks.
Pistachios and raspberries are one of those flavour pairings that feel genuinely elevated without requiring any complicated technique. The nutty, slightly sweet pistachio sponge and the sharp, fruity raspberry filling balance each other in a way that neither ingredient achieves alone. This homemade pistachio berry cake recipe delivers that balance in every single slice.
What You’ll Need (Ingredients)
Everything here comes from a good supermarket. Raw unsalted pistachios and pistachio paste may require an online order or a specialist deli, but both are worth tracking down.
For pistachio sponge layers:
- 150g (1.25 cups) raw unsalted pistachios, plus extra for decoration
- 180g (1.5 cups) plain flour
- 1.5 teaspoons baking powder
- 1/2 teaspoon bicarbonate of soda
- 1/4 teaspoon salt
- 200g (1 cup) caster sugar
- 150g (10.5 tablespoons) unsalted butter, softened at room temperature
- 3 large eggs, room temperature
- 180ml (3/4 cup) whole milk, room temperature
- 2 tablespoons pistachio paste — optional but deepens the flavour significantly
- 1 teaspoon vanilla extract
- 1/4 teaspoon almond extract
Raspberry filling:
- 200g (7 oz) fresh raspberries — plus extra for decoration
- 4 tablespoons good quality raspberry jam
- 1 teaspoon lemon juice
For the whipped cream frosting:
- 500ml (2 cups) double cream or heavy whipping cream, very cold
- 3 tablespoons icing sugar, sifted
- 1 teaspoon vanilla extract
- 200g (7 oz) full-fat cream cheese, cold — this stabilises the whipped cream
How to Make It — Full Step-by-Step Process
Step One: Prepare the Pistachio Flour
This step transforms whole raw pistachios into a fine pistachio flour that carries the colour, flavour, and moisture into the cake sponge. Place 150g of raw unsalted pistachios into a food processor. Pulse in 5-second bursts — approximately 8 to 10 pulses — until the pistachios reach a fine, sandy texture throughout.
Stop processing before the mixture turns into a paste. The moment you hear the texture shift from a crumbly, sandy sound to a wetter, stickier sound, the oils have started releasing and you are approaching pistachio butter rather than pistachio flour. Spread the ground pistachios onto a plate and check the texture — it should look dry, fine, and pale green throughout with no wet clumps.
FYI — if you push past this point and the mixture starts clumping, spread it onto a baking tray and place it in a 150°C oven for 5 minutes to dry it out before using. It will not ruin the cake, but the texture will be slightly denser than with properly ground dry pistachio flour.
Step Two: Preheat Oven and Prepare Tins
Set your oven to 175°C (350°F) fan-forced or 180°C (360°F) conventional. Preheat for at least 20 minutes before the batter goes in. Grease two 20cm (8 inch) round cake tins generously with softened butter, line the bases with parchment circles, and grease the parchment as well.
The double greasing method — tin sides, parchment base, parchment top — guarantees clean release from both tins after baking. Pistachio sponge contains ground nuts which can cause the batter to stick more persistently than a plain flour cake. Taking 2 minutes on proper tin preparation prevents the heartbreak of a beautifully baked layer tearing on release.
Step Three: Combine the Dry Ingredients
In a medium bowl, combine the ground pistachio flour, 180g of plain flour, 1.5 teaspoons of baking powder, 1/2 teaspoon of bicarbonate of soda, and 1/4 teaspoon of salt. Whisk everything together with a balloon whisk for about 20 seconds to distribute the raising agents evenly through the flour and pistachio mixture.
The pistachio flour adds both flavour and a gentle moisture to the sponge because of its natural oil content. Additionally, it contributes the subtle green tint to the batter that deepens during baking into the distinctive pale sage colour of a properly made moist pistachio cake with raspberries. Set the dry mixture aside while you prepare the wet ingredients.
Step Four: Cream the Butter and Sugar
Place 150g of softened room temperature butter and 200g of caster sugar in a large mixing bowl. Beat on medium-high speed using a hand mixer or stand mixer for 4 full minutes. The mixture should transform from a pale yellow, grainy paste at the start to a noticeably lighter, almost white, and fluffy consistency by the end of those 4 minutes.
This extended creaming phase incorporates a significant volume of air into the butter and sugar mixture. That trapped air expands during baking and creates the light, tender crumb structure that distinguishes a proper sponge from a dense, heavy cake. Under-creaming — stopping at 1 or 2 minutes — produces a denser cake with less rise. Four minutes feels like a long time, but the result justifies every second of it.
Step Five: Add Eggs and Extracts
Add the 3 room temperature eggs one at a time to the creamed butter and sugar, beating on medium speed for 30 seconds after each addition. Adding all three eggs at once causes the emulsion to break — the mixture curdles into an unpleasant separated texture that partially recovers during baking but never fully. One egg at a time, beaten in gradually, keeps the emulsion stable and produces a smooth, glossy batter.
After the last egg incorporates, add 1 teaspoon of vanilla extract and 1/4 teaspoon of almond extract. Add the pistachio paste now as well if using — spoon it directly into the bowl and mix for 20 seconds until fully incorporated. Pistachio paste deepens both the flavour and the green colour of the finished sponge more than any other single addition in this recipe. It is genuinely worth sourcing.
Step Six: Fold in Dry and Wet Ingredients Alternately
Add the dry flour and pistachio mixture to the bowl in three additions, alternating with the 180ml of whole milk in two additions. This alternating method — dry, milk, dry, milk, dry — keeps the batter emulsified and prevents it from splitting or becoming too dry between additions. Always start and end with the dry ingredients.
Use a large spatula and fold each addition in with wide, slow circular motions rather than beating or stirring vigorously. After the final addition of dry ingredients, fold only until no visible streaks of flour remain. The batter should look smooth, pale green, and slightly thick. Over-mixing at this stage develops too much gluten and produces a tough sponge — put the spatula down the moment the flour disappears and divide the batter immediately.
Step Seven: Bake the Pistachio Layers
Divide the batter evenly between both prepared tins. Smooth the surface of each tin using the back of a spoon or an offset spatula to create a flat, even top. Tap each tin on the counter 3 to 4 times to release air bubbles, then place both tins on the centre rack of the preheated oven.
Bake for 28 to 32 minutes without opening the door during the first 25 minutes. At the 28-minute mark, insert a clean skewer into the centre of each layer. It should come out with a few moist crumbs — not wet batter, not bone dry. A few moist crumbs mean the sponge is perfectly done and will remain moist after cooling. Bone dry means slightly overbaked.
Cool in the tins for 15 minutes, then run a knife around the edges and invert onto a wire rack. Peel off the parchment gently and cool completely for a minimum of 45 minutes. This complete cooling time is non-negotiable before applying the whipped cream frosting — whipped cream melts on contact with even slightly warm cake and collapses completely within minutes of application.
Step Eight: Prepare the Raspberry Filling
Place 200g of fresh raspberries into a small bowl. Add 4 tablespoons of raspberry jam and 1 teaspoon of lemon juice. Use a fork to crush the raspberries roughly into the jam — you want a chunky, textured mixture rather than a smooth puree. Some whole raspberry pieces should remain visible throughout the filling.
The jam acts as a binder that holds the crushed raspberries together and prevents the filling from running out of the sides when the second cake layer goes on top. Without the jam, fresh raspberries alone collapse and create a wet, unstable filling layer that slides during assembly. The lemon juice sharpens the fruit flavour and prevents the raspberry filling from tasting too sweet against the already-sweet pistachio sponge.
Step Nine: Make the Stabilised Whipped Cream Frosting
Place 200g of cold cream cheese into a large cold mixing bowl and beat on medium speed for 1 minute until smooth and lump-free. Add 500ml of very cold double cream, 3 tablespoons of sifted icing sugar, and 1 teaspoon of vanilla extract.
Beat on medium-high speed for 2 to 3 minutes until the mixture thickens to stiff, billowy peaks that hold their shape clearly when you lift the beaters. The cream cheese stabilises the whipped cream and prevents it from deflating or weeping during assembly and refrigeration. Plain whipped cream without a stabiliser collapses within an hour of application — the cream cheese version holds beautifully for 24 hours in the fridge. Stop beating the moment stiff peaks form. Over-beaten cream turns grainy and eventually separates into butter.
Step Ten: Assemble the Layered Cake
Place the first completely cooled pistachio layer on a flat serving plate or cake board. Spread approximately one-third of the whipped cream frosting across the top surface in an even layer using an offset spatula. Leave a 1cm border around the edge — the raspberry filling added in the next step will push the cream outward and fill that gap naturally.
Spoon the raspberry filling across the cream layer, spreading it evenly across the surface right to the cream border. Press the raspberries gently into the cream so they do not slide when the second layer goes on top. Place the second pistachio layer carefully on top, pressing very gently to seat it flat without squeezing too much filling out from the sides.
Apply the remaining whipped cream frosting to the top and sides of the assembled cake in smooth, generous strokes. For an elegant pistachio raspberry cake design finish, use a large offset spatula or bench scraper to smooth the sides to a clean, even surface. Alternatively, create a textured finish by pulling the spatula across the sides in a series of short horizontal strokes for a rustic, relaxed look that suits this style of cake beautifully.
Step Eleven: Decorate and Refrigerate
Arrange fresh raspberries across the top of the finished cake in a loose, generous cluster concentrated toward the centre. Scatter a generous handful of roughly chopped pistachios around and over the raspberries. The contrast of deep red raspberries, pale green chopped pistachios, and white cream frosting creates a naturally beautiful, elegant pistachio raspberry cake design that requires no specialist decorating skills whatsoever.
Refrigerate the finished cake for at least 30 minutes before slicing — this firms the whipped cream frosting and allows the layers to set against each other for a clean, neat cut. Serve cold or at room temperature within 2 hours of removing from the fridge.
Why Pistachio and Raspberry Work So Well Together
Have you ever noticed that some flavour combinations feel completely natural the first time you try them — as if they were always meant to exist together? Pistachio and raspberry create that feeling immediately. The pistachio brings a buttery, subtly sweet nuttiness with a hint of earthiness. The raspberry brings bright, sharp, fruity acidity that cuts directly through the richness of the nut.
Neither flavour overwhelms the other. The pistachio does not dull the raspberry sharpness, and the raspberry does not mask the delicate nuttiness of the pistachio. This is the natural balance that makes easy pistachio raspberry layer cake recipes consistently impressive to people tasting them for the first time.
Using Pistachio Paste vs. Ground Pistachios
Both work in this recipe, but they produce slightly different results worth understanding.
Ground pistachios — made fresh from raw nuts as described in this recipe — add texture, a natural green colour, and a mild, fresh pistachio flavour throughout the sponge. The oil in the ground nuts also contributes to a particularly moist crumb that stays tender for 2 days after baking.
Pistachio paste — a smooth, concentrated paste made from blanched pistachios — delivers a far more intense pistachio flavour and a deeper green colour with less texture. Using both ground pistachios and pistachio paste in the same batter, as this recipe does, gives you the best of both characteristics simultaneously. IMO this combination produces the most genuinely pistachio-forward sponge possible without resorting to artificial flavouring.
Making This as a Festive Birthday Cake
This festive pistachio raspberry birthday cake version requires only a few additions to the base recipe. Pipe the remaining whipped cream frosting around the top edge in a decorative border using a star-tipped piping bag. Fill the centre of the piped border with a generous pile of fresh raspberries. Scatter finely chopped pistachios across the frosting border and finish with a light dusting of icing sugar through a fine sieve.
Adding birthday candles directly into the raspberry cluster in the centre of the top creates a naturally beautiful, unfussy presentation that looks professionally styled without requiring any specialist technique. This gourmet pistachio raspberry cake recipe easy enough for home bakers consistently produces a result that genuinely looks and tastes celebration-worthy.
Common Mistakes to Avoid
Over-processing the pistachios: Grinding past the sandy stage releases the oils and creates a wet paste that changes the moisture balance of the batter entirely. Pulse in short bursts, check frequently, and stop as soon as the texture looks dry and sandy.
Using warm cake layers with whipped cream: Whipped cream melts within seconds on warm cake. Always cool layers completely — minimum 45 minutes at room temperature — before applying any frosting. Warm cake and whipped cream produce a liquid mess rather than a clean, sliceable layer cake.
Skipping the cream cheese in the frosting: Plain whipped cream deflates within an hour and cannot hold the weight of the second cake layer during assembly. The cream cheese stabiliser takes 30 seconds to add and makes the frosting structurally reliable for 24 hours. Never skip it. :/
Using sweetened pistachios: Salted or sweetened pistachios change the flavour balance of the sponge significantly. Always use raw unsalted pistachios so you control the salt and sweetness levels in the batter entirely.
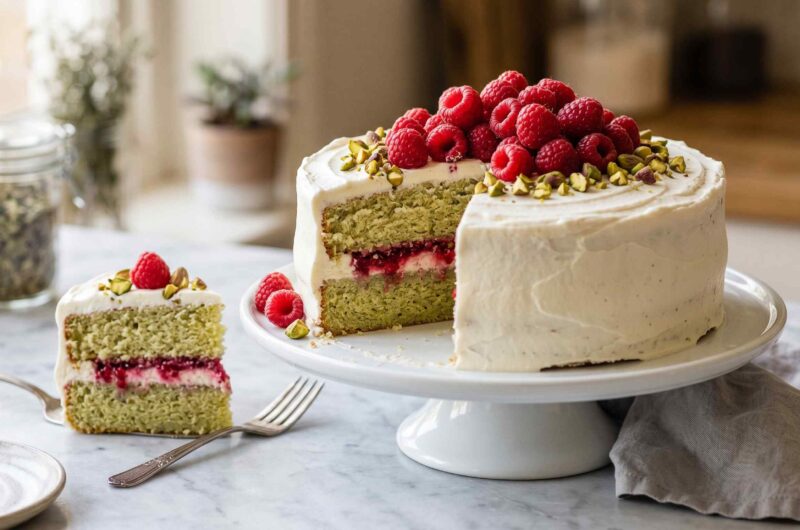
Layered Pistachio Cream Cake With Fresh Raspberries
10
servings30
minutes30
minutes1
hourIngredients
Pistachio sponge:
150g raw unsalted pistachios, ground
180g plain flour
1.5 teaspoons baking powder
1/2 teaspoon bicarbonate of soda
1/4 teaspoon salt
200g caster sugar
150g unsalted butter, softened
3 large eggs, room temperature
180ml whole milk, room temperature
2 tablespoons pistachio paste (optional)
1 teaspoon vanilla extract
1/4 teaspoon almond extract
Raspberry filling:
200g fresh raspberries
4 tablespoons raspberry jam
1 teaspoon lemon juice
Whipped cream frosting:
500ml double cream, very cold
3 tablespoons icing sugar, sifted
1 teaspoon vanilla extract
200g full-fat cream cheese, cold
Decoration:
Extra fresh raspberries
Roughly chopped pistachios
- Pulse 150g raw unsalted pistachios in a food processor in short bursts until a fine dry sandy texture forms
- Stop processing before the mixture turns wet or paste-like
- Preheat oven to 175°C fan or 180°C conventional for at least 20 minutes
- Grease two 20cm round tins, line bases with parchment, and grease parchment
- Combine ground pistachio flour, plain flour, baking powder, bicarbonate of soda, and salt in a bowl and whisk briefly
- Beat softened butter and caster sugar together on medium-high speed for 4 full minutes until pale and fluffy
- Add room temperature eggs one at a time beating for 30 seconds after each addition
- Add vanilla extract, almond extract, and pistachio paste and mix for 20 seconds
- Add dry ingredients in three additions alternating with milk in two additions using gentle folding motions
- Fold only until no dry flour streaks remain then divide batter equally between both tins
- Smooth the surface of each tin and tap on the counter 3 to 4 times
- Bake on the centre rack for 28 to 32 minutes without opening door in the first 25 minutes
- Test with a skewer — moist crumbs means done, wet batter means 3 more minutes
- Cool in tins for 15 minutes then invert onto a wire rack and peel off parchment
- Cool completely for at least 45 minutes before assembling
- Crush 200g fresh raspberries roughly with a fork into 4 tablespoons of raspberry jam and 1 teaspoon lemon juice
- Beat cold cream cheese on medium speed for 1 minute until smooth
- Add cold double cream, sifted icing sugar, and vanilla extract to the cream cheese
- Beat on medium-high speed for 2 to 3 minutes until stiff billowy peaks form
- Stop immediately when stiff peaks are reached to avoid over-beating
- Place first cooled pistachio layer on a serving plate
- Spread one-third of the whipped cream frosting across the top leaving a 1cm border
- Spoon raspberry filling evenly over the cream and press gently into place
- Position second layer on top and press gently to seat flat
- Apply remaining frosting to the top and sides in smooth generous strokes
- Smooth sides with an offset spatula or bench scraper for a clean finish
- Arrange fresh raspberries in a generous cluster across the top
- Scatter roughly chopped pistachios over and around the raspberries
- Refrigerate for at least 30 minutes before slicing and serving
FAQs
Q1: Can I use frozen raspberries for the filling?
Yes — thaw frozen raspberries completely and drain off excess liquid thoroughly before using. Undrained frozen raspberries release too much water into the jam mixture and produce a wet filling that seeps into the sponge layers and makes them soggy. Pat the thawed raspberries dry with paper towels before combining with the jam for the best result.
Q2: How do I make pistachio paste at home?
Blanch 150g of raw pistachios in boiling water for 1 minute, then drain and rub them in a clean tea towel to remove the skins. Blend the skinned pistachios in a food processor for 3 to 5 minutes, scraping down the sides regularly, until the mixture reaches a smooth, spreadable paste consistency. Add 1 tablespoon of neutral oil and 1 teaspoon of honey to help achieve a smoother texture.
Q3: Can I make this cake gluten-free?
Yes — replace the plain flour with a good quality gluten-free plain flour blend on a 1-to-1 substitution basis. The ground pistachios already provide a significant proportion of the structure, which means the cake tolerates gluten-free flour substitution better than a standard all-flour sponge. Add 1/2 teaspoon of xanthan gum to the dry ingredients if your gluten-free flour blend does not already contain it.
Q4: How far in advance can I make this cake?
Bake the sponge layers up to 2 days ahead, wrap individually in cling film, and store at room temperature. Make the raspberry filling up to 1 day ahead and refrigerate in a sealed container. Assemble and frost on the day of serving for the best appearance and texture. Alternatively, assemble the fully decorated cake up to 24 hours ahead and refrigerate until needed — the stabilised whipped cream holds well for this period.
Wrapping It Up
This pistachio raspberry cake recipe delivers a genuinely impressive, gourmet-quality result from straightforward home baking techniques. Grind the pistachios properly, cream the butter for a full 4 minutes, alternate wet and dry ingredients when folding, cool completely before assembling, and stabilise the whipped cream with cream cheese. Those five habits produce a layered pistachio raspberry cake homemade result that consistently earns the highest compliments at any table.
Whether you make it as a birthday showpiece, a dinner party dessert, or a weekend baking project, this cake delivers every single time. Now go find some good pistachios and get baking