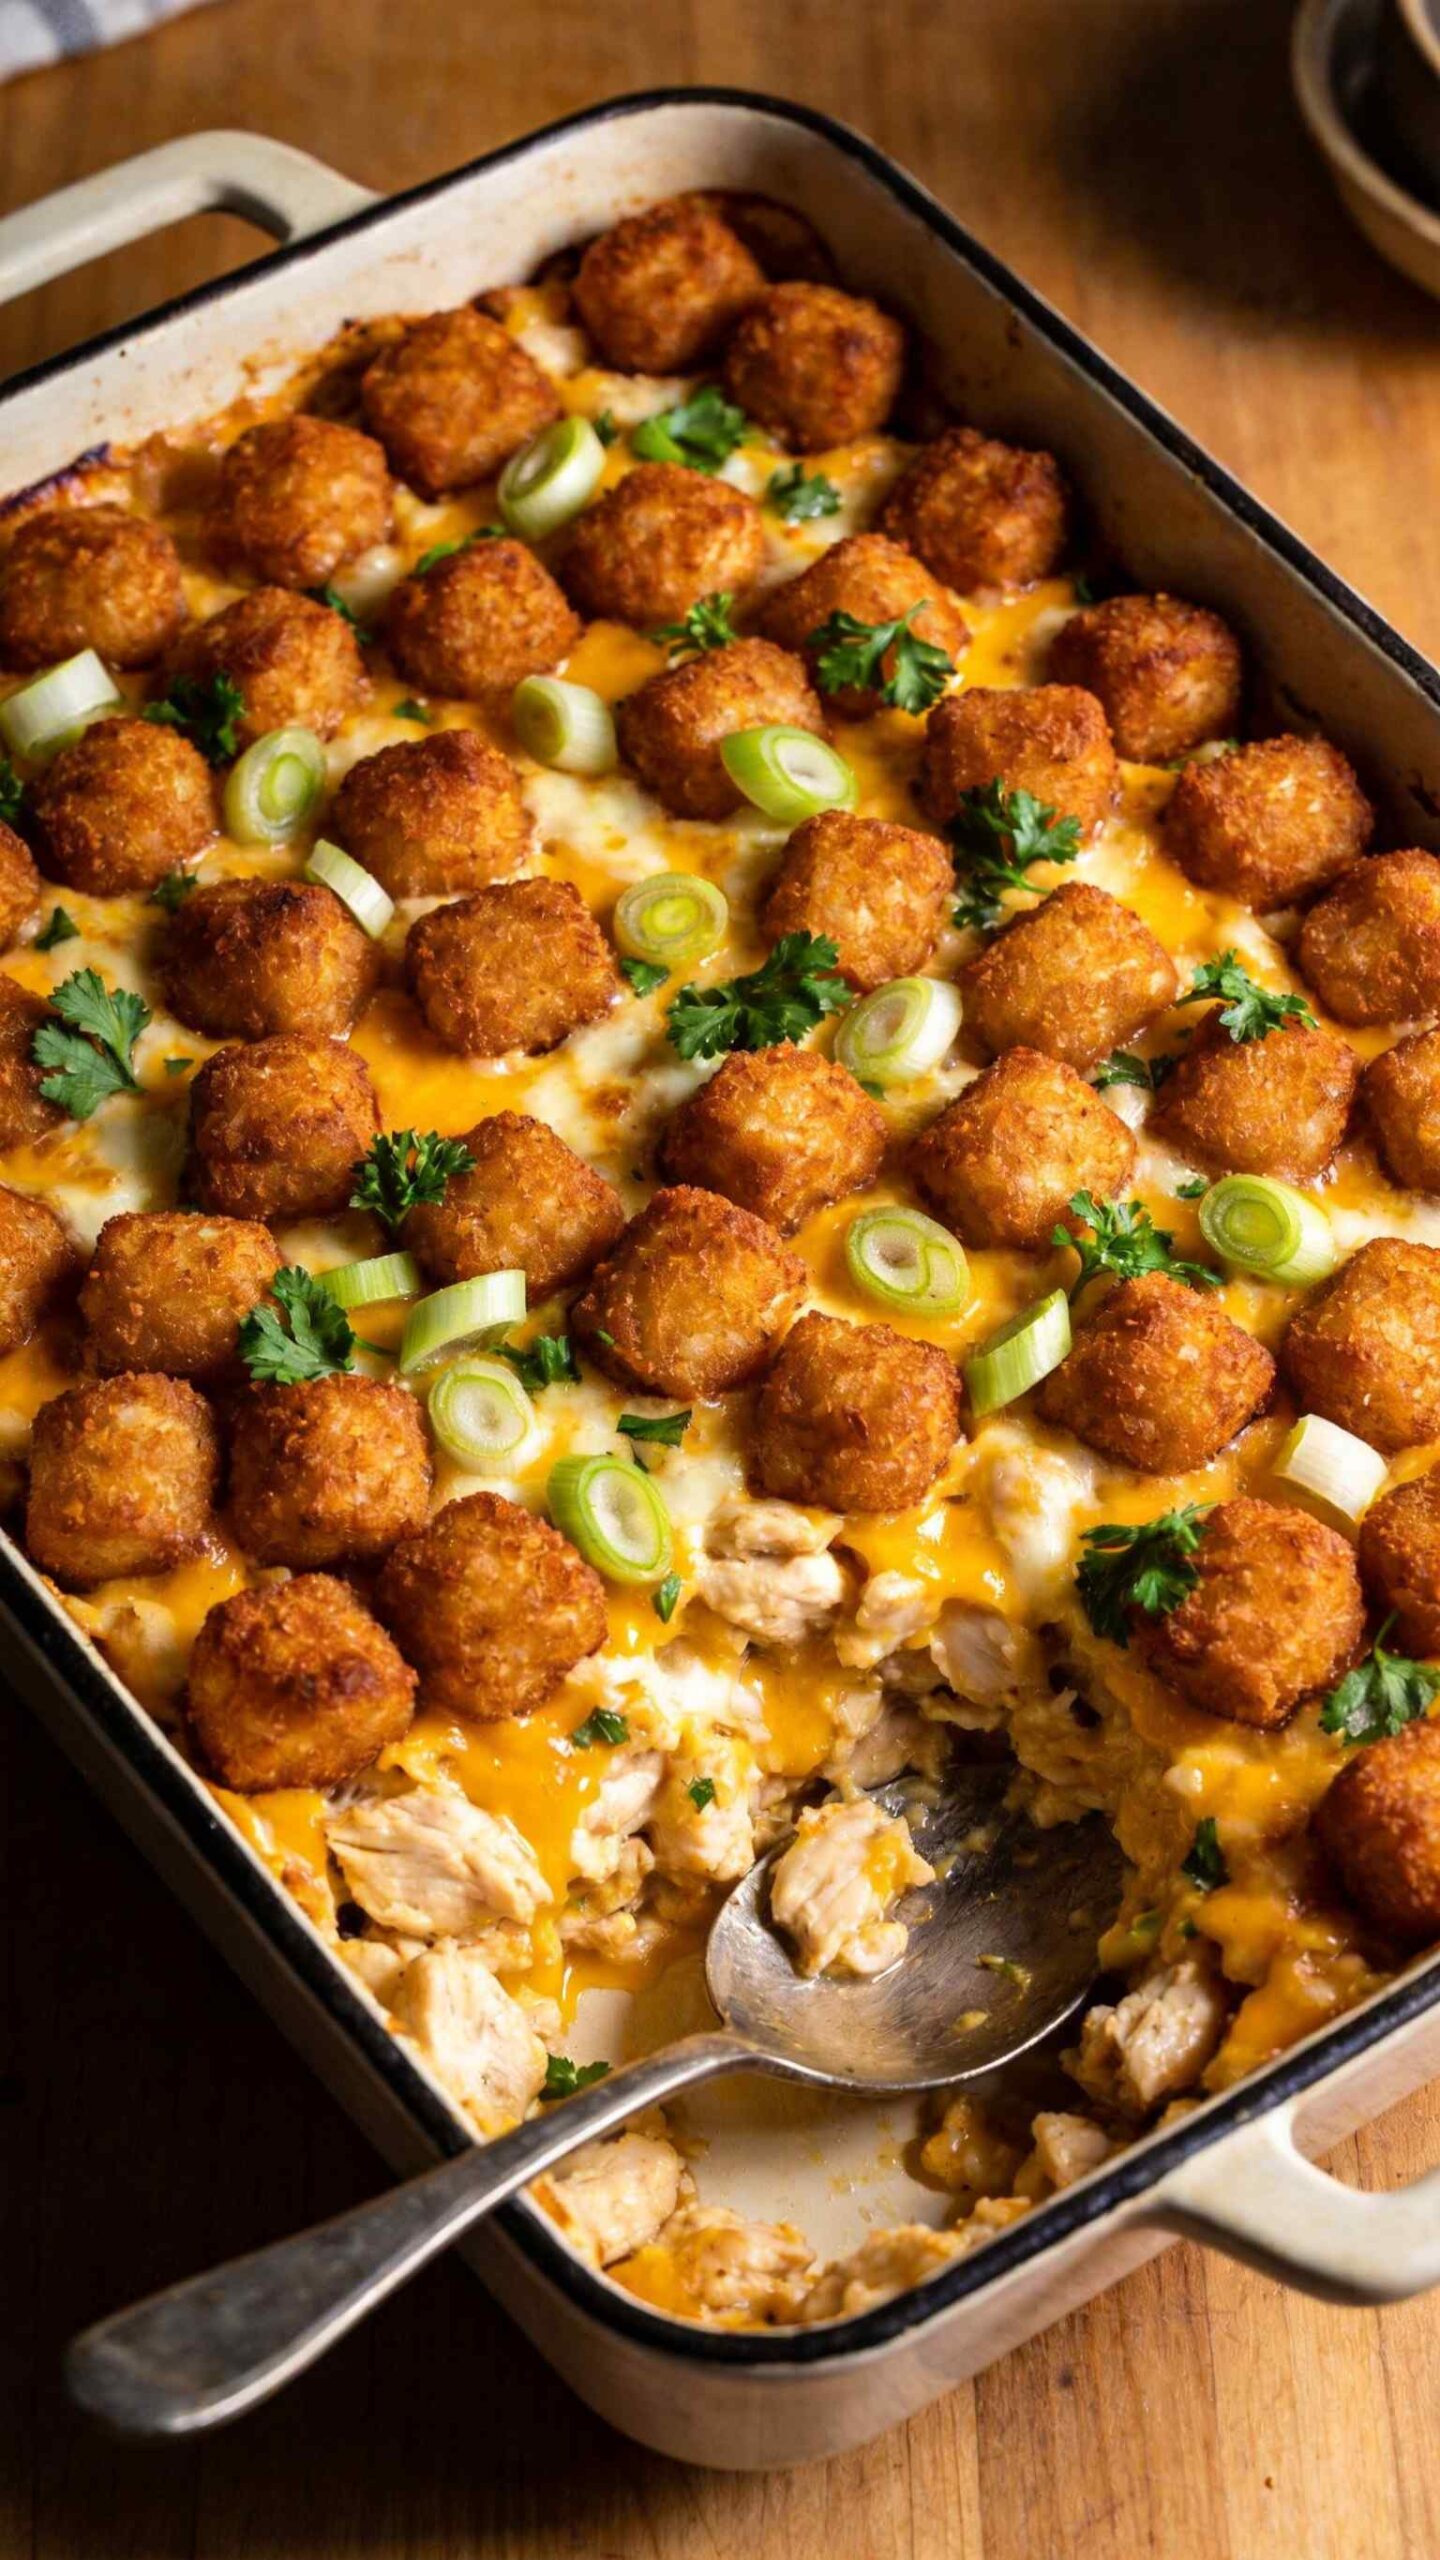
My mum made this cheesy chicken tater tot casserole for the first time when I was about twelve and I genuinely thought it was the greatest thing anyone had ever cooked. Crispy tater tots on top, creamy cheesy chicken underneath, and the whole thing bubbling hot from the oven — absolute perfection.
This is not a fancy dish and it makes no attempt to be. It is a classic chicken tater tot casserole dish built for feeding hungry people quickly, with ingredients almost everyone already has. Comforting, filling, endlessly crowd-pleasing, and surprisingly simple to pull together on any weeknight.
What You’ll Need (Ingredients)
Everything here is straightforward and budget-friendly. No specialist ingredients required whatsoever.
For chicken filling:
- 600g (21 oz) cooked chicken breast or thigh, shredded or diced — rotisserie chicken works brilliantly
- 1 tablespoon olive oil or butter
- 1 medium onion, finely diced
- 3 garlic cloves, finely minced
- 1 cup (150g) frozen peas or mixed vegetables
- 1 can (295g) cream of chicken soup — condensed, undiluted
- 150ml (2/3 cup) sour cream
- 100ml (1/3 cup) whole milk
- 1 teaspoon garlic powder
- 1 teaspoon onion powder
- 1/2 teaspoon smoked paprika
- 1/2 teaspoon black pepper
- 1/2 teaspoon salt
Topping:
- 800g (28 oz) frozen tater tots — do not thaw before using
- 200g (7 oz) sharp cheddar cheese, freshly grated — divided into two portions
- 50g (1.75 oz) mozzarella cheese, grated
For the garnish:
- 3 spring onions, thinly sliced
- Fresh parsley, chopped
How to Make It — Full Step-by-Step Process
Step One: Preheat the Oven and Prepare the Dish
Set your oven to 200°C (400°F) fan-forced or 210°C (410°F) conventional and allow it to preheat fully for at least 15 minutes before the casserole goes in. A properly preheated oven ensures the tater tots start crisping from the very first minute rather than sitting in a lukewarm environment and steaming instead of browning.
Take a 23x33cm (9×13 inch) baking dish and grease it generously with butter or cooking spray. Cover the base and all the way up the sides — any filling that touches an ungreased surface sticks and tears when you serve it. This takes 20 seconds and prevents a frustrating mess when you try to dish up. Set the greased baking dish aside on the counter while you prepare the filling.
Step Two: Cook the Aromatics
Place a large skillet or frying pan over medium heat and add 1 tablespoon of olive oil or butter. Once the butter melts or the oil shimmers, add the finely diced onion. Cook the onion for 4 to 5 minutes, stirring occasionally, until it turns completely soft and translucent with no raw crunch remaining. Soft, properly cooked onion melts into the filling and adds sweetness and depth — undercooked onion stays harsh and intrusive in every bite.
Add the 3 minced garlic cloves once the onion softens and stir continuously for 60 seconds. Keep the heat at medium throughout — garlic burns quickly on high heat and turns bitter almost instantly once it goes past golden. Remove the pan from heat after the 60 seconds and set aside. The onion and garlic mixture will incorporate into the filling in the next step and form the flavour base of the entire casserole.
Step Three: Make the Creamy Chicken Filling
In a large mixing bowl, combine the can of condensed cream of chicken soup, 150ml of sour cream, and 100ml of whole milk. Whisk these three together first before adding anything else — combining them separately ensures the sour cream and soup blend into a smooth, uniform base rather than sitting in lumps throughout the filling. The mixture should look creamy and pale with no visible streaks.
Add 1 teaspoon of garlic powder, 1 teaspoon of onion powder, 1/2 teaspoon of smoked paprika, 1/2 teaspoon of black pepper, and 1/2 teaspoon of salt to the cream mixture and stir to distribute the seasoning evenly. Add cooked onion and garlic from the pan directly into the bowl. Now add the 600g of shredded cooked chicken and the 1 cup of frozen peas or mixed vegetables. Fold everything together gently until the chicken and vegetables look fully incorporated and every piece carries a visible coating of the creamy sauce.
Add half the grated cheddar — approximately 100g — to the filling mixture and fold it through. This cheese inside the filling melts during baking and creates pockets of gooey, stretchy cheese throughout the interior rather than just on the top surface. It makes a significant difference to the overall eating experience and is one of the reasons this creamy chicken tater tot casserole homemade version tastes so much better than simpler versions that only put cheese on top.
Step Four: Assemble the Casserole
Pour the chicken filling into the prepared greased baking dish. Use a spatula to spread it into an even layer, pressing gently to ensure no air pockets sit underneath the filling. An even layer is important here because uneven filling thickness means some areas cook faster than others — you can end up with overcooked edges and an underdone centre if the filling mounds up unevenly.
Take the frozen tater tots straight from the freezer — do not thaw them first. Arrange them in a tight, single layer directly on top of the chicken filling, pressing them gently to sit flat and close together. Start from one end of the dish and work systematically to the other, placing each tot right next to the previous one. You want minimal gaps between the tots so the entire surface looks covered. Gaps let the filling bubble up between the tater tots during baking, which is fine flavour-wise but produces a less visually tidy finished dish.
FYI — the reason you do not thaw the tater tots before baking is that frozen tots go into a hot oven and crisp on the outside while the filling heats through at the same rate. Thawed tots release excess moisture during baking, which steams the underside of each tot and prevents that essential golden crunch from developing properly.
Step Five: Add the Cheese Topping
Scatter the remaining 100g of grated cheddar evenly across the top of the tater tot layer. Add the 50g of grated mozzarella on top of the cheddar. Using two cheeses here is a deliberate choice — cheddar delivers sharp flavour and a golden, slightly crisp top, while mozzarella adds stretch and that satisfying pull when you serve a portion. Mozzarella alone produces a milder, less flavourful top. Using cheddar alone gives great flavour but less stretch. Together they deliver both qualities simultaneously.
Distribute the cheese evenly so every section of the casserole gets an equal amount. Uneven cheese distribution means some bites get a thick, gooey layer while others get almost nothing. Take 30 seconds to spread it properly and the entire dish looks and tastes consistent from edge to edge.
Step Six: Bake the Casserole
Place the assembled casserole dish on the centre rack of your fully preheated oven. Bake uncovered at 200°C (400°F) for 30 to 35 minutes. Uncovered baking is essential for this easy chicken tater tot casserole bake — covering the dish traps steam, which makes the tater tots soggy rather than crispy. The whole appeal of the top layer depends on direct dry oven heat reaching the tots throughout the full baking time.
At the 30-minute mark, check the casserole by looking at the tater tots and cheese. The tots should look golden-brown and slightly crispy on top. The cheese should look fully melted, bubbling at the edges, and showing a few golden patches across the surface. If the cheese looks pale and the tots still look pale yellow rather than golden, continue baking for a further 5 minutes and check again.
For extra crispy tater tots with a deep golden colour, switch the oven to grill or broil mode for the final 3 minutes of baking. Keep the oven door slightly ajar and watch constantly during those final 3 minutes — the cheese and tots go from perfectly golden to burnt surprisingly quickly under direct grill heat. Remove from the oven the moment the surface looks deeply golden and bubbling.
Step Seven: Rest, Garnish, and Serve
Remove the casserole from the oven and allow it to rest on a heatproof surface for 5 minutes before serving. This resting time lets the filling settle and thicken slightly — cutting straight into a just-baked casserole produces a runny, loose filling that spreads across the plate rather than holding its shape in a clean, scoopable portion.
After resting, scatter sliced spring onions and fresh chopped parsley generously over the top of the entire casserole. The fresh green garnish adds a colour contrast against the golden cheese and brown tots that makes the dish look far more appealing. Additionally, the mild sharpness of the spring onion cuts through the richness of the creamy filling and adds a fresh note that prevents the dish from feeling too heavy.
Use a large spoon or spatula to scoop generous portions onto plates. Each serving should include a full layer of crispy tater tots, a thick section of cheesy filling underneath, and a scattering of the fresh garnish on top. Serve immediately while the tots remain crispy and the filling stays hot and loose. IMO, this comfort food chicken tater tot casserole hits best straight from the oven with nothing else needed alongside it — it is a complete meal in one dish. 🙂
Why This Recipe Works So Well as a Family Dinner
Have you ever tried to find one dish that genuinely satisfies everyone at the table — adults, children, picky eaters, and people who claim they are not hungry? This family dinner chicken tater tot casserole is that dish. The tater tot topping appeals immediately to anyone who loves crispy potato. The creamy filling underneath feels genuinely comforting and substantial.
Beyond the crowd-pleasing factor, this recipe works practically for busy households. The filling takes 10 minutes to prepare. The assembly takes 5 minutes. The oven does everything else. Additionally, it uses cooked leftover chicken brilliantly — rotisserie chicken works perfectly and saves the prep time of cooking chicken from raw entirely.
Using Leftover or Rotisserie Chicken
Rotisserie chicken makes this quick chicken tater tot casserole meal even faster to assemble. Pull the meat from a whole rotisserie chicken and shred it roughly with two forks — a full rotisserie bird yields approximately 600 to 700g of meat, which is exactly the right amount for this recipe.
The pre-seasoned flavour of rotisserie chicken also adds depth to the filling that plain poached or baked chicken cannot match. The herbs and spices used in the rotisserie process carry through into the finished casserole and complement the garlic powder, paprika, and cream soup beautifully. This is probably the single most effective shortcut in this entire recipe.
Variations Worth Trying
Adding Bacon
Cook 150g of streaky bacon until crispy, then crumble it over the filling layer before adding the tater tots. The smoky, salty bacon works brilliantly with the creamy chicken filling and adds a textural element that makes the dish feel noticeably more indulgent. This version works particularly well for the cheesy chicken potato casserole recipe crowd who want maximum comfort in every bite.
Spicy Version
Add 1 teaspoon of hot sauce and 1/2 teaspoon of cayenne pepper to the cream filling mixture. Swap the mild cheddar for a sharp pepper jack cheese as the topping layer. The spice level stays manageable but adds a genuine kick that cuts through the richness of the cream soup and sour cream perfectly.
Adding Broccoli
Stir 1.5 cups of small broccoli florets into the filling alongside the frozen peas. The broccoli softens during baking and absorbs the creamy sauce beautifully. This turns the baked chicken tater tot casserole easy version into a more complete, nutritionally balanced meal without any extra effort or preparation time.
Common Mistakes to Avoid
Using thawed tater tots: Thawed tots release moisture in the oven and steam rather than crisp. Always use them straight from the freezer for the best possible top layer texture.
Covering the dish while baking: A foil cover traps steam and produces soft, pale tater tots with no crunch. The dish must bake uncovered for the entire time to develop the golden, crispy surface that defines this recipe.
Under-seasoning the filling: Condensed soup and sour cream both carry some salt, but the large volume of chicken and vegetables dilutes the seasoning significantly. Always taste the filling before assembling and adjust salt and pepper as needed. :/
Skipping the resting time: Serving immediately after removing from the oven produces a runny filling that does not hold its shape on the plate. Five minutes of resting makes a real, practical difference to how the dish serves and looks.
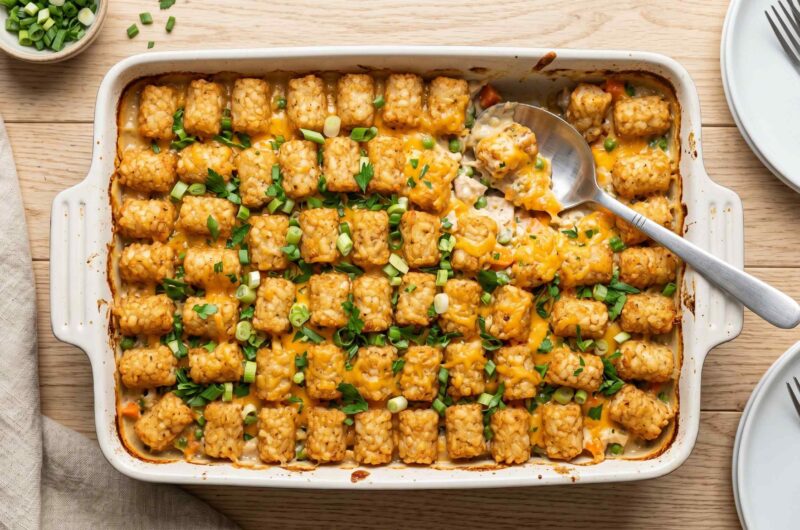
Crispy Cheesy Chicken Casserole With Tater Tot Topping
6
servings15
minutes35
minutesThis cheesy chicken tater tot casserole layers a creamy chicken filling made with condensed soup, sour cream, and cheddar cheese under a full layer of frozen tater tots baked until golden and crispy. Ready in 50 minutes, it is the ultimate comfort food chicken tater tot casserole for the whole family.
Ingredients
Chicken filling:
600g cooked chicken, shredded
1 tablespoon olive oil or butter
1 medium onion, finely diced
3 garlic cloves, minced
1 cup frozen peas or mixed vegetables
1 can (295g) condensed cream of chicken soup
150ml sour cream
100ml whole milk
1 teaspoon garlic powder
1 teaspoon onion powder
1/2 teaspoon smoked paprika
1/2 teaspoon black pepper
1/2 teaspoon salt
Topping:
800g frozen tater tots (do not thaw)
200g sharp cheddar cheese, freshly grated (divided)
50g mozzarella cheese, grated
Garnish:
3 spring onions, sliced
Fresh parsley, chopped
- Preheat oven to 200°C fan or 210°C conventional for at least 15 minutes
- Grease a 23x33cm baking dish thoroughly with butter or cooking spray
- Heat olive oil or butter in a skillet over medium heat
- Add diced onion and cook for 4 to 5 minutes until fully soft and translucent
- Add minced garlic and stir continuously for 60 seconds then remove from heat
- Combine condensed cream of chicken soup, sour cream, and whole milk in a large bowl
- Whisk together until smooth and uniform with no visible lumps
- Add garlic powder, onion powder, smoked paprika, black pepper, and salt to the bowl
- Stir seasoning through the cream mixture evenly
- Add cooked onion and garlic mixture to the bowl
- Add shredded chicken and frozen peas or mixed vegetables
- Fold everything together gently until fully combined and evenly coated
- Add half the grated cheddar to the filling and fold through
- Pour filling into the greased baking dish and spread into an even layer
- Arrange frozen tater tots in a tight single layer directly on top of the filling
- Press each tot gently to sit flat and close to the next with minimal gaps
- Scatter remaining cheddar evenly across the tater tot layer
- Add grated mozzarella on top of the cheddar and distribute evenly
- Place casserole on the centre rack of the preheated oven uncovered
- Bake for 30 to 35 minutes until tots are golden and cheese is bubbling
- Switch to grill or broil for the final 3 minutes for extra crunch if desired
- Remove from oven and rest on a heatproof surface for 5 minutes
- Scatter sliced spring onions and chopped parsley generously over the top
- Scoop generous portions onto plates ensuring each serving includes tots and filling
- Serve immediately while tots are still crispy and filling is hot
FAQs
Q1: Can I make this casserole ahead of time?
Yes — assemble the entire casserole through Step Five, cover tightly with cling film or foil, and refrigerate for up to 24 hours before baking. Remove from the fridge 20 minutes before baking to take the chill off. Add 5 to 10 minutes to the baking time to account for the cold filling. This makes this chicken cheese tater tot bake recipe ideal for meal prepping ahead of a busy week.
Q2: Can I freeze this casserole?
Yes, with one caveat. Freeze before baking rather than after — tater tots that have already baked do not reheat well from frozen and lose their crunch entirely. Assemble the casserole, cover tightly with two layers of cling film and one layer of foil, and freeze for up to 2 months. Thaw in the fridge overnight, then bake as normal adding 10 extra minutes to the total baking time.
Q3: What can I use instead of cream of chicken soup?
Make a quick homemade substitute by melting 2 tablespoons of butter in a saucepan, whisking in 2 tablespoons of plain flour to form a paste, then slowly adding 250ml of chicken stock and 100ml of milk while whisking continuously until thickened. Season with salt, pepper, and garlic powder. This substitution tastes fresher and lets you control the sodium content completely.
Q4: Can I use a different cheese?
Any good melting cheese works here. Gruyere adds a nuttier, more sophisticated flavour. Colby Jack produces a milder, creamier result. Smoked gouda adds a deep smokiness that pairs brilliantly with the tater tots. Avoid pre-grated bagged cheese — the anti-caking coating on pre-grated cheese prevents it from melting as smoothly as freshly grated cheese does.
Wrapping It Up
This cheesy chicken tater tot casserole recipe delivers everything you want from a comfort food dinner — crispy tops, creamy filling, bold cheesy flavour, and a dish that genuinely satisfies the whole table. Cook the aromatics properly, season the filling assertively, use frozen tots straight from the packet, bake uncovered, and rest before serving. Those five habits guarantee a perfect result every time.
Whether you make the classic version, add bacon, or go spicy, this casserole delivers consistently. Now preheat the oven and get that dish assembled — it is genuinely one of the easiest impressive dinners you will ever make.