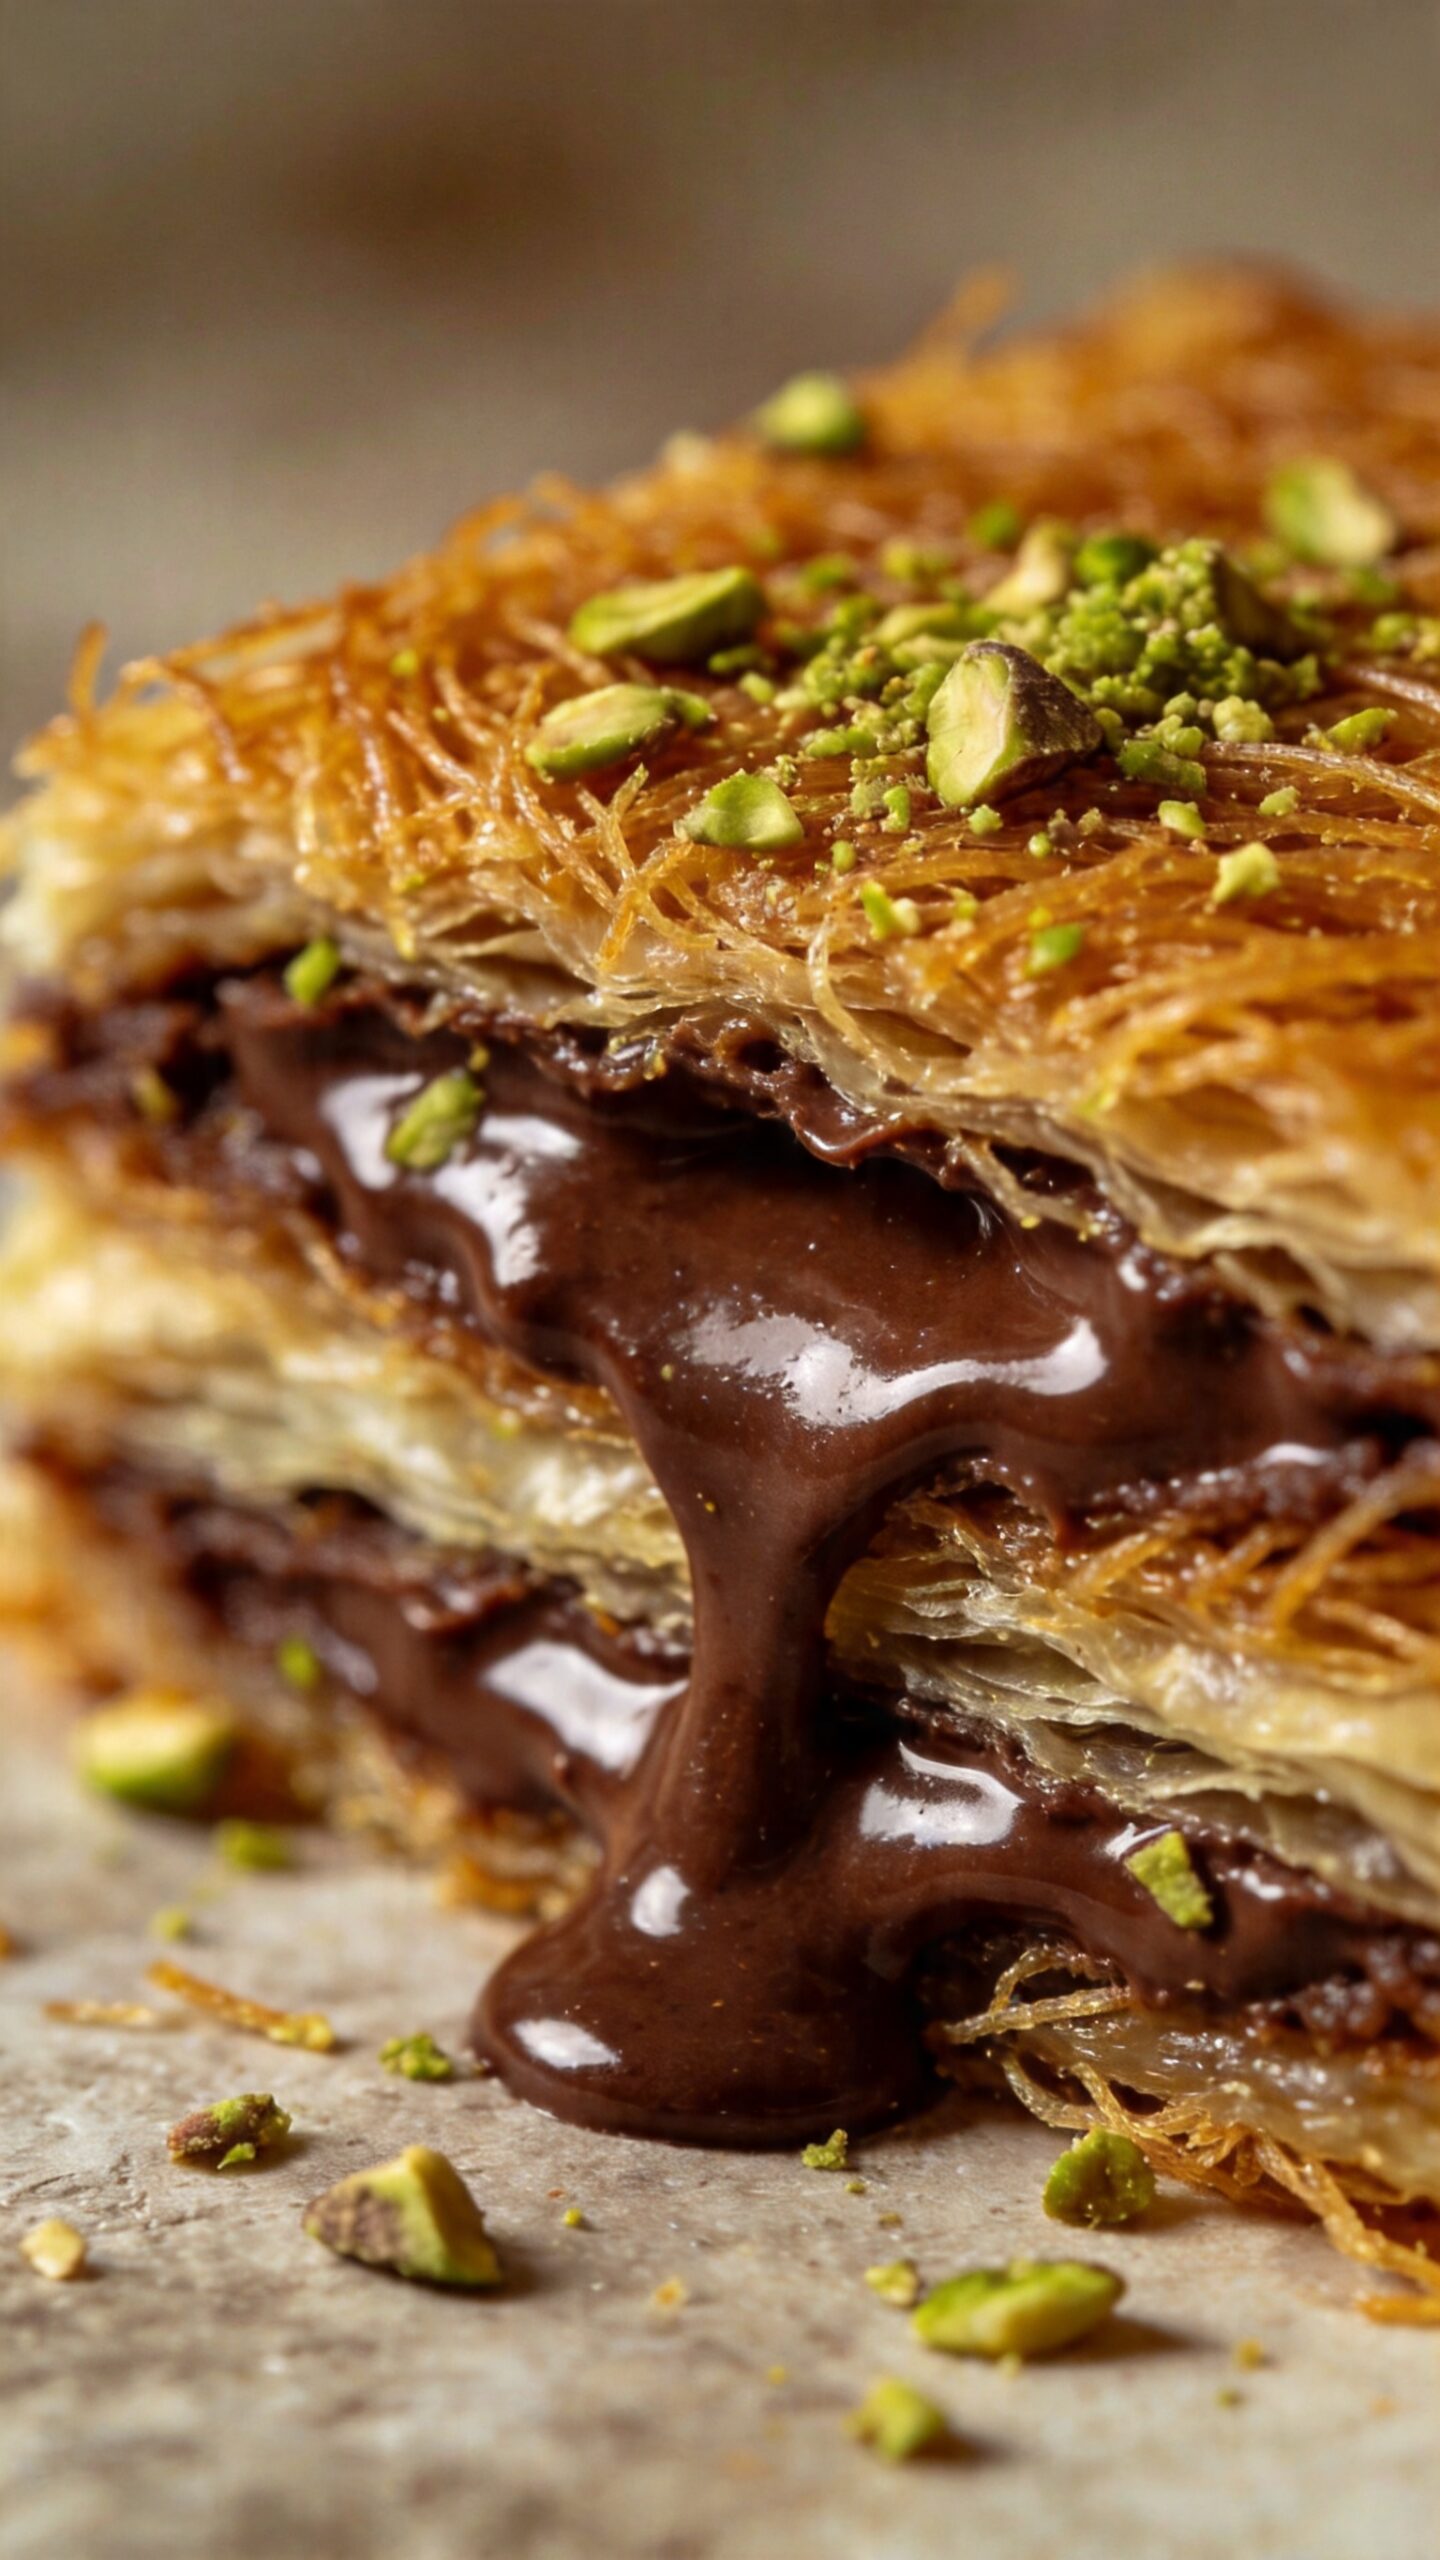
This Chocolate Kunafa Recipe is the dessert that genuinely stops people mid-conversation at the table. Crispy golden shredded pastry on the outside, warm melted chocolate and stretchy cheese on the inside — it is the kind of thing you make once and then get asked to make every single week after that.
Why Chocolate Kunafa Deserves a Spot in Your Kitchen
Traditional Kunafa Dessert is already one of the greatest things ever created. However, adding a chocolate layer takes it somewhere completely different and honestly even better. The combination of crispy pastry, rich chocolate, and melted cheese together creates something truly unforgettable.
Have you ever tasted the Dubai Kunafa Chocolate trend that took over social media? That satisfying snap and pull moment is exactly what this recipe recreates at home. Furthermore, you do not need any special equipment or hard-to-find ingredients to make it happen.
Ingredients You Will Need
For the Kunafa Base:
- 400 grams kataifi shredded pastry dough, thawed if frozen
- 150 grams unsalted butter, melted
- 1 tablespoon sugar
- 1/2 teaspoon ground cinnamon (optional)
For the Chocolate Filling:
- 200 grams dark chocolate, finely chopped
- 100 grams milk chocolate, finely chopped
- 1/2 cup heavy cream
- 2 tablespoons unsalted butter
- 1 teaspoon vanilla extract
For the Cheese Layer:
- 250 grams mozzarella cheese, shredded
- 100 grams akkawi cheese or ricotta cheese, crumbled
- 1 tablespoon sugar
For the Simple Sugar Syrup:
- 1 cup granulated sugar
- 1/2 cup water
- 1 teaspoon lemon juice
- 1 teaspoon rose water or orange blossom water
For Garnish:
- 2 tablespoons crushed pistachios
- 1 tablespoon desiccated coconut (optional)
- Cocoa powder for light dusting
How to Make Chocolate Kunafa Recipe at Home
Step 1 — Make the Sugar Syrup First
- Combine the sugar and water together in a small saucepan over medium heat
- Stir gently until the sugar fully dissolves into the water — this takes about 2 minutes
- Once dissolved, stop stirring and let the syrup come to a gentle boil
- Add the lemon juice and let it boil steadily for 8 to 10 minutes until it thickens slightly and coats a spoon
- Remove the pan from heat and stir in the rose water or orange blossom water
- Pour the syrup into a heatproof jug and allow it to cool completely before using
- Cold syrup poured onto hot kunafa creates the perfect absorption without making the pastry soggy
Pro Tip: Always make the sugar syrup first and let it cool fully before you start baking. Hot syrup poured onto hot kunafa makes the pastry go limp and wet instead of staying crispy on the outside.
Step 2 — Prepare the Kataifi Pastry
- Remove the kataifi shredded pastry from its packaging and place it into a large mixing bowl
- Use your fingers to gently separate and loosen all the shredded strands apart from each other
- Work through the entire amount carefully because unloosened clumps create dense, tough patches in the finished kunafa
- Pour the melted butter gradually over the separated pastry strands
- Add the sugar and cinnamon if using, then toss everything together with your hands
- Make sure every single strand gets coated evenly in butter — unbuttered strands will not brown and crisp properly during baking
- The pastry should feel lightly moistened and golden from the butter throughout
Step 3 — Make the Chocolate Filling
- Place the finely chopped dark chocolate and milk chocolate together into a heatproof bowl
- Heat the heavy cream in a small saucepan over medium heat until it just begins to simmer at the edges
- Pour the hot cream directly over the chopped chocolate and let everything sit undisturbed for 2 full minutes
- After 2 minutes, stir slowly from the center outward until the mixture becomes completely smooth and glossy
- Add the butter and vanilla extract to the ganache and stir again until fully combined
- Set the chocolate ganache aside at room temperature to cool and thicken slightly before assembling
- A ganache that is too hot will run through the pastry layers instead of staying as a defined filling
Step 4 — Prepare the Cheese Layer
- Combine the shredded mozzarella and crumbled akkawi or ricotta in a bowl
- Add the tablespoon of sugar and mix everything together with a fork until evenly combined
- The sugar balances the saltiness of the cheese and helps it melt more smoothly during baking
- If your akkawi cheese tastes very salty, soak it in cold water for 30 minutes beforehand and then drain it thoroughly before using
Step 5 — Assemble the Kunafa in Layers
- Preheat your oven to 190C or 375F and grease a 30 centimeter round baking pan generously with butter
- Take half the buttered kataifi pastry and press it firmly and evenly across the base of the greased pan
- Use your fingers and the back of a spoon to press the pastry down into a compact, even layer about 1 centimeter thick
- Next, spread the cheese mixture evenly across the entire pastry base layer
- Then pour the cooled chocolate ganache slowly and evenly over the cheese layer
- Spread the ganache gently with a spatula so it covers the cheese completely without mixing into it
- Finally, take the remaining half of the buttered kataifi pastry and distribute it evenly across the top of the chocolate layer
- Press this top layer down firmly with your hands so it compacts well and covers everything completely underneath
Pro Tip: Pressing each pastry layer down firmly before baking is essential. Loose, unpressed pastry creates an uneven surface that browns patchily and does not hold its shape when you flip or slice the kunafa.
Step 6 — Bake the Kunafa
- Place the assembled pan on the middle rack of the preheated oven
- Bake for 25 to 30 minutes until the top surface turns a deep golden amber color
- After 20 minutes, check the color — if the edges are browning faster than the center, rotate the pan 180 degrees
- The kunafa is ready when the entire top surface looks uniformly golden brown and you can see the edges pulling away slightly from the sides of the pan
- Remove the pan from the oven carefully and place it on a heatproof surface
Step 7 — Add the Sugar Syrup and Serve
- Immediately pour the cooled sugar syrup evenly across the entire surface of the hot kunafa straight out of the oven
- Pour it gradually and let it absorb naturally — do not rush this step or flood the surface all at once
- Listen for the sizzle as the cold syrup hits the hot pastry — that sound means it is absorbing correctly
- Let the kunafa rest in the pan for 5 minutes before attempting to flip or slice it
- To flip, place a large flat serving plate face-down on top of the pan and then invert both together in one confident motion
- Lift the pan away to reveal the golden crispy bottom layer now facing upward
- Scatter the crushed pistachios generously across the top surface immediately while the kunafa is still hot
- Dust lightly with cocoa powder and add desiccated coconut if using, then serve straight away
Flavor Variations
Dubai Kunafa Chocolate Snap Style
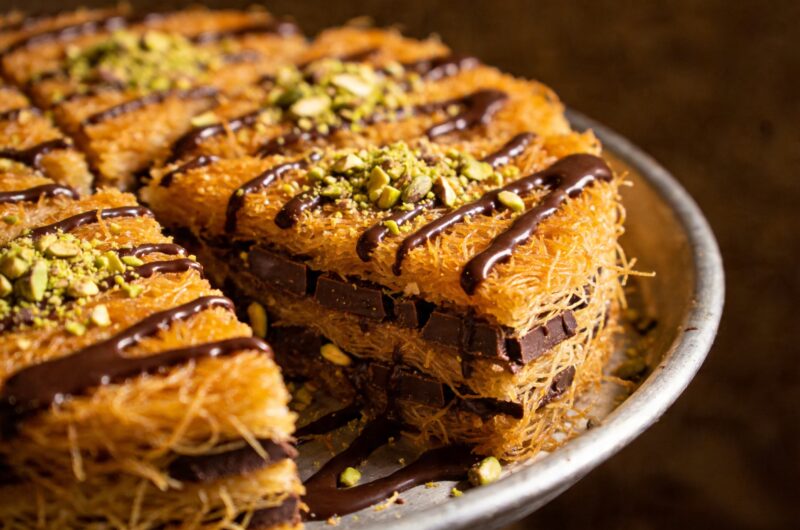
- Melt an additional 150 grams of dark chocolate and spread it thinly over the finished kunafa surface
- Let it set at room temperature for 10 minutes until firm enough to snap when tapped
- This recreates the famous Dubai Kunafa Chocolate snap experience that everyone went crazy for online
Mini Kunafa Individual Portions
- Press the pastry into greased muffin tins instead of a large round pan
- Fill each cup with a spoonful of cheese and a spoonful of chocolate ganache
- Bake at 190C for 15 to 18 minutes for perfect individual Mini Kunafa portions that look incredible on a dessert table
Kunafa Cheesecake Fusion
- Replace the cheese layer entirely with a sweetened cream cheese mixture made from 200 grams cream cheese, 3 tablespoons sugar, and 1 teaspoon vanilla
- Spread it thickly between the pastry layers before adding the chocolate ganache on top
- This Kunafa Cheesecake hybrid is one of the most requested Arabic Dessert Recipes at any gathering
Why This Chocolate Kunafa Recipe Works Every Time
Three clear reasons make this recipe consistently reliable and impressive:
- Cold syrup on hot kunafa creates the perfect crispy-outside, moist-inside texture balance that defines great kunafa
- Two types of chocolate in the ganache produce a filling that is rich enough to taste indulgent but not so bitter it overwhelms the pastry
- Firm pressing of both pastry layers before baking ensures even browning and a clean structure that holds together when flipped and sliced
Serving Ideas
Turn this into a full Arabic Sweets Recipes spread for any occasion with these ideas:
- Serve alongside small cups of Arabic cardamom coffee or mint tea
- Add a scoop of vanilla ice cream on the side for a hot-and-cold contrast that works beautifully
- Arrange Mini Kunafa portions on a decorative tray for an impressive Eid Sweets Recipes presentation
- Dust with extra cocoa powder and gold edible glitter for a stunning Kunafa Photography worthy display
- FYI, this kunafa also works beautifully as a Kunafa Cake centerpiece for celebrations when made in a rectangular pan and sliced into squares
Common Mistakes to Avoid
- Using warm syrup on hot kunafa — always cool the syrup completely before pouring or the pastry goes soft immediately
- Not pressing the pastry layers firmly — loose pastry creates an uneven surface that browns patchily and falls apart when sliced
- Skipping the cheese layer — the cheese creates that iconic stretchy pull that makes kunafa so satisfying to eat
- Adding too much ganache — an overfilled kunafa leaks during baking and makes the pastry greasy and heavy
- Not buttering every pastry strand — dry strands do not brown and create white, raw-looking patches on the finished surface
Storage Tips
- Room temperature: Cover loosely and store for up to 1 day — kunafa tastes best eaten fresh on the day it is made
- Refrigerator: Store in an airtight container for up to 3 days — reheat in a 180C oven for 8 minutes to restore crispiness
- Freezer: Freeze the unbaked assembled kunafa for up to 1 month — bake directly from frozen at 190C for 35 to 40 minutes
Dubai Style Chocolate Kunafa You Can Make Tonight
Course: Deserts10
servings20
minutes30
minutes300
kcalThis Chocolate Kunafa Recipe layers buttered kataifi pastry with a rich dark chocolate ganache and melted cheese filling, baked until golden and finished with cold sugar syrup and crushed pistachios. Crispy outside, gooey chocolatey inside, and deeply satisfying. Ready in 50 minutes and serves 8 to 10 people perfectly.
Ingredients
For the Kunafa Base:
400g kataifi shredded pastry dough
150g unsalted butter, melted
1 tbsp sugar
1/2 tsp ground cinnamon
For the Chocolate Filling:
200g dark chocolate, finely chopped
100g milk chocolate, finely chopped
1/2 cup heavy cream
2 tbsp unsalted butter
1 tsp vanilla extract
For the Cheese Layer:
250g mozzarella cheese, shredded
100g akkawi or ricotta cheese, crumbled
1 tbsp sugar
For the Sugar Syrup:
1 cup granulated sugar
1/2 cup water
1 tsp lemon juice
1 tsp rose water or orange blossom water
For Garnish:
2 tbsp crushed pistachios
1 tbsp desiccated coconut
Cocoa powder for dusting
- Step 1: Combine sugar and water, boil for 8 to 10 minutes, add rose water, and cool completely
- Step 2: Loosen kataifi strands, coat every strand in melted butter and sugar, and set aside
- Step 3: Pour hot cream over chopped chocolate, stir into smooth ganache, add butter and vanilla, and cool slightly
- Step 4: Mix shredded mozzarella, crumbled akkawi, and sugar together in a bowl
- Step 5: Press half the pastry into a greased pan, layer cheese, pour chocolate ganache, then top with remaining pastry and press firmly
- Step 6: Bake at 190C for 25 to 30 minutes until deep golden brown all over
- Step 7: Pour cooled syrup over hot kunafa, rest 5 minutes, flip onto a plate, garnish with pistachios and cocoa, and serve
Frequently Asked Questions
Q1: Can I make this chocolate kunafa recipe without kataifi pastry? Kataifi is the traditional shredded pastry used in authentic kunafa and produces the best texture. However, if you cannot find it, very finely shredded filo pastry makes a reasonable substitute. Additionally, some people use crushed shredded wheat biscuits as an accessible alternative that still gives a similar crunch.
Q2: What cheese works best for homemade kunafa? Akkawi cheese is the most traditional choice because it melts smoothly and has a mild, slightly salty flavor. Mozzarella works excellently as a substitute or in combination with akkawi. Moreover, ricotta works well for a softer, creamier filling that suits the Kunafa Cheesecake style variation perfectly.
Q3: How do I get the kunafa to flip out cleanly without breaking? First, let the kunafa rest for a full 5 minutes after adding the syrup before attempting to flip. Then place a large flat plate firmly on top of the pan and invert quickly and confidently in one smooth motion. Hesitating mid-flip causes the kunafa to shift and crack.
Q4: Can I make this recipe as individual mini portions for a party? Absolutely. Press the pastry into well-greased muffin tins, fill with cheese and chocolate, top with more pastry, and bake for 15 to 18 minutes. IMO, individual Mini Kunafa portions actually look more impressive on a party table than one large pan and are much easier to serve to guests.
Q5: Is this chocolate kunafa recipe suitable for Eid or special occasions? Yes, completely. This recipe scales up easily by doubling all quantities and using a larger pan. Furthermore, the Dubai Kunafa Chocolate snap variation and the mini portion style both create stunning visual presentations that make this one of the most memorable Eid Sweets Recipes you can bring to any celebration.
Final Thoughts
This Chocolate Kunafa Recipe brings together everything that makes Middle Eastern desserts so special — the crispy pastry, the warm melted filling, the fragrant syrup — and then adds a rich chocolate dimension that makes it genuinely next level. Furthermore, every step is straightforward enough for a first-time kunafa maker to follow with confidence.
Whether you make the classic version, try the Dubai Kunafa Chocolate snap style, or go the Mini Kunafa route for a party, this recipe always delivers something spectacular. Make it this weekend and watch it become the most requested dessert in your household.