A standard brownie is already a very good thing. A fudgy chocolate mousse brownie recipe easy enough for a home baker — with a thick, rich brownie base topped by a silky, airy chocolate mousse layer — is an entirely different category of dessert. It is the kind of thing you bring to one dinner party and then spend the next three months being asked about by everyone who was there.
This layered chocolate mousse brownies dessert uses a proper baked fudgy brownie as the base and a whipped dark chocolate mousse layer set on top, chilled until firm, and finished with chocolate shavings or a ganache drizzle. No complicated techniques, no specialist equipment, and no shortcuts that compromise either layer. The result tastes like a creamy mousse brownie cake recipe homemade in a professional kitchen and looks considerably more impressive than the actual effort involved.
What You’ll Need (Ingredients)
Quality dark chocolate makes the biggest difference across both layers here. Use the same chocolate for both and the flavour profile stays coherent throughout.
For fudgy brownie base:
- 200g (7oz) dark chocolate, minimum 70% cocoa, roughly chopped
- 150g (10 tablespoons) unsalted butter, cubed
- 250g (1¼ cups) caster sugar
- 3 large eggs, room temperature
- 1 teaspoon vanilla extract
- 80g (⅔ cup) plain flour
- 30g (3 tablespoons) cocoa powder, sifted
- ½ teaspoon fine salt
- ½ teaspoon baking powder
Chocolate mousse topping:
- 200g (7oz) dark chocolate, minimum 70% cocoa, roughly chopped
- 300ml (1¼ cups) double cream, cold — divided into 100ml and 200ml
- 2 tablespoons icing sugar, sifted
- 1 teaspoon vanilla extract
- 1 pinch of fine salt
- 1 tablespoon unsalted butter
For the finishing layer:
- 50g (2oz) dark chocolate, melted — for drizzling
- 2 tablespoons dark chocolate shavings
- 1 tablespoon cocoa powder for dusting
- Optional: flaky sea salt for scattering
How to Make It — Full Step-by-Step Process
Step One: Prepare the Tin and Preheat the Oven
Preheat your oven to 175°C (350°F) fan-forced or 180°C (355°F) conventional. Grease a 23x23cm (9×9 inch) square baking tin thoroughly with butter, making sure to cover the sides as well as the base. Line the tin with two strips of parchment paper crossing each other in an X pattern with enough overhang on all four sides to act as handles — this overhang is how you lift the entire finished slab out of the tin cleanly after chilling, without disturbing the mousse layer or breaking the brownie base.
Grease the parchment paper lightly as well, particularly the sides where it folds up against the tin walls. A well-greased and lined tin means the finished chocolate mousse brownies dessert releases in one clean piece rather than sticking at the edges and tearing when you attempt to remove it. Set the prepared tin aside on a baking tray while you make the brownie batter.
Step Two: Make the Fudgy Brownie Base
Place 200g of chopped dark chocolate and 150g of cubed unsalted butter together in a large heatproof bowl. Set the bowl over a saucepan of barely simmering water, making sure the bottom of the bowl does not touch the water surface, and stir continuously until both the chocolate and butter melt completely into a smooth, glossy, unified mixture. Remove from the heat immediately once fully melted and allow to cool for 5 minutes — adding hot chocolate mixture directly to eggs scrambles them on contact and ruins the batter entirely.
Add 250g of caster sugar to the cooled chocolate mixture and stir vigorously with a wooden spoon for 1 full minute until completely combined. The sugar dissolves partially into the warm chocolate and creates the slightly crackled, shiny top surface that defines a properly made best fudgy mousse brownies recipe homemade result. Add 3 room temperature eggs one at a time, stirring firmly after each addition until fully incorporated before adding the next. Add 1 teaspoon of vanilla extract and stir once more.
Sift 80g of plain flour, 30g of cocoa powder, ½ teaspoon of fine salt, and ½ teaspoon of baking powder directly into the chocolate mixture. Fold everything together using a large spatula in slow, deliberate strokes until no dry flour streaks remain visible — stop folding immediately at this point. Over-mixing brownie batter develops the gluten in the flour and produces a cakey, springy texture rather than the dense, fudgy crumb that makes rich chocolate brownies with mousse topping taste so genuinely satisfying.
Pour the brownie batter into the prepared tin and spread evenly to all four corners using the spatula. Bake for 22 to 26 minutes until the top surface looks set and slightly crackled and a skewer inserted 2 cm from the edge comes out with moist crumbs attached but no wet batter. The centre should look barely set — it firms significantly as it cools. Remove from the oven and cool completely in the tin on a wire rack before adding the mousse layer, approximately 1 to 1.5 hours. Adding mousse to a warm brownie base melts the mousse on contact and ruins both layers. :/
Step Three: Make the Chocolate Mousse Layer
Place 200g of chopped dark chocolate, 1 tablespoon of unsalted butter, and 100ml of the double cream together in a heatproof bowl. Set over barely simmering water and stir continuously until the chocolate and butter melt completely into the cream and the mixture looks smooth, dark, and glossy. Remove from heat, stir in 1 teaspoon of vanilla extract and a pinch of salt, and allow to cool at room temperature for 10 to 12 minutes until the mixture feels warm but not hot.
Pour the remaining 200ml of cold double cream into a large mixing bowl and beat with an electric hand mixer on high speed until it begins to thicken. Add 2 tablespoons of sifted icing sugar and continue beating until the cream holds firm but slightly soft peaks — peaks that hold their shape when you lift the beaters without drooping immediately. This is the ideal consistency for folding: stable enough to maintain the mousse structure, soft enough to incorporate smoothly without deflating.
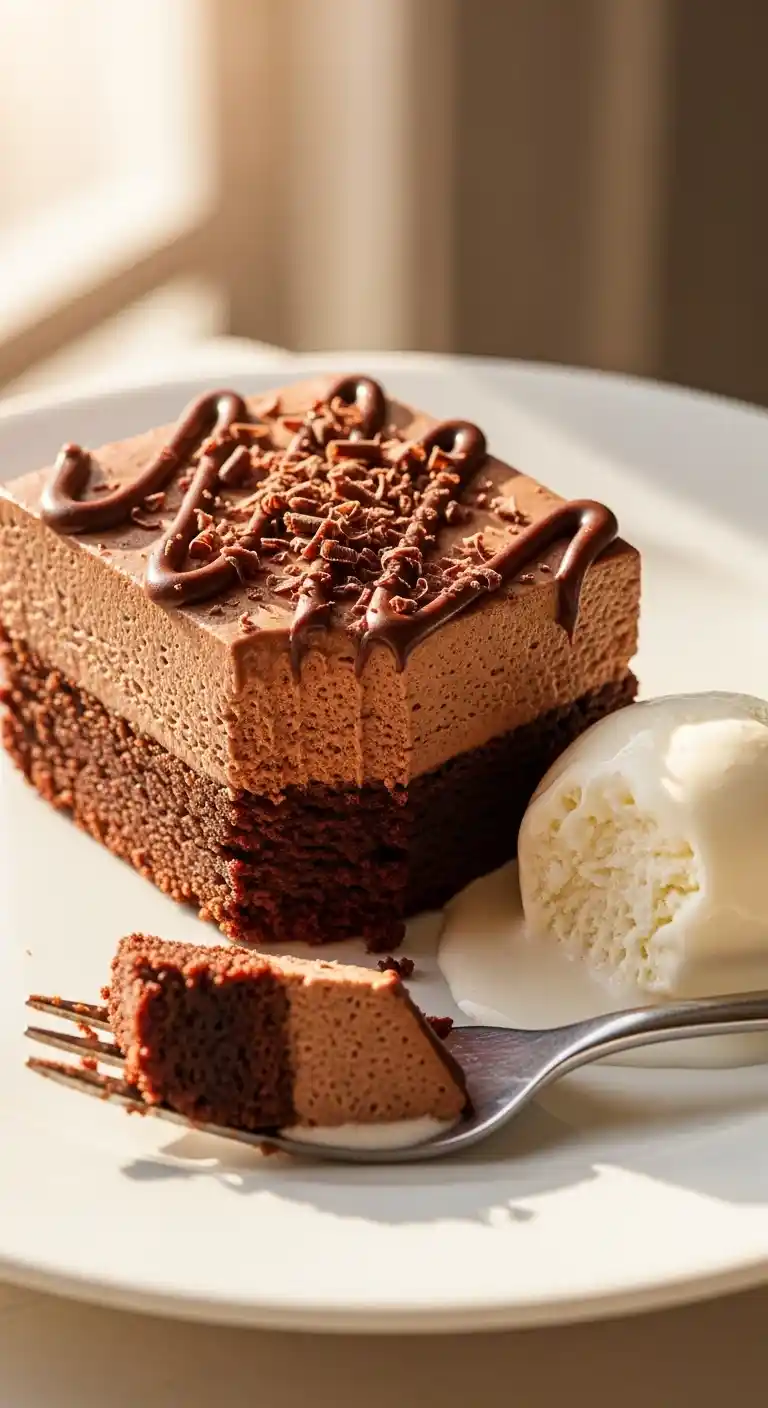
Pour the cooled chocolate mixture into the whipped cream in two additions. Add the first half and fold gently using a large spatula, cutting down through the centre and folding upward in slow deliberate strokes. Add the second half and fold until completely incorporated with no visible white cream streaks remaining in the mixture. The finished mousse should look uniformly dark, smooth, and slightly glossy — the easy chocolate mousse brownie dessert recipe topping that sets this dessert apart from every standard brownie you have ever made.
Step Four: Layer, Chill, and Finish
Spoon the finished chocolate mousse directly onto the completely cooled brownie base in the tin in large dollops distributed evenly across the surface. Spread the mousse layer evenly from the centre outward to all four edges using an offset spatula or the back of a large spoon, working in smooth strokes until the surface looks flat and uniform with no thin or thick spots. The mousse layer should sit approximately 2 to 3 cm deep over the brownie base — a generous layer that delivers a meaningful mousse-to-brownie ratio in every slice.
Tap the tin gently on the counter two or three times to settle the mousse and remove any air pockets between the mousse and the brownie surface. Cover the tin loosely with cling film — not touching the mousse surface — and refrigerate for a minimum of 2 hours until the mousse sets firmly enough to slice cleanly. Overnight chilling produces a noticeably firmer, denser mousse layer that slices with exceptional cleanness and holds its shape on the plate without any support from the tin. FYI, overnight chilling also allows the flavours across both layers to develop and deepen, producing a noticeably richer result on day two than on the day of making.
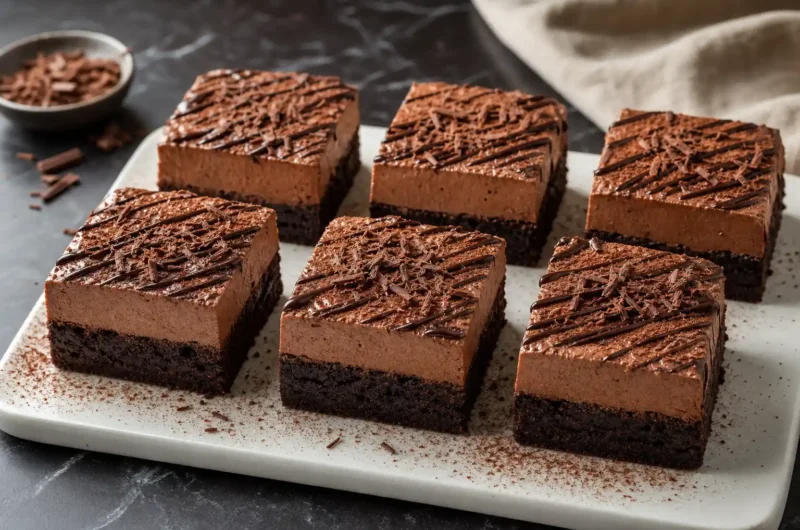
Remove the chilled tin from the fridge and lift the entire slab out using the parchment paper overhangs. Place on a cutting board and drizzle melted dark chocolate across the surface in a loose pattern. Scatter dark chocolate shavings and a light dusting of cocoa powder across the top. Scatter a small pinch of flaky sea salt if using — the salt contrasts beautifully with the sweetness of both layers and adds a sophisticated finish. Slice into 12 even bars using a sharp knife dipped in hot water and wiped clean between each cut for the cleanest, most defined edges. 🙂
Why Two Layers Beat One Every Single Time
Have you ever eaten a plain brownie and thought — this is good, but it is missing something? What it is missing is almost certainly a silky mousse layer and the understanding that desserts should always be reconsidered as opportunities.
The decadent chocolate brownies mousse layer recipe format works because the two layers offer genuinely different textures and eating experiences in a single bite. The brownie base delivers density, chew, and deep fudgy richness. The mousse layer delivers lightness, creaminess, and a smooth, airy contrast that prevents the overall dessert from feeling heavy despite containing considerable amounts of chocolate. Together they produce a triple chocolate mousse brownies recipe experience that neither layer achieves alone.
The chocolate percentage matters across both layers. Using minimum 70% cocoa solids dark chocolate in both the brownie and the mousse produces a coherent, deeply flavoured result throughout. Lower percentage chocolate produces a sweeter, less complex flavour that makes the finished dessert taste like a confection rather than a genuinely sophisticated bake. The quality of the chocolate you choose is the single biggest flavour decision in this entire recipe — treat it accordingly.
Getting the Mousse Consistency Right
The no bake chocolate mousse brownies dessert ideas format for the topping layer depends entirely on getting the double cream whipped to exactly the right consistency before folding in the chocolate.
Under-whipped cream produces a mousse that never fully sets and stays soft and pourable even after overnight chilling. Over-whipped cream produces a grainy, slightly curdled mousse with an uneven texture that looks and feels wrong even when the flavour is correct. Firm but slightly soft peaks — where the cream holds its shape for 3 to 4 seconds before slowly relaxing — is the ideal target. IMO checking the consistency every 15 seconds during the final stage of whipping takes the guesswork out completely and produces a consistent result every time.
Rich Chocolate Brownies With Mousse Topping Homemade
12
servings25
minutes25
minutesThese chocolate mousse brownies bake a fudgy dark chocolate brownie base until barely set, cool completely, then top with a silky whipped dark chocolate mousse layer chilled until firm. Finished with a chocolate drizzle and shavings, they deliver a genuinely impressive two-layer dessert with rich, creamy, fudgy results every time.
Ingredients
Fudgy brownie base:
200g dark chocolate, 70% cocoa, chopped
150g unsalted butter, cubed
250g caster sugar
3 large eggs, room temperature
1 teaspoon vanilla extract
80g plain flour
30g cocoa powder, sifted
½ teaspoon fine salt
½ teaspoon baking powder
Chocolate mousse topping:
200g dark chocolate, 70% cocoa, chopped
300ml double cream, cold, divided
2 tablespoons icing sugar, sifted
1 teaspoon vanilla extract
1 pinch fine salt
1 tablespoon unsalted butter
Finishing layer:
50g dark chocolate, melted
2 tablespoons dark chocolate shavings
1 tablespoon cocoa powder
Optional flaky sea salt
- Preheat oven to 175°C fan and grease a 23x23cm square tin thoroughly
- Line tin with two crossing strips of parchment paper with overhang on all sides
- Melt 200g dark chocolate and 150g butter together over barely simmering water
- Cool melted mixture for 5 minutes then stir in caster sugar vigorously for 1 minute
- Add eggs one at a time stirring firmly after each addition until fully incorporated
- Add vanilla extract and stir once more
- Sift flour, cocoa powder, salt, and baking powder directly into the chocolate mixture
- Fold with a spatula until no dry flour streaks remain then stop immediately
- Pour batter into prepared tin and spread evenly to all four corners
- Bake for 22 to 26 minutes until top looks set and skewer shows moist crumbs
- Cool completely in tin on a wire rack for 1 to 1.5 hours before adding mousse
- Melt 200g dark chocolate with 1 tablespoon butter and 100ml double cream over simmering water
- Stir in vanilla extract and salt then cool at room temperature for 10 to 12 minutes
- Beat remaining 200ml cold double cream with icing sugar to firm soft peaks
- Add first half of cooled chocolate to whipped cream and fold gently
- Add second half and fold until no white streaks remain
- Spoon mousse over cooled brownie base in evenly distributed dollops
- Spread mousse evenly to all four edges using an offset spatula
- Tap tin gently on counter two or three times to settle the mousse
- Cover loosely with cling film without touching the mousse surface
- Refrigerate for minimum 2 hours or overnight until firmly set
- Lift slab from tin using parchment overhangs and place on a cutting board
- Drizzle melted dark chocolate across the surface and scatter chocolate shavings
- Dust lightly with cocoa powder and scatter flaky sea salt if using
- Slice into 12 bars using a hot damp knife wiped clean between each cut
Common Mistakes to Avoid
Adding mousse to a warm brownie: Warm brownie base melts the mousse immediately and the two layers blend together into a dense, unstructured slab. Always cool the brownie completely — at least 1 hour at room temperature — before adding any mousse.
Over-mixing the brownie batter: Over-mixed brownie batter develops gluten and produces a cakey, springy texture. Fold until the flour just disappears and stop — every extra stroke after that point works against the fudgy result you want.
Folding mousse too vigorously: Vigorous stirring deflates the whipped cream and collapses the airy structure that makes mousse light. Always fold in slow, gentle, deliberate strokes and stop the moment the mixture looks uniform.
Slicing before fully chilled: Slicing a mousse layer that has not set fully produces a smeared, messy cut that ruins the visual definition between the layers. Always chill for a minimum of 2 hours — preferably overnight — before cutting.
Skipping the hot knife technique: A dry room temperature knife drags through the chilled mousse and tears both layers. Dip the knife in hot water, wipe clean, and slice in one firm downward motion for a clean, professional cut every time.
FAQs
Q1: Can I make these brownies ahead of time? Yes — these brownies are ideal for making one day ahead. Bake the brownie base, cool completely, add the mousse layer, and refrigerate overnight. The mousse firms more completely with overnight chilling and the flavours across both layers deepen and become more integrated. Slice and finish with chocolate drizzle and shavings on the day of serving for the freshest appearance and cleanest cuts.
Q2: Can I use milk chocolate instead of dark chocolate? Yes — milk chocolate works in both layers but produces a noticeably sweeter, less complex result. Reduce the icing sugar in the mousse to 1 tablespoon if using milk chocolate to prevent the topping from tasting cloying. The brownie base also becomes softer and less fudgy with milk chocolate because milk chocolate contains more sugar and less cocoa solids than dark, which affects the structure of the baked layer.
Q3: Why did my mousse layer not set firmly? A mousse that does not set almost always results from under-whipped cream, chocolate that was too warm when folded in, or insufficient chilling time. Ensure the cream reaches firm peaks before folding, allow the melted chocolate to cool to warm rather than hot, and chill for the full 2 hours minimum. If the mousse is still soft after 2 hours, return to the fridge for a further hour before attempting to slice.
Wrapping It Up
This fudgy chocolate mousse brownie recipe easy enough for any home baker delivers a genuinely impressive, two-layer dessert from a straightforward process. Melt chocolate and butter for the brownie base, bake until barely set, cool completely, fold a dark chocolate mousse over whipped cream, layer over the cooled brownie, chill for two hours, and finish with chocolate drizzle and shavings. Those six steps produce a perfect result every single time.
Whether you serve these at a dinner party with a chocolate ganache finish, make them a day ahead for the best flavour, scatter flaky sea salt across the top for a sophisticated contrast, or simply eat one straight from the fridge on a Wednesday evening because you deserve it — they consistently impress every single person who tries them. Now melt that chocolate and make something worth every single layer.