Dairy free mousse is one of those desserts that sceptics try once and immediately stop being sceptical. The moment a thick, silky, genuinely rich chocolate mousse arrives at the table with no cream, no butter, and no dairy of any kind, people assume something clever happened. Something did. You used coconut milk, good quality dark chocolate, and a technique that takes 15 minutes and requires nothing more than a saucepan and a whisk.
This dairy free mousse recipe easy enough for a complete beginner uses full-fat coconut milk as the cream substitute — which whips into a genuinely thick, stable foam that holds its structure through chilling and serving — alongside dark chocolate and a handful of pantry ingredients. The result tastes like a rich vegan mousse dessert homemade in a professional kitchen and requires no dairy, no eggs, and no specialist ingredients that take three days to source.
What You’ll Need (Ingredients)
Simple, plant-based, and worth buying the full-fat coconut milk specifically. The fat content determines everything about the texture here.
For the dairy free chocolate mousse base:
- 2 cans (800ml total) full-fat coconut milk, refrigerated overnight
- 200g (7oz) good quality dark chocolate — minimum 70% cocoa solids, dairy free
- 3 tablespoons maple syrup or agave nectar
- 2 teaspoons vanilla extract
- 1 tablespoon cocoa powder, sifted — for deeper flavour
- ¼ teaspoon fine salt
- ¼ teaspoon instant coffee granules — optional, intensifies chocolate flavour
For the topping:
- 2 tablespoons reserved coconut cream — whipped for serving
- 1 tablespoon dark chocolate shavings
- Fresh raspberries or strawberries
- A light dusting of cocoa powder
Optional flavour variations:
- 1 teaspoon orange zest — for a chocolate orange version
- ½ teaspoon peppermint extract — for a mint chocolate version
- 1 tablespoon peanut butter — folded in after melting chocolate
How to Make It — Full Step-by-Step Process
Step One: Refrigerate the Coconut Milk Overnight
Place both cans of full-fat coconut milk in the fridge the night before you plan to make this recipe — ideally 12 to 24 hours before starting. This chilling time is not optional. Cold temperatures cause the thick coconut cream to separate completely from the thinner coconut water inside the can, rising to the top as a solid, scoopable layer. Without overnight chilling, the cream and water remain emulsified and the coconut milk pours as a uniform liquid that cannot whip into the thick, stable foam this recipe depends on entirely.
When you open the chilled cans, the solid coconut cream will have set firmly at the top of each can with the thin coconut water sitting beneath it. Scoop the solid cream out carefully using a spoon, transferring it into a large mixing bowl — you need approximately 400ml of solid cream total from both cans. Reserve 2 tablespoons of the scooped cream separately in a small bowl for the topping. Pour the remaining coconut water from both cans into a separate container and set aside — you will use a small amount of it to help melt the chocolate smoothly in the next step.
Step Two: Melt the Dark Chocolate
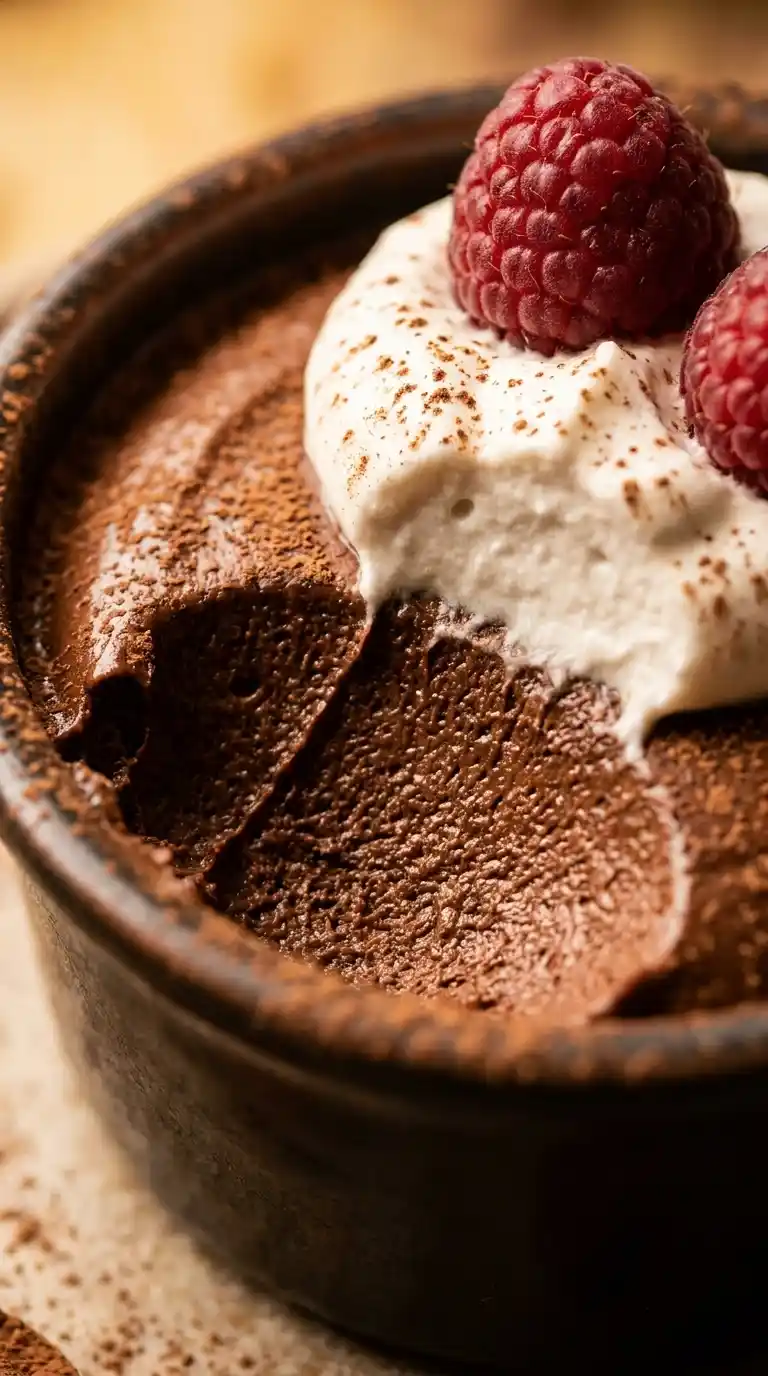
Break 200g of dairy free dark chocolate into small, roughly even pieces and place them in a heatproof bowl. Small pieces melt faster and more evenly than large chunks, reducing the risk of the chocolate overheating and seizing into a grainy, unworkable mass. Add 1 tablespoon of the reserved coconut water to the chocolate pieces before heating — this small amount of liquid helps the chocolate melt into a smooth, pourable consistency rather than a thick paste.
Set the bowl over a small saucepan of barely simmering water, making sure the bottom of the bowl does not touch the water surface — steam, not direct contact with boiling water, provides the gentle heat that melts chocolate without burning it. Stir continuously with a spatula as the chocolate melts, working from the outside of the bowl inward, until the mixture is completely smooth, glossy, and fluid with no solid pieces remaining. Remove from the heat immediately once fully melted and stir in 3 tablespoons of maple syrup, 1 tablespoon of sifted cocoa powder, 2 teaspoons of vanilla extract, ¼ teaspoon of fine salt, and the optional ¼ teaspoon of instant coffee granules.
Stir the finished chocolate mixture until all additions are fully dissolved and the result looks uniformly dark, glossy, and smooth. Allow to cool at room temperature for 8 to 10 minutes — the chocolate should feel warm but not hot when you touch the bowl. Adding hot chocolate directly to the whipped coconut cream melts the cream and collapses the foam structure you are about to build. A warm but not hot chocolate base folds cleanly into the cream without this problem.
Step Three: Whip the Coconut Cream
Place the large bowl of solid coconut cream — chilled from the cans — and beat with an electric hand mixer on high speed for 3 to 4 minutes until the cream forms thick, fluffy peaks that hold their shape when you lift the beaters. Cold coconut cream whips more effectively than cream at room temperature — if your kitchen is warm and the cream begins to soften before whipping, return the bowl to the fridge for 15 minutes and try again.
The whipped coconut cream should look visibly pale, fluffy, and significantly increased in volume compared to the dense solid cream you started with. It will not be as stiff as fully whipped double cream — coconut cream produces a slightly softer peak — but it should hold its shape firmly enough that it does not immediately collapse when you stop the mixer. This is exactly the consistency you need for folding, and it produces the creamy dairy free mousse dessert easy texture that makes this recipe genuinely impressive rather than just acceptable. FYI, coconut cream from brands with higher fat content whips more firmly — check the label and choose a brand with at least 20% fat for the best result.
Step Four: Fold the Chocolate Into the Whipped Cream
Pour the cooled chocolate mixture into the bowl of whipped coconut cream in two additions. Add the first half and fold gently using a large spatula, cutting down through the centre of the mixture and folding upward in slow, deliberate strokes — the same technique used when folding egg whites into a soufflé. This folding method preserves the air trapped in the whipped cream and maintains the light, mousse-like texture through to the finished dessert.
Add the second half of the chocolate and fold again until completely incorporated with no visible white streaks of coconut cream remaining in the mixture. The finished mousse batter should look uniformly dark, smooth, and slightly glossy, with a texture that falls slowly from the spatula when you lift it. Work relatively quickly from this point — the mousse begins to firm as it sits at room temperature, and it is significantly easier to portion into serving glasses while still slightly fluid than after it has started to set. :/
Step Five: Portion and Chill
Spoon or pour the mousse mixture evenly into four serving glasses, ramekins, or small bowls. Fill each vessel to approximately 2 cm below the rim to leave space for the topping. Tap each glass gently on the counter two or three times to settle the mousse and remove any visible air pockets near the surface. Cover each glass loosely with cling film, making sure the film does not touch the surface of the mousse — direct contact leaves an impression on the surface that affects the finished appearance.
Refrigerate for a minimum of 2 hours until the mousse sets into a firm, sliceable, spoonable texture. Overnight chilling produces an even firmer, denser result — the quick dairy free dessert mousse recipe format works well at 2 hours, but the overnight version produces a slightly richer, more concentrated flavour as the chocolate and coconut cream fully meld together. Remove from the fridge 5 minutes before serving to take the chill off slightly, then top each glass with a small spoonful of reserved whipped coconut cream, a few dark chocolate shavings, fresh raspberries, and a light dusting of cocoa powder. 🙂
Why Full-Fat Coconut Milk Beats Every Other Dairy Alternative
Have you ever attempted a no cream chocolate mousse recipe vegan style using oat milk or almond milk and found the result thin, barely set, and completely lacking the richness of a proper mousse? The problem is the fat content of the milk you used.
Full-fat coconut milk contains 17 to 24% fat, depending on the brand — a fat content high enough to separate into a thick, whippable cream after chilling. Oat milk contains approximately 1.5% fat, almond milk less than 1%. Neither has sufficient fat to whip into a stable foam or produce the structure a mousse requires. They work in smoothies and hot drinks because neither application requires structural stability — mousse absolutely does.
The plant based chocolate mousse dessert format works precisely because full-fat coconut milk behaves structurally like dairy cream when chilled and whipped. The coconut flavour is present but subtle after combining with dark chocolate, maple syrup, and vanilla — most people describe the finished mousse as tasting of chocolate with a faint tropical note rather than tasting of coconut dessert. The healthy dairy free dessert mousse result is genuinely impressive and satisfying without compromise.
Adding the Orange Variation
The orange zest variation takes this from a straightforward eggless dairy free mousse recipe easy weeknight dessert into something that feels genuinely special and flavour-complex.
Add 1 teaspoon of finely grated orange zest to the melted chocolate mixture alongside the maple syrup and vanilla, stirring until evenly distributed. The orange zest releases its aromatic oils into the warm chocolate and produces a fragrant, citrus-chocolate flavour combination that contrasts beautifully with the richness of the coconut cream. IMO the orange version is the single best flavour variation this recipe offers — it takes 10 seconds to add and transforms the mousse from simply good into genuinely memorable.
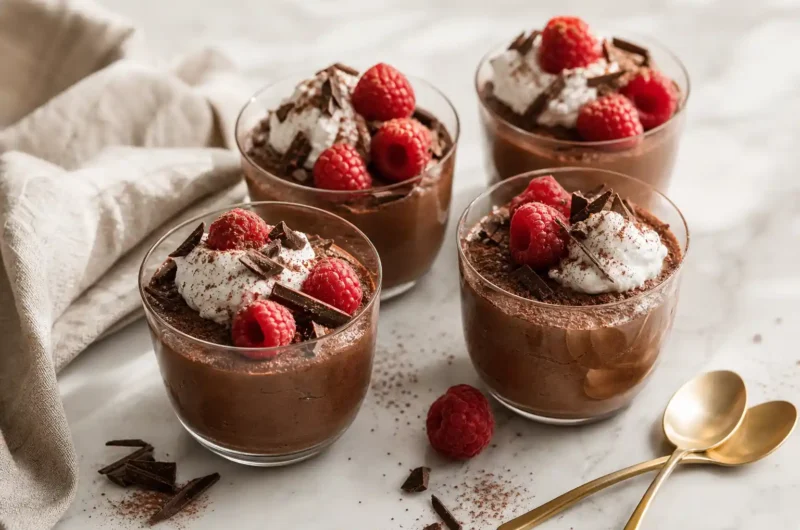
Creamy Dairy Free Mousse Dessert Anyone Can Make
4
servings14
minutes2
hoursThis dairy free mousse whips chilled full-fat coconut cream to fluffy peaks, folds in cooled melted dark chocolate with maple syrup and vanilla, portions into glasses, and chills for two hours until set. Ready in 15 minutes of active preparation, it delivers rich, silky, genuinely impressive results every time.
Ingredients
Dairy free mousse base:
2 cans (800ml) full-fat coconut milk, refrigerated overnight
200g dairy free dark chocolate, minimum 70% cocoa
3 tablespoons maple syrup or agave nectar
2 teaspoons vanilla extract
1 tablespoon cocoa powder, sifted
¼ teaspoon fine salt
¼ teaspoon instant coffee granules, optional
Toppings:
2 tablespoons reserved whipped coconut cream
1 tablespoon dark chocolate shavings
Fresh raspberries or strawberries
Cocoa powder for dusting
Optional variations:
1 teaspoon orange zest
½ teaspoon peppermint extract
1 tablespoon peanut butter
- Refrigerate both cans of full-fat coconut milk for 12 to 24 hours before starting
- Open chilled cans and scoop solid coconut cream into a large mixing bowl
- Reserve 2 tablespoons of cream separately for topping
- Pour remaining coconut water into a separate container and set aside
- Break dark chocolate into small pieces and place in a heatproof bowl
- Add 1 tablespoon of reserved coconut water to the chocolate pieces
- Set bowl over a pan of barely simmering water and stir continuously until fully melted
- Remove from heat and stir in maple syrup, cocoa powder, vanilla, salt, and coffee
- Stir until all additions are dissolved and mixture looks smooth and glossy
- Allow chocolate mixture to cool at room temperature for 8 to 10 minutes
- Beat solid coconut cream on high speed for 3 to 4 minutes until fluffy peaks form
- Pour first half of cooled chocolate into whipped coconut cream
- Fold gently using a large spatula in slow deliberate strokes
- Add second half of chocolate and fold until no white streaks remain
- Spoon mousse evenly into four serving glasses or ramekins
- Tap each glass gently on the counter to remove air pockets
- Cover loosely with cling film without touching the mousse surface
- Refrigerate for a minimum of 2 hours until firmly set
- Remove from fridge 5 minutes before serving
- Top each glass with whipped coconut cream, chocolate shavings, raspberries, and cocoa dusting
Common Mistakes to Avoid
Not chilling the coconut milk overnight: Unchilled coconut milk does not separate into cream and water and cannot whip into a stable foam. Overnight chilling is mandatory for the texture this recipe produces — no shortcut produces the same result.
Using light coconut milk: Light coconut milk contains significantly less fat than full-fat and will not whip regardless of how cold it is. Always buy full-fat coconut milk specifically for this recipe — the label should state full-fat or coconut cream.
Adding hot chocolate to the whipped cream: Hot chocolate melts the whipped coconut cream immediately and produces a pourable liquid rather than a mousse. Always cool the melted chocolate to warm before folding it into the cream — 8 to 10 minutes at room temperature is sufficient.
Over-folding the mixture: Vigorous stirring deflates the air incorporated during whipping and produces a dense, flat result rather than a light mousse texture. Fold gently in slow deliberate strokes and stop the moment the mixture looks uniform.
Under-chilling before serving: A mousse chilled for less than 2 hours stays soft and pourable rather than setting into a spoonable, structured dessert. Two hours is the minimum — overnight produces the best result.
FAQs
Q1: Can I make this mousse without any chocolate? Yes — replace the dark chocolate with 3 tablespoons of cocoa powder dissolved in 2 tablespoons of warm coconut water, 4 tablespoons of maple syrup, and 1 teaspoon of vanilla. The result is lighter in colour and slightly less rich than the full chocolate version but still produces a genuine coconut milk chocolate mousse recipe result that sets firmly and tastes excellent.
Q2: How long does this mousse keep in the fridge? This mousse keeps well covered in the fridge for up to 4 days. The texture firms slightly after the first day and becomes denser by day three — both are pleasant textures in different ways. Add the fresh toppings immediately before serving rather than storing them on the mousse, as raspberries release juice and whipped coconut cream deflates within a few hours of being applied.
Q3: Can I use chocolate chips instead of a chocolate bar? Yes — dairy free dark chocolate chips melt cleanly and produce the same smooth result as a chopped chocolate bar. Use the same weight — 200g — and melt using the same double boiler method. Check the label carefully to confirm the chips are genuinely dairy free, as some chocolate chip brands include milk derivatives despite using dark chocolate.
Wrapping It Up
This vegan chocolate mousse recipe dairy free delivers a genuinely rich, silky, restaurant-quality dessert from a 15-minute process. Refrigerate full-fat coconut milk overnight to separate the cream, melt dark chocolate with coconut water and flavourings, cool to warm, whip the coconut cream to fluffy peaks, fold the chocolate through in two additions, portion into glasses, and chill for 2 hours. Those six steps produce a perfect result every time.
Whether you make the classic dark chocolate version, add orange zest for something fragrant and complex, try the mint variation for a refreshing finish, or serve it at a dinner party where nobody needs to know it is completely dairy free — it consistently impresses everyone who tries it. Now chill those coconut cans and make something worth every spoonful.