Banana cream pie is one of those desserts that looks significantly more technical than it actually is. The moment a golden pastry shell arrives at the table filled with thick vanilla custard, layered with fresh banana slices, and topped with a cloud of whipped cream, everyone assumes you spent the entire afternoon doing something complicated. You did not. You made a simple custard, blind-baked a shell, and let the fridge do the rest.
This homemade banana cream pie from scratch uses a classic butter pastry crust — which gives the pie its distinctive flaky, short base that a shop-bought shell simply cannot replicate — alongside a proper cooked vanilla custard filling that sets into a thick, sliceable layer over fresh banana slices. The result tastes like the best old fashioned banana cream pie recipe you have ever encountered and requires nothing more than a standard saucepan, a mixing bowl, and some patience while it chills.
What You’ll Need (Ingredients)
Simple, familiar, and worth buying fresh bananas specifically for. The egg yolks make the biggest difference to the custard richness here.
For pastry crust:
- 200g (1⅔ cups) plain flour
- 125g (9 tablespoons) cold unsalted butter, cubed
- 1 tablespoon caster sugar
- ¼ teaspoon fine salt
- 3 to 4 tablespoons ice cold water
Vanilla custard filling:
- 600ml (2½ cups) whole milk
- 5 large egg yolks
- 150g (¾ cup) caster sugar
- 40g (5 tablespoons) cornstarch
- 30g (2 tablespoons) unsalted butter
- 2 teaspoons vanilla extract
- ¼ teaspoon fine salt
For the layers and topping:
- 3 medium ripe bananas, sliced into 1cm rounds
- 1 tablespoon fresh lemon juice — for tossing with banana slices
- 300ml (1¼ cups) double cream, cold
- 2 tablespoons icing sugar, sifted
- 1 teaspoon vanilla extract
Optional garnish:
- 1 medium banana, sliced — for topping decoration
- 2 tablespoons crushed digestive biscuits or vanilla wafers
- A dusting of ground cinnamon
How to Make It — Full Step-by-Step Process
Step One: Make the Pastry Crust
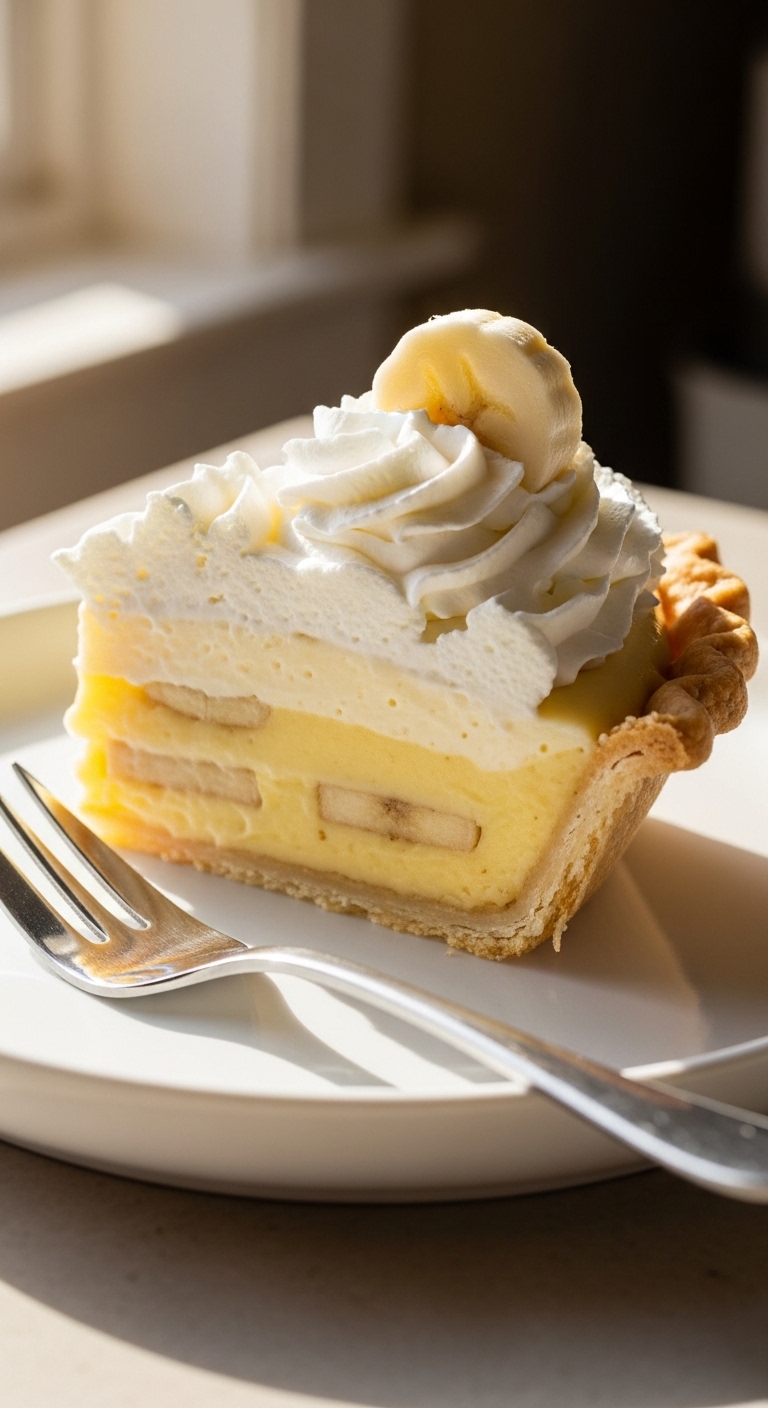
Combine 200g of plain flour, 1 tablespoon of caster sugar, and ¼ teaspoon of salt in a large mixing bowl and stir briefly to distribute the dry ingredients evenly. Add 125g of cold cubed unsalted butter to the flour mixture and rub the butter into the flour using your fingertips, working quickly and lightly to keep the butter as cold as possible throughout. You are aiming for a texture that resembles rough breadcrumbs with some pea-sized butter pieces still visible — these larger butter pieces are what create the distinct flaky layers in a proper flaky crust banana cream pie dessert.
Add 3 tablespoons of ice cold water to the mixture and stir with a fork until the dough just begins to clump together. Add the fourth tablespoon only if the dough still looks dry and will not hold together when you press a small amount between your fingers. Turn the dough out onto a lightly floured surface and bring it together with your hands into a flat disc shape — do not knead it. Wrap the disc tightly in cling film and refrigerate for at least 30 minutes before rolling. Chilling the dough relaxes the gluten and firms the butter back up, both of which produce a more tender, less tough pastry crust after baking.
Step Two: Blind Bake the Pastry Shell
Preheat your oven to 190°C (375°F) fan-forced or 200°C (400°F) conventional. Remove the chilled pastry from the fridge and roll it out on a lightly floured surface into a circle approximately 30cm in diameter and 3mm thick — large enough to line a 23cm pie dish with some overhang at the edges. Roll the pastry loosely around the rolling pin and unroll it over the pie dish, pressing it gently into the base and sides without stretching it. Trim the overhang to approximately 1cm beyond the rim and fold it under itself to create a neat, thick edge. Crimp the edge with your fingers or a fork for a decorative finish.
Line the pastry shell with a piece of crumpled parchment paper — crumpling the paper first makes it more flexible and easier to press into the corners — and fill it completely with baking beans, dried rice, or lentils. Blind bake for 15 minutes, then remove the parchment and weights carefully and return the shell to the oven for a further 8 to 10 minutes until the base looks dry, set, and very lightly golden. A fully baked pastry shell that looks pale and undercooked at this stage will turn soggy once the custard filling goes in. Allow the baked shell to cool completely on a wire rack before adding any filling — adding custard to a warm shell softens the base and prevents the pie from slicing cleanly.
Step Three: Make the Vanilla Custard Filling
Pour 600ml of whole milk into a medium saucepan and heat over medium heat until it just begins to steam and small bubbles appear around the edges — do not let it boil. While the milk heats, whisk together 5 large egg yolks, 150g of caster sugar, 40g of cornstarch, and ¼ teaspoon of salt in a large heatproof bowl until the mixture is pale, smooth, and completely free of lumps. This whisking stage is important — undissolved cornstarch creates lumps in the finished custard that no amount of stirring will remove once the hot milk goes in.
Once the milk is steaming, slowly pour approximately one third of it into the egg yolk mixture in a thin, steady stream while whisking constantly — this process is called tempering and it gradually raises the temperature of the eggs without scrambling them. Pour the tempered egg mixture back into the saucepan with the remaining hot milk, whisking continuously as you pour. Place the saucepan back over medium heat and cook the custard, stirring constantly with a wooden spoon or heatproof spatula, for 3 to 5 minutes until it thickens noticeably and begins to bubble in the centre. The moment you see the first large bubble break the surface, cook for exactly 1 more minute while stirring vigorously, then remove from heat immediately.
Add 30g of unsalted butter and 2 teaspoons of vanilla extract to the hot custard and stir until the butter melts completely and the vanilla is fully incorporated. The butter adds richness and gives the finished custard a smooth, glossy appearance that makes the creamy banana custard pie homemade result look as good as it tastes. Press a sheet of cling film directly onto the surface of the custard — touching the surface rather than just covering the bowl prevents a skin from forming as it cools. Allow the custard to cool to room temperature before using, approximately 30 to 45 minutes.
Step Four: Layer the Banana and Custard
Toss 3 medium sliced bananas with 1 tablespoon of fresh lemon juice in a bowl and stir gently to coat every slice. The lemon juice slows the browning process significantly and keeps the banana slices looking fresh and pale for the full chilling period and beyond. Without lemon juice, the banana slices begin browning within 30 minutes of slicing, which affects the appearance of the finished pie when sliced and served.
Arrange approximately half of the lemon-tossed banana slices in a single, even layer across the base of the cooled pastry shell, covering the entire base surface without gaps. Pour the cooled vanilla custard over the banana layer and spread it evenly to the edges using an offset spatula or the back of a spoon, working in smooth strokes to create a flat, even surface. Arrange the remaining banana slices across the top surface of the custard in an overlapping pattern. Cover the pie loosely with cling film and refrigerate for a minimum of 3 hours — overnight chilling produces a firmer, cleaner-slicing result that holds its layers visibly when cut.
Step Five: Top With Whipped Cream and Serve
Remove the chilled pie from the fridge approximately 10 minutes before serving. Pour 300ml of cold double cream into a large mixing bowl and whip with an electric hand mixer on high speed until it begins to thicken. Add 2 tablespoons of sifted icing sugar and 1 teaspoon of vanilla extract and continue whipping until the cream holds firm, soft peaks that hold their shape when you lift the beaters without drooping immediately.
Spoon or pipe the whipped cream generously over the entire top surface of the chilled pie, covering the banana layer completely. Pipe decorative rosettes around the outer edge if you want a more formal finish — a large star nozzle produces the classic diner-style look of a proper best banana cream pie recipe homemade result. Garnish with a few fresh banana slices arranged in the centre, a dusting of ground cinnamon, and a scatter of crushed vanilla wafers or digestive biscuits for texture. Slice with a sharp knife wiped clean between cuts for the neatest result. 🙂
Why a Cooked Custard Beats Instant Pudding Every Time
Have you ever made a banana pudding cream pie recipe easy version using instant pudding mix and found the result decent but somehow flat and slightly artificial tasting? The difference between that and a properly made cooked custard is immediately obvious in both texture and flavour.
Instant pudding sets using modified starch and produces a softer, more gelatinous texture that slices poorly and releases liquid into the pastry base over time. A cooked custard made from egg yolks, whole milk, and cornstarch sets into a firm, sliceable layer that holds its shape cleanly, tastes genuinely rich and eggy, and does not weep liquid into the pastry shell even after overnight chilling.
The egg yolks in a proper cooked custard also add a natural golden colour and a richness that no instant mix replicates. The classic banana cream pie dessert recipe format has always used cooked custard precisely because the flavour and texture it produces are categorically better than any shortcut alternative. The extra 10 minutes of stovetop cooking produces a result worth the effort every single time.
Getting the Whipped Cream Topping Right
The whipped cream topping takes this from a straightforward whipped banana cream pie dessert easy weeknight bake into something that looks genuinely finished and impressive on any table.
Whip the cream to firm but still slightly soft peaks rather than stiff peaks — cream whipped to stiff peaks becomes grainy and loses its smooth, light appearance within an hour of being applied. Firm-soft peaks pipe beautifully, hold their shape for several hours in the fridge, and have the smooth, billowy appearance that defines a properly finished cream pie. IMO, taking 30 extra seconds to get the cream consistency exactly right makes a visible difference to how the finished pie looks when you bring it to the table.
Common Mistakes to Avoid
Not blind baking the pastry shell fully: An undercooked pastry shell turns soggy once the custard goes in and produces a pie that slices messily and tastes doughy at the base. Bake until the base looks genuinely dry and set before adding any filling.
Adding custard to warm banana slices: Warm custard poured directly over fresh banana slices accelerates browning. Always cool the custard to room temperature before assembling the pie and toss the banana slices in lemon juice without exception.
Skipping the tempering step: Pouring all the hot milk directly onto the egg yolks at once scrambles them instantly. Always add the hot milk gradually while whisking — the tempering step takes 30 seconds and prevents a bowl of sweet scrambled eggs. :/
Under-chilling the pie: Three hours is the absolute minimum. A pie chilled for less time cuts into a soft, flowing filling that does not hold its layers. Overnight chilling is always the better option for a clean, impressive result at the table.
Over-whipping the cream: Cream whipped to stiff peaks looks grainy and splits quickly once applied to the pie. Stop whipping the moment the cream holds firm but slightly soft peaks — it should look smooth and billowy, not lumpy and dry.
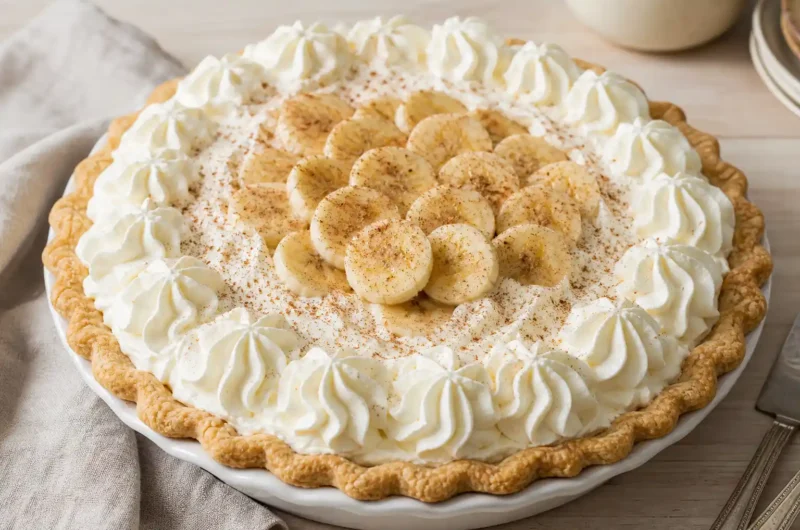
Flaky Crust Banana Cream Pie Dessert Anyone Can Make
This banana cream pie blind bakes a flaky butter pastry shell, fills it with layers of lemon-tossed fresh banana slices and thick cooked vanilla custard, chills for three hours until firmly set, then tops with softly whipped cream. Ready in 25 minutes of active preparation with genuinely impressive, classic results every time.
Ingredients
Pastry crust:
200g plain flour
125g cold unsalted butter, cubed
1 tablespoon caster sugar
¼ teaspoon fine salt
3 to 4 tablespoons ice cold water
Vanilla custard filling:
600ml whole milk
5 large egg yolks
150g caster sugar
40g cornstarch
30g unsalted butter
2 teaspoons vanilla extract
¼ teaspoon fine salt
Layers and topping:
3 medium ripe bananas, sliced
1 tablespoon fresh lemon juice
300ml double cream, cold
2 tablespoons icing sugar, sifted
1 teaspoon vanilla extract
Optional garnish:
1 medium banana, sliced
2 tablespoons crushed digestive biscuits
Ground cinnamon for dusting
- Rub cold butter into flour, sugar, and salt until mixture resembles rough breadcrumbs
- Add ice cold water one tablespoon at a time and stir until dough just clumps together
- Shape into a disc, wrap in cling film, and refrigerate for 30 minutes
- Roll chilled pastry into a 30cm circle and line a 23cm pie dish
- Trim and crimp the edges then line with parchment and fill with baking beans
- Blind bake at 190°C fan for 15 minutes then remove beans and bake 8 to 10 minutes more
- Cool the baked pastry shell completely on a wire rack before filling
- Heat whole milk in a saucepan over medium heat until steaming
- Whisk egg yolks, sugar, cornstarch, and salt together in a heatproof bowl until smooth
- Slowly pour one third of the hot milk into the egg mixture while whisking constantly
- Pour tempered egg mixture back into the saucepan with remaining milk
- Cook over medium heat stirring constantly for 3 to 5 minutes until thick and bubbling
- Cook for exactly 1 more minute after first bubble appears then remove from heat
- Stir in butter and vanilla extract until fully incorporated and smooth
- Press cling film directly onto custard surface and cool to room temperature
- Toss sliced bananas in lemon juice and stir gently to coat every slice
- Arrange half the banana slices in a single layer across the cooled pastry base
- Pour cooled custard over the banana layer and spread evenly to the edges
- Arrange remaining banana slices across the top surface of the custard
- Cover loosely and refrigerate for a minimum of 3 hours or overnight
- Whip cold double cream with icing sugar and vanilla to firm soft peaks
- Spoon or pipe whipped cream generously over the entire chilled pie surface
- Garnish with fresh banana slices, crushed biscuits, and a dusting of cinnamon
- Slice with a sharp clean knife and serve immediately
FAQs
Q1: Can I make this as a no bake banana cream pie recipe easy version? Yes — replace the blind-baked pastry shell with a pressed biscuit crust made from 250g of crushed digestive biscuits mixed with 80g of melted butter, pressed firmly into a pie dish, and chilled for 30 minutes. Use the same cooked custard filling and whipped cream topping. The no bake version requires no oven at all and produces an equally delicious result with a buttery, crunchy biscuit base instead of pastry.
Q2: How do I stop the bananas from going brown inside the pie? Toss all banana slices in fresh lemon juice immediately after cutting and assemble the pie promptly. The lemon juice slows enzymatic browning significantly and keeps the slices pale for 24 to 48 hours inside the chilled pie. Using bananas that are ripe but not over-ripe also helps — very soft, spotty bananas brown faster once sliced than firm-ripe ones.
Q3: Can I make this pie a day ahead? Yes — this pie is actually better made the day before serving. The custard sets more firmly overnight, the banana slices stay pale for up to 48 hours when lemon-tossed, and the pastry base absorbs a small amount of moisture from the custard which actually makes it taste richer rather than soggy. Add the whipped cream topping on the day of serving rather than the day before for the freshest appearance.
Wrapping It Up
This classic banana cream pie dessert recipe delivers a genuinely impressive, old fashioned banana cream pie result from a straightforward process. Make and blind bake the pastry shell, cook a proper egg yolk custard until thick and glossy, layer banana slices and custard in the cooled shell, chill for a minimum of three hours, and top generously with softly whipped cream. Those five steps produce a perfect result every single time.
Whether you serve this at a dinner party with decorative cream rosettes and fresh banana garnish, make the no bake version for a simpler weeknight dessert, or bake it ahead the day before a celebration — it consistently impresses everyone who tries it. Now chill that pastry and make something worth slicing.